Media
InspireCMS provides a comprehensive media management system for handling images, documents, videos, and other files. This guide explains how to upload, organize, and use media in your content.
- Overview
- Uploading Files
- File Organization
- Media Usage
- Media Metadata
- Media Storage
- Media Security
- Best Practices
Overview
The media library is accessible from: Admin Panel > Media
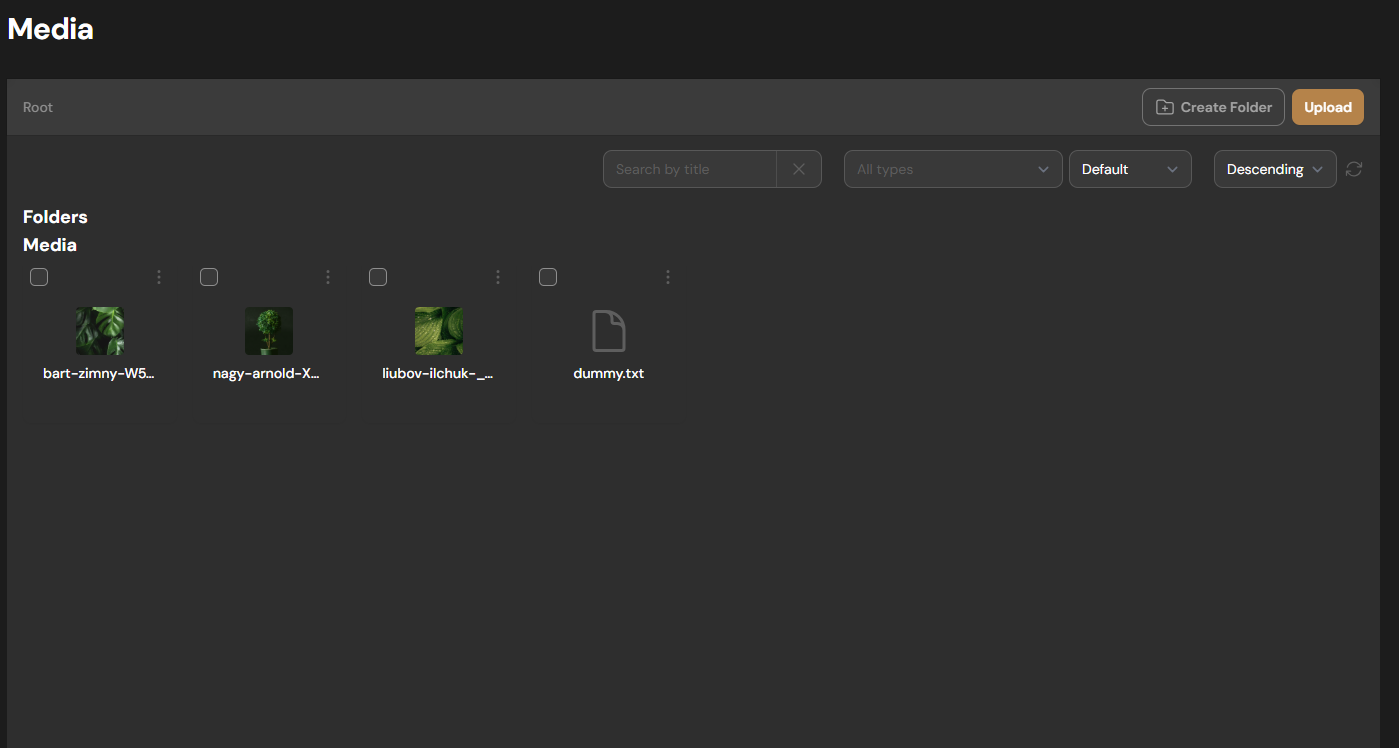
Browsing Media
The media library interface includes:
- Folders: Organize media in a hierarchical structure
- Search: Find media by filename, type, or metadata
- Filters: Filter by date, file type, or custom attributes
- Sorting: Arrange files by name, date or size
File Details
Click on a file to view detailed information:
- Properties: Technical information (dimensions, format, size)
- Actions: Download, edit, move, or delete
Uploading Files
Upload Methods
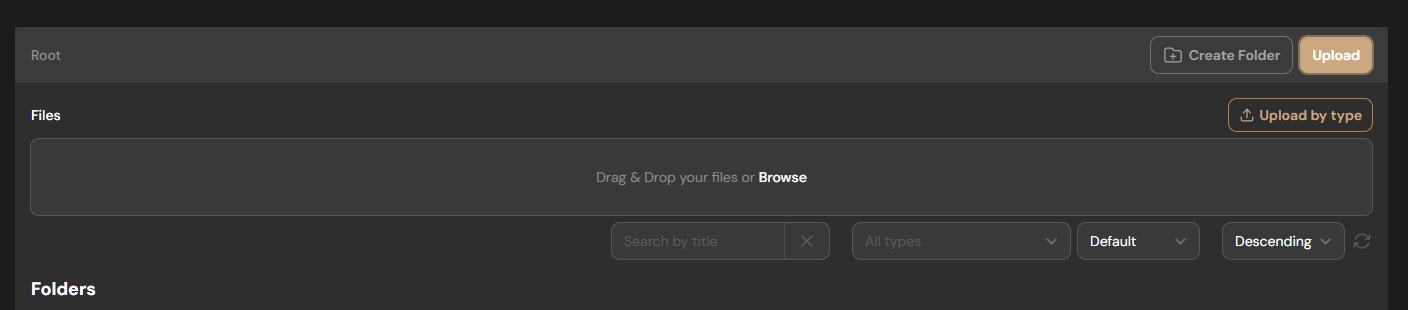
InspireCMS supports multiple upload methods:
- Drag and Drop: Drag files directly into the media library
- File Browser: Click "Upload" and select files from your computer
Upload Configuration
Configure upload settings in config/inspirecms.php. For more details, see Configuration
File Organization
Folder Structure
Organize your media with folders:
- Click "Create Folder" in the media library
- Name your folder
- Optionally, choose a parent folder
- Click "Create"
Moving Files
To move files between folders:
- Select the file(s) you want to move
- Click "Move" or drag them to the destination folder
- Confirm the move operation
Media Usage
Inserting Media into Content
To add media to your content:
- Edit your content
- Place cursor where you want to insert media
- Click the "Media" button in the editor toolbar
- Select the file from the media picker
- Insert the media
Media Fields
Content types can include dedicated media fields:
// In a filament form schema definition
use SolutionForest\InspireCms\Support\MediaLibrary\Forms\Components\MediaPicker;

MediaPicker::make('hero_image')
    ->label('Hero Image')
    ->filterTypes(['image'])
    ->min(1)
    ->max(1)
In templates, access media fields:
 @propertyArray('hero', 'image_slider')
 @foreach ($hero_image_slider ?? [] as $item)
     <div class="swiper-slide">
         <img src="{{ $item?->getUrl() }}" alt="Slide {{ $loop->iteration }}">
         <p>{{ $item?->description }}</p>
     </div>
 @endforeach
Media in Templates
Access media directly in templates:
@php
    $image = inspirecms_asset()->findByKey('550e8400-e29b-41d4-a716-446655440000');
@endphp

@if($image)
    <img src="{{ $image->getUrl() }}" alt="{{ $image->description }}">
@endif
Responsive Images
Generate responsive image variants:
@propertyArray('hero', 'image')
@if(!empty($hero_image))
    <img
        src="{{ $hero_image[0]->getUrl() }}"
        srcset="{{ $hero_image[0]->getSrcset(['small', 'medium']) }}"
        sizes="(max-width: 768px) 100vw, 50vw"
        alt="{{ $hero_image[0]->description }}"
    >
@endif
Media Metadata
Default Metadata
Every media file includes standard metadata:
- Filename
- File type and extension
- File size
- Upload date
- Uploader
- Dimensions (for images)
- Duration (for audio/video)
Custom Metadata
Add custom metadata to media files:
- Select a file in the media library
- Click "Edit"
- Add metadata fields:
- Title: Display name for the media
- Alt Text: Alternative text for accessibility
- Caption: Explanatory text shown with the media
- Description: Longer description for internal use
Metadata in Templates
Use metadata in your templates:
@propertyArray('gallery', 'images')
@foreach($gallery_images ?? [] as $image)
    <figure>
        <img src="{{ $image->getUrl() }}" alt="{{ $image->caption }}">
        <figcaption>{{ $image->description }}</figcaption>
    </figure>
@endforeach
Media Storage
Storage Configuration
Configure where media is stored:
config/filesystems.php
'disks' => [
    'public' => [
        'driver' => 'local',
        'root' => storage_path('app/public'),
        'url' => env('APP_URL').'/storage',
        'visibility' => 'public',
    ],

    's3' => [
        'driver' => 's3',
        'key' => env('AWS_ACCESS_KEY_ID'),
        'secret' => env('AWS_SECRET_ACCESS_KEY'),
        'region' => env('AWS_DEFAULT_REGION'),
        'bucket' => env('AWS_BUCKET'),
        'url' => env('AWS_URL'),
        'endpoint' => env('AWS_ENDPOINT'),
        'use_path_style_endpoint' => env('AWS_USE_PATH_STYLE_ENDPOINT', false),
    ],
],
Link your storage:
php artisan storage:link
Changing Storage Disk
To use a different storage provider:
config/inspirecms.php
'media' => [
    'media_library' => [
        'disk' => 's3',
        'directory' => 'media',
        // other settings...
    ],
],
Media Security
Permission Control
Control who can access and manage media by registering a custom policy class:
config/inspirecms.php
return [
    // Other config options...

    'models' => [
        'policies' => [
            'media_asset' => \App\Policies\MediaAssetPolicy::class,
        ],
    ],
];
Create your custom policy class:
namespace App\Policies;

use App\Models\User;
use SolutionForest\InspireCms\Base\BasePolicy;
use SolutionForest\InspireCms\Models\MediaAsset;

class MediaAssetPolicy extends BasePolicy
{
    public function viewAny(User $user): bool
    {
        return static::authorizeModel($user, __FUNCTION__);
    }

    public function create(User $user): bool
    {
        return static::authorizeModel($user, __FUNCTION__);
    }

    public function delete(User $user, MediaAsset $mediaAsset): bool
    {
        return static::authorizeModel($user, __FUNCTION__);
    }

    // Define other permissions as needed

    protected static function authorizeModel($user, $ability)
    {
        return $user?->can(static::guessPermissionName($ability, MediaAsset::class));
    }
}
Best Practices
- Organize Logically: Use a consistent folder structure
- Meaningful Filenames: Use descriptive, URL-friendly filenames
- Complete Metadata: Add alt text and descriptions for accessibility
- Optimize Images: Use appropriate file formats and compression
- Responsive Images: Use responsive techniques for different screen sizes
- Accessibility: Ensure all media has appropriate alt text