Content Drafts & Revisions
InspireCMS provides a content versioning system that allows you to work with drafts and track revisions of your content. This guide explains how to use these features to manage your content workflow effectively.
- Overview
- Working with Drafts
- Publishing Content
- Content Revisions
- Content Locks
- Custom Publishing States
- Example Usage: Content Review and Approval System
- Conflict Resolution
Overview
In InspireCMS, content can exist in various states:
- Draft: Content that is being worked on but not yet published
- Published: Content that is live and visible to site visitors
- Unpublished: Previously published content that has been taken offline
- Scheduled: Content set to be published automatically at a future date
The system will not create a new revision entry if the content data remains unchanged, even if other metadata like publish time differs. This prevents unnecessary revision clutter and maintains a clean content history focused on actual content modifications.
Working with Drafts
Creating a Draft
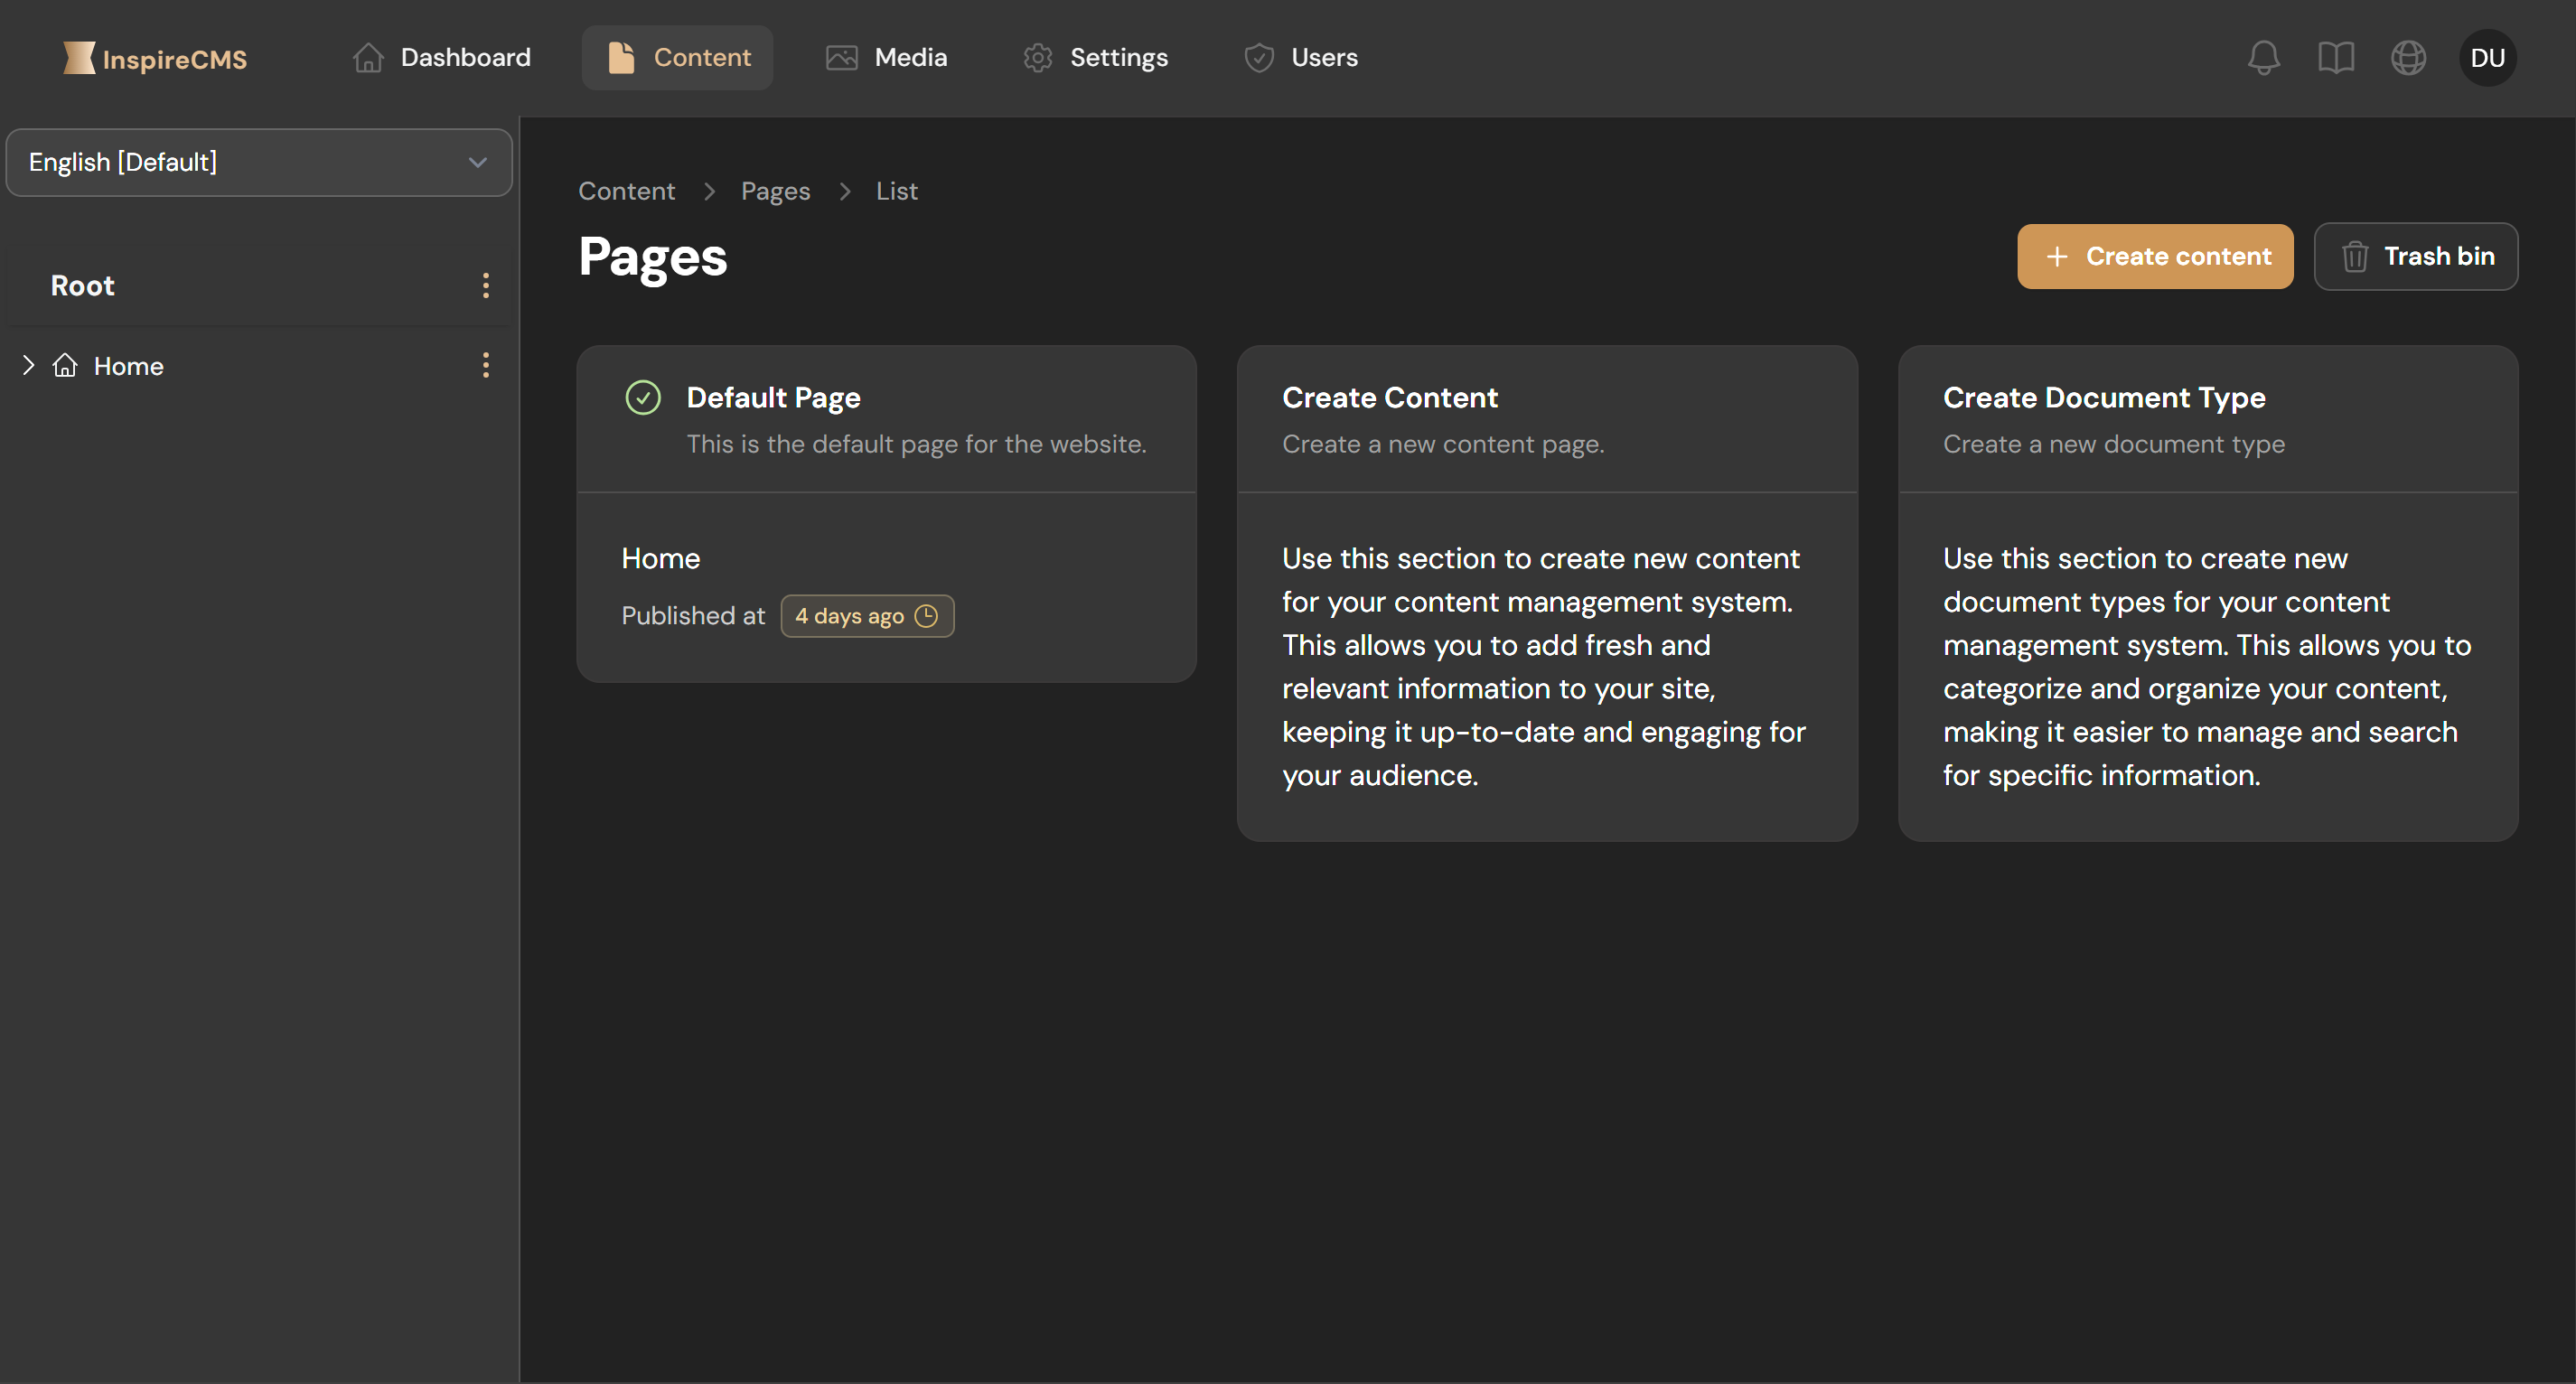
When you create new content in InspireCMS, it starts as a draft by default:
- Navigate to Content in the admin panel
- Click Create Content
- Add your content details, fields, and settings
- Click Save (not "Publish") to store as a draft
Drafts are visible only in the admin panel and not on your live site.
Identifying Drafts
Drafts are clearly marked in the content list:
- Status indicator shows "Draft"
- Often color-coded differently from published content
- Show an editing icon
Editing Drafts
You can freely modify drafts without affecting your live content:
- Find the draft in your content list
- Click to open it in the editor
- Make your changes
- Click Save to update the draft
Draft Preview
Preview your draft to see how it will look when published:
- Open the draft in the editor
- Click the Preview button in the editor toolbar
- Your draft will appear in a modal window showing how it will appear on the site
This preview is visible only to authenticated admin users.
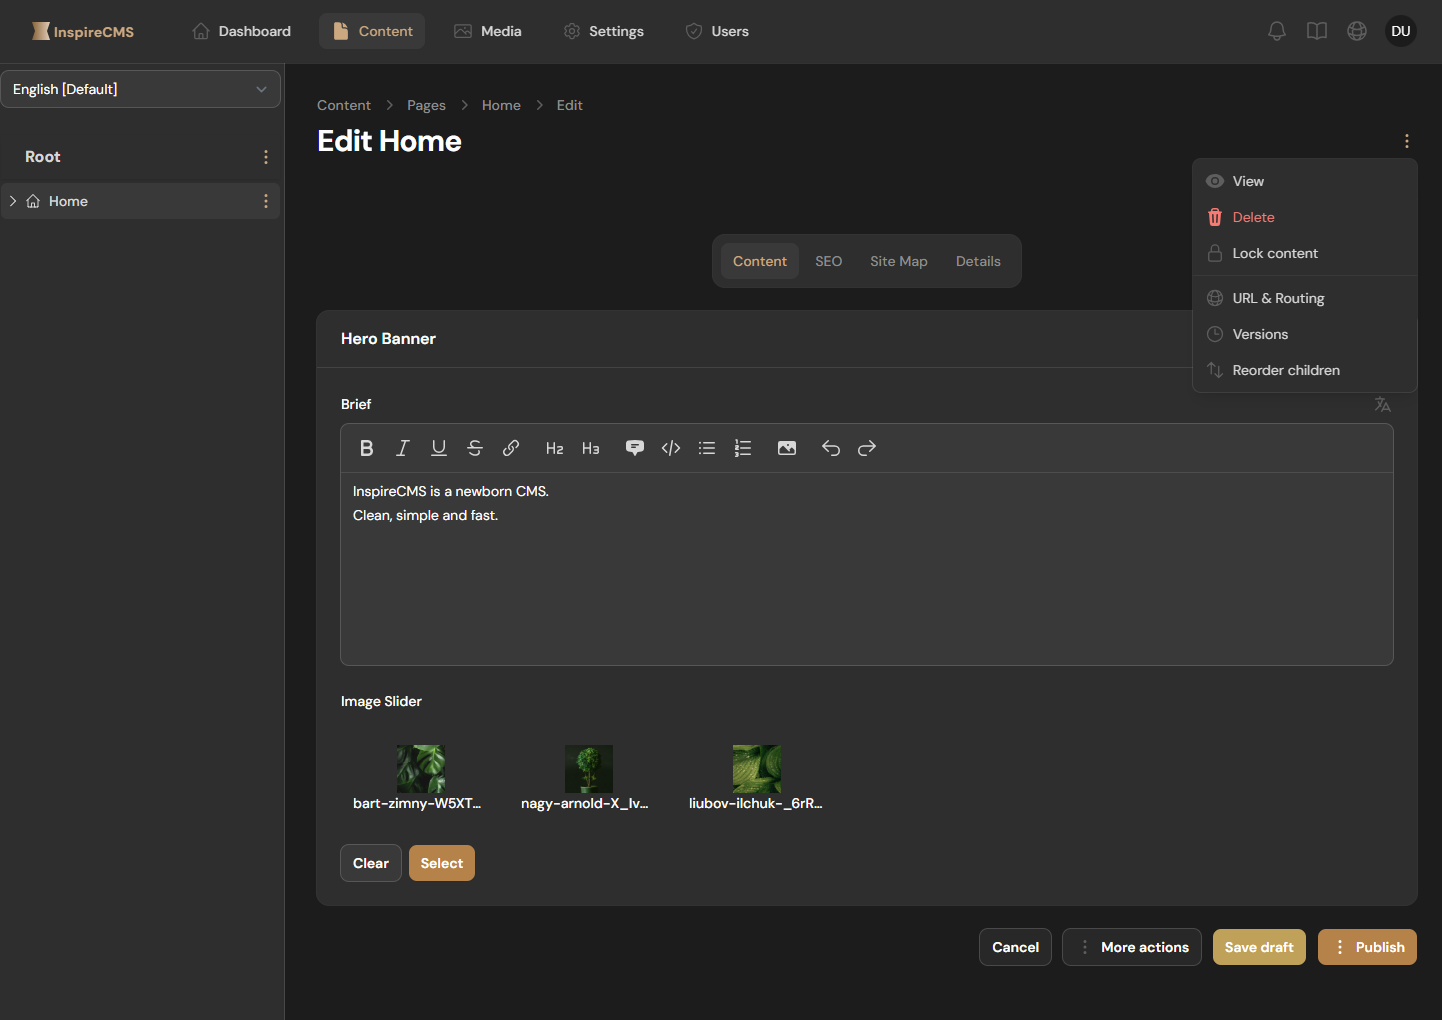
Publishing Content
When your draft is ready to go live:
- Open the draft in the editor
- Review all content and settings
- Click the Publish button
- Confirm the publish action
Once published, the content becomes visible on your live site.
Scheduling Publication
For content that should go live at a specific time:
- Edit your content as usual
- In the publishing options, select Schedule
- Set the desired publish date and time
- Click Schedule
The system will automatically change the content status from "Scheduled" to "Published" at the specified time.
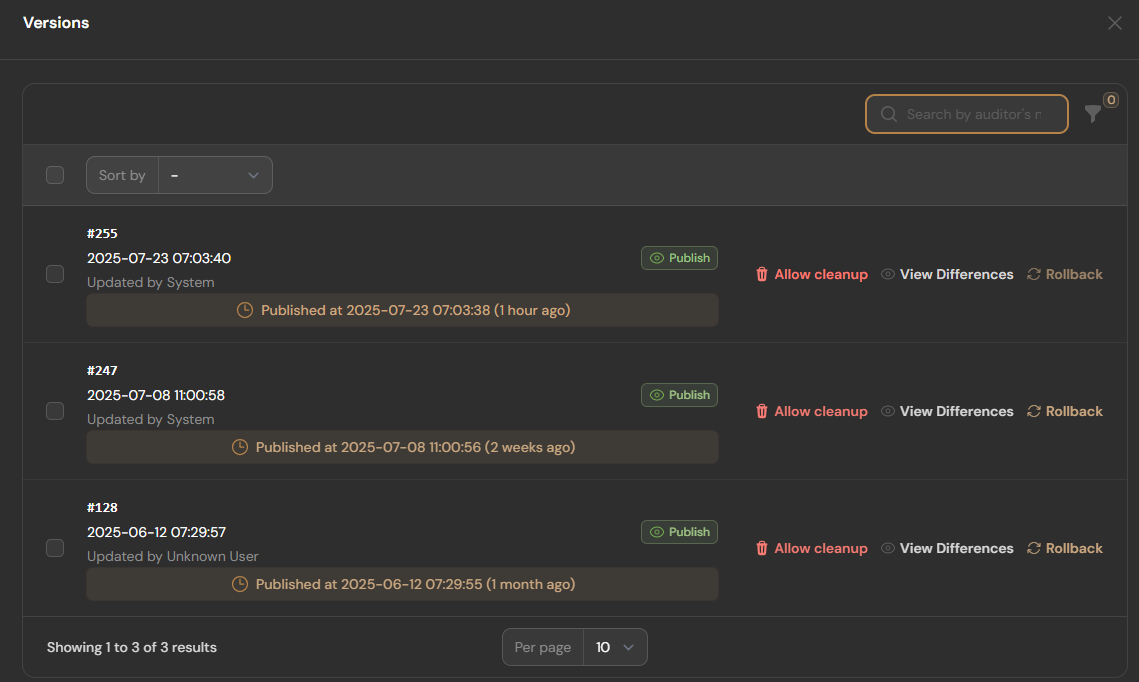
Content Revisions
InspireCMS automatically tracks revisions each time content is saved, creating a history of changes.
Viewing Revision History
To see the history of changes to a content item:
- Open the content item in the editor
- Look for the Versions button in the top-right corner of the page
- View the list of all revisions with timestamps and authors
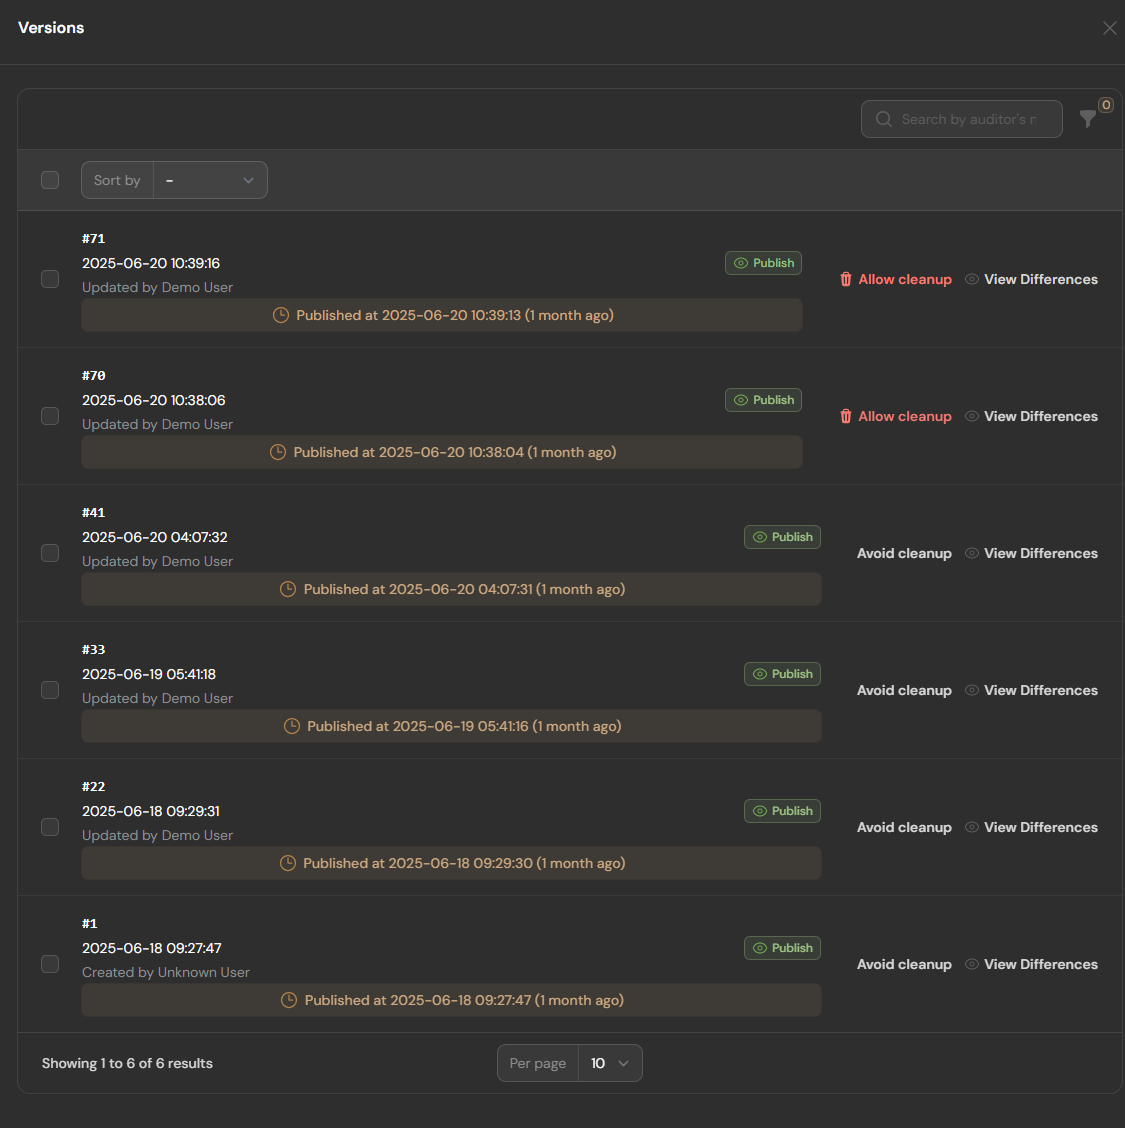
Rolling Back to Previous Versions
Rollback functionality is available in v1.1.0+
If you have Pro tier license, you can restore content to selected version:
- Navigate to the revision history as described above
- Find the revision you want to restore
- Click the Rollback button next to that revision
- Confirm the rollback action
Content Locks
To prevent conflicts when multiple users edit the same content:
- When a user begins editing content, a lock is placed on that content
- Other users see an indicator that the content is being edited
- Locks remain active until explicitly released
- Only administrators and the user who placed the lock can unlock the content
Custom Publishing States
InspireCMS allows for custom publishing states to match your workflow:
app/Providers/AppServiceProvider.php
use SolutionForest\InspireCms\Facades\ContentStatusManifest;
use SolutionForest\InspireCms\DataTypes\Manifest\ContentStatusOption;
use Filament\Actions\Action;

// In your service provider
public function boot()
{
    ContentStatusManifest::addOption(
        new ContentStatusOption(
            value: 2,
            name: 'review',
            formAction: fn () => Action::make('review')
                ->label('Send for Review')
                ->action(function ($record, $action) {
                    if (is_null($record)) {
                        $action->cancel();
                        return;
                    }
                    if (! \SolutionForest\InspireCms\Helpers\ContentHelper::handlePublishableRecord($record, $publishableState, $livewire, [])) {
                        return;
                    }
                    $action->success();
                })
        )
    );
}
Example Usage: Content Review and Approval System
For organizations that require approval before publishing:
- Content author creates and edits a draft
- Author submits the content for review
- Editors/approvers are notified of pending review
- Approvers can:
- Approve and publish
- Request changes (returns to draft)
- Reject the content
Adding a Custom Content Status
A basic approval workflow can be set up using custom states and notifications:
app/Providers/AppServiceProvider.php
use Filament\Actions\Action;
use SolutionForest\InspireCms\DataTypes\Manifest\ContentStatusOption;
use SolutionForest\InspireCms\Facades\ContentStatusManifest;
use SolutionForest\InspireCms\Helpers\ContentHelper;

// In your service provider
public function boot()
{
     // Add "In Review" status
     ContentStatusManifest::addOption(
          new ContentStatusOption(
                value: 2, // Raw db value
                name: 'in_review',
                formAction: fn () => Action::make('submit_for_review')
                    ->authorize('inReview')
                    ->successNotificationTitle('Send to Review')
                    ->action(function ($record, $action, $livewire) {
                        $if (is_null($record)) {
                        $action->cancel();

                        return;
                    }

                    $publishableState = 'in_review';

                    if (! ContentHelper::handlePublishableRecord($record, $publishableState, $livewire, [])) {
                        return;
                    }

                    $action->success();
                })
          )
     );
     // Add "Approved" status
     ContentStatusManifest::addOption(
          new ContentStatusOption(
                value: 5, // Raw db value
                name: 'approved',
                formAction: fn () => Action::make('approved')
                    ->authorize('approved')
                    ->successNotificationTitle('Approved')
                    ->action(function ($record, $action, $livewire) {
                        $if (is_null($record)) {
                        $action->cancel();

                        return;
                    }

                    $publishableState = 'approved';

                    if (! ContentHelper::handlePublishableRecord($record, $publishableState, $livewire, [])) {
                        return;
                    }

                    $action->success();
                })
          )
     );
}
Customizing Models and Authorization Policies
To fully implement a review workflow, you may need to extend the default content model and define authorization policies:
Custom Content Policy
namespace App\Policies;

use App\Models\Content;
use App\Models\User;
use SolutionForest\InspireCms\Policies\ContentStatusPolicy as BasePolicy;

class ContentPolicy extends BasePolicy
{
    public function viewAny(User $user): bool
    {
        return true;
    }

    public function view(User $user, Content $content): bool
    {
        return true;
    }

    public function create(User $user): bool
    {
        return $user->hasAnyRole(['author', 'editor', 'admin']);
    }

    public function update(User $user, Content $content): bool
    {
        // Authors can only edit drafts they created
        if ($user->hasRole('author') && $content->user_id === $user->id) {
            return $content?->display_status?->getName() === 'draft';
        }

        // Editors can review content in review status and edit any draft
        if ($user->hasRole('editor')) {
            return in_array($content?->display_status?->getName(), [
                'draft',
                'in_review',
            ]);
        }

        // Admins can edit anything
        return $user->hasRole('admin');
    }

    public function publish(User $user, Content $content): bool
    {
        return $user->hasAnyRole(['editor', 'admin']);
    }

    public function inReview(User $user, Content $content): bool
    {
        return $content?->display_status?->getName() !== 'in_review';
    }

    public function approved(User $user, Content $content): bool
    {
        return $content?->display_status?->getName() === 'in_review';
    }
}
Custom Content Model
namespace App\Models;

use SolutionForest\InspireCms\Models\Content as BaseContent;

class Content extends BaseContent
{
}
Register your custom model and policy in your AppServiceProvider:
app/Providers/AppServiceProvider.php
use Illuminate\Support\Facades\Gate;
use Illuminate\Support\ServiceProvider;
use SolutionForest\InspireCms\Facades\InspireCms;
use SolutionForest\InspireCms\Facades\ModelManifest;
use SolutionForest\InspireCms\Models\Contracts\Content;

class AppServiceProvider extends ServiceProvider
{
    public function register(): void
    {
        ModelManifest::replace(Content::class, \App\Models\Content::class);
    }

    public function boot()
    {
        Gate::policy(\App\Models\Content::class, \App\Policies\ContentPolicy::class);
    }
}
Or update in config:
config/inspirecms.php
return [
    'models' => [
        'fqcn' => [
            'content' => \App\Models\Content::class,
        ],
        'policies' => [
            'content' => \App\Policies\YourContentPolicy::class,
        ]
    ],
];
Conflict Resolution
When conflicting edits occur:
- The system detects when two users have edited the same content
- On save, the second user is shown a conflict resolution screen
- They can choose to:
- Merge changes manually
- Keep their version (overwrite)
- Discard their changes
- Save as a new draft