## Caching
---
title: Caching
slug: caching
path: docs/v1/caching
uri: /docs/v1/caching
heading: Caching
brief:
quick_links: []
---
## Overview
Caching in InspireCMS accelerates content delivery by storing frequently accessed data in fast-access storage. The system employs several caching strategies:
- **Language Cache**
- **Navigation Cache**: Makes menu loading faster
- **Route Cache**: Improves URL resolution
- **KeyValue Cache**: Stores simple configuration and settings data
---
## Cache Configuration
Configure caching in your application's configuration files.
### Main Cache Settings
Configure basic cache settings in `config/inspirecms.php`:
```php {title="config/inspirecms.php"}
'cache' => [
'languages' => [
'key' => 'inspirecms.languages',
'ttl' => 60 * 60 * 24, // 24 hours in seconds
],
'navigation' => [
'key' => 'inspirecms.navigation',
'ttl' => 60 * 60 * 24,
],
'content_routes' => [
'key' => 'inspirecms.content_routes',
'ttl' => 120 * 60 * 24, // 120 days in seconds
],
'key_value' => [
'ttl' => 60 * 60 * 24,
],
],
```
### Laravel Cache Driver Configuration
InspireCMS uses Laravel's caching system. Configure the cache driver in `config/cache.php`:
```php {title="config/cache.php"}
'default' => env('CACHE_DRIVER', 'file'),
'stores' => [
'file' => [
'driver' => 'file',
'path' => storage_path('framework/cache/data'),
],
'redis' => [
'driver' => 'redis',
'connection' => 'cache',
'lock_connection' => 'default',
],
'memcached' => [
'driver' => 'memcached',
'persistent_id' => env('MEMCACHED_PERSISTENT_ID'),
'sasl' => [
env('MEMCACHED_USERNAME'),
env('MEMCACHED_PASSWORD'),
],
'options' => [
// Memcached::OPT_CONNECT_TIMEOUT => 2000,
],
'servers' => [
[
'host' => env('MEMCACHED_HOST', '127.0.0.1'),
'port' => env('MEMCACHED_PORT', 11211),
'weight' => 100,
],
],
],
],
```
---
## Language Caching
### Working with Language Cache
Example of cached language retrieval:
```php
// This method internally uses caching
la = inspirecms()->getAllAvailableLanguages();
```
### Invalidating Language Cache
Clear the language cache manually:
```php
// Clear all language cache
\SolutionForest\InspireCms\Facades\InspireCms::forgetCachedLanguages();
```
---
## Navigation Caching
### Working with Navigation Cache
Example of cached navigation retrieval:
```php
// This method internally uses caching
$navigation = inspirecms()->getNavigation('main', 'en');
```
### Invalidating Navigation Cache
Clear the navigation cache manually:
```php
// Clear all navigation cache
\SolutionForest\InspireCms\Facades\InspireCms::forgetCachedNavigation();
```
---
## Route Caching
InspireCMS caches content routes for faster URL resolution.
### Route Cache Commands
In addition to Laravel's route caching, clear InspireCMS route cache:
```bash
php artisan route:clear
```
or
```bash
php artisan inspirecms:clear-cache --routes
```
---
## KeyValue Caching
InspireCMS provides a persistent key-value storage system with caching capabilities through the `KeyValue` model.
### Working with KeyValue Model
The `KeyValue` model provides a simple way to store and retrieve configuration values:
```php
[
/**
* Whether to include an X-Powered-By header in HTTP responses
*
* When true, InspireCMS adds an X-Powered-By HTTP header to responses.
*/
'send_powered_by_header' => true,
/**
* License configuration for InspireCMS
*
* These settings are required for the CMS to validate your license.
*/
'license' => [
// Your InspireCMS license key from your subscription
'key' => env('INSPIRECMS_LICENSE_KEY'),
],
/**
* Control how InspireCMS interacts with key plugins
*/
'override_plugins' => [
'field_group_models' => true, // Whether to override field group models
'spatie_permission' => true, // Whether to override Spatie Permission package functionality
],
],
```
### Authentication
Configure how users authenticate with your CMS \([learn more about laravel authentication](https://laravel.com/docs/12.x/authentication#adding-custom-guards)\):
```php
'auth' => [
/**
* Define the guard that InspireCMS will use for authentication
*/
'guard' => [
'name' => 'inspirecms', // The name of the guard - used in auth middleware
'driver' => 'session', // Authentication method (session or token)
'provider' => 'cms_users', // Which provider this guard uses
],
/**
* Define how users are retrieved from your database
*/
'provider' => [
'name' => 'cms_users', // Name of the provider
'driver' => 'eloquent', // Driver to use (eloquent or database)
'model' => \SolutionForest\InspireCms\Models\User::class, // User model - change to use a custom model
],
/**
* Password reset functionality
*/
'resetting_password' => [
'enabled' => true, // Set to false to disable password reset functionality
// other password reset settings...
],
/**
* Security settings to protect against brute-force attacks
*
* Number of failed attempts before lockout
*/
'failed_login_attempts' => 5, // Number of attempts before account lockout
/**
* The number of minutes to lock the user out for after the maximum number of failed login attempts is reached.
*/
'lockout_duration' => 120, // Duration of lockout in minutes
/**
* Controls when super admin checks are performed in the authentication flow
*
* Allowed values: before, after, none
*/
'skip_super_admin_check' => 'before',
/**
* Skip account verification for users.
*
* Set to true to skip account email verification requirements.
*/
'skip_account_verification' => false,
],
```
### Media Management
Configure media uploads, storage, and processing:
```php
'media' => [
/**
* User avatar storage configuration
*/
'user_avatar' => [
'disk' => 'public', // Storage disk to use (public, s3, etc.)
'directory' => 'avatars', // Subdirectory where avatars will be stored
],
/**
* Media library configuration
*/
'media_library' => [
'disk' => 'public', // Storage disk (public makes files accessible via URL)
// Use 's3' or other drivers for cloud storage
/**
* Allowed file types
*
* e.g. ['image/jpeg', 'image/png', 'video/mp4']
*/
'allowed_mime_types' => [],
/**
* Maximum file size in Bytes
*/
'max_file_size' => null,
/**
* Automatic thumbnail generation settings
*/
'thumbnail' => [
'width' => 300, // Width of generated thumbnails in pixels
'height' => 300, // Height of generated thumbnails in pixels
// Set both the same for square thumbnails
],
/**
* Whether to use FFmpeg to extract metadata from video files
*/
'should_map_video_properties_with_ffmpeg' => false, // Set to true to analyze video files
// Requires FFmpeg to be installed on the server
// Enables extraction of duration, dimensions, codec info
// Increases processing time for video uploads
/**
* Responsive image generation settings
*/
'responsive_images' => [
'small' => [
'enabled' => true,
'width' => 400,
],
'medium' => [
'enabled' => true,
'width' => 600,
],
],
],
],
```
### Caching
Optimize performance with caching configurations:
```php
'cache' => [
'languages' => [
'store' => null, // null: Fallback to default store
'key' => 'inspirecms.languages', // Cache key for storing language data
'ttl' => 60 * 60 * 24, // Time-to-live in seconds (24 hours)
// Decrease for more frequent updates
// Increase for better performance
],
'navigation' => [
'store' => null, // null: Fallback to default store
'key' => 'inspirecms.navigation', // Cache key for menu structures
'ttl' => 60 * 60 * 24, // 24 hour cache duration
// Clear with: php artisan cache:clear
// Critical for site performance under high traffic
],
'content_routes' => [
'store' => null, // null: Fallback to default store
'key' => 'inspirecms.content_routes', // Cache key for content URL routing data
'ttl' => 120 * 60 * 24, // 5-day cache duration (longer than other caches)
// Extended duration improves routing performance
// Clear after adding new content types
],
'key_value' => [
'store' => null, // null: Fallback to default store
'ttl' => 60 * 60 * 24, // Cache duration for system settings
// Affects all configuration values retrieved at runtime
// Consider shorter values during development
// Longer values (3-7 days) for production
'prefix' => 'inspire_key_value.',
],
// For production environments, consider enabling a persistent cache driver
// such as Redis or Memcached in your .env file:
// CACHE_DRIVER=redis
// Monitor cache usage with: php artisan inspirecms:cache-stats
],
```
### Admin Panel
Configure the admin panel:
```php
use SolutionForest\InspireCms\Filament\Clusters as FilamentClusters;
use SolutionForest\InspireCms\Filament\Pages as FilamentPages;
use SolutionForest\InspireCms\Filament\Resources as FilamentResources;
'admin' => [
'enable_cluster_navigation' => true, // Group navigation items by function
// Set to false for a flat navigation structure
'navigation_position' => 'top', // left, top
'panel_id' => 'cms', // Internal identifier for the panel
// Must be unique if using multiple panels
'path' => 'cms', // URL path segment for admin area
// Example: https://yoursite.com/cms
'allow_registration' => false, // Whether to allow user registration via the admin panel
'brand' => [ // More info https://filamentphp.com/docs/3.x/panels/themes#adding-a-logo
'name' => 'InspireCMS', // Display name shown in admin header
'logo' => fn () => view('inspirecms::logo'), // Logo component (can be replaced with custom view)
'logo_title' => 'InspireCMS',
'logo_show_text' => true,
'favicon' => fb () => asset('images/favicon.png'), // Browser tab icon
],
'database_notification' => [
'enabled' => true, // Real-time admin notifications
// Disable for improved performance
'polling_interval' => '30s', // How often to check for new notifications
// Lower for more responsiveness, higher for reduced server load
],
'background_image' => 'https://random.danielpetrica.com/api/random?format=regular',
// Login page background
// Replace with your own image path for branding
// Resource classes define admin CRUD interfaces
// Replace with custom classes to modify behavior
'resources' => [
'content' => FilamentResources\ContentResource::class,
'document_type' => FilamentResources\DocumentTypeResource::class,
// ... other resources
],
// Admin panel pages (replace to customize specific pages)
'pages' => [
'dashboard' => FilamentPages\Dashboard::class,
'export' => FilamentPages\Export::class,
'health' => FilamentPages\Health::class,
],
// Navigation clusters (groupings of admin features)
'clusters' => [
'content' => FilamentClusters\Content::class,
'media' => FilamentClusters\Media::class,
'settings' => FilamentClusters\Settings::class,
'users' => FilamentClusters\Users::class,
],
// Extra widgets to display on the dashboard
// Add custom widgets to enhance the admin experience
'extra_widgets' => [
// Example: App\Filament\Widgets\LatestOrders::class,
// Example: App\Filament\Widgets\VisitorStatistics::class,
// Each widget will appear on the dashboard page
// Implement custom widgets by extending Filament\Widgets\Widget
],
],
```
### Data Import/Export
Manage data migration and content portability:
```php
'import_export' => [
'imports' => [
// Storage configuration for imports
'disk' => 'local', // Storage disk for finished imports
// Options: 'local', 'public', 's3', etc.
// Use 'local' for security as imports may contain sensitive data
'directory' => 'imports', // Directory within the disk where imports are stored
// Keep distinct from other file types for organization
'temporary' => [
'disk' => 'local', // Storage for in-progress imports before processing
// Should be fast, local storage for performance
'directory' => 'temp/imports', // Temporary location during processing
// Automatically cleaned after successful import
],
'allowed_mime_types' => [ // Limit file formats for security
'application/zip',
'application/octet-stream',
'application/x-zip-compressed',
'multipart/x-zip',
],
'max_file_size' => 10 * 1024, // 10MB limit
// Increase for larger datasets
],
'exports' => [
'directory' => storage_path('app/exports'), // Where export files are saved
'include_media' => false, // Set to true to include media files in exports
// Warning: Can create very large exports
'include_users' => false, // Set to true to export user accounts
// Consider security implications
],
],
```
### Models and Database
Configure entity models and database settings:
```php
use SolutionForest\InspireCms\Models;
use SolutionForest\InspireCms\Policies;
use SolutionForest\InspireCms\Support\Models as SupportModels;
'models' => [
'table_name_prefix' => 'cms_', // Prefix for database tables
// Change requires database migration update
'morph_map_prefix' => 'cms_', // Prefix for polymorphic relationships
// Model class mappings - replace with your own to extend functionality
// Example: 'user' => App\Models\User::class
'fqcn' => [
'content' => Models\Content::class,
'content_path' => Models\ContentPath::class,
// ... other models
],
/**
* Policy mappings control authorization
*/
'policies' => [
'content' => Policies\ContentStatusPolicy::class,
// Add custom policies here
],
/**
* Auto-cleanup settings for database tables that can grow large
*/
'prunable' => [
'content_version' => [
'interval' => 30, // Delete content versions older than 30 days
],
'import' => [
'interval' => 5, // Delete import records older than 5 days
],
'export' => [
'interval' => 5, // Delete export records older than 5 days
],
],
],
```
### Custom Fields
Define and manage custom fields for content types:
```php
'custom_fields' => [
// Register field configuration classes
// Add your own custom field types by creating a class that extends
// \SolutionForest\InspireCms\Fields\Configs\FieldConfig
'extra_config' => [
// Complex field types
\SolutionForest\InspireCms\Fields\Configs\Repeater::class, // Repeatable field groups
\SolutionForest\InspireCms\Fields\Configs\Tags::class, // Tag selection field
// Rich content editors
\SolutionForest\InspireCms\Fields\Configs\RichEditor::class, // WYSIWYG editor
\SolutionForest\InspireCms\Fields\Configs\MarkdownEditor::class, // Markdown support
// Relationship fields
\SolutionForest\InspireCms\Fields\Configs\ContentPicker::class, // Select related content
\SolutionForest\InspireCms\Fields\Configs\MediaPicker::class, // Select media items
],
],
```
### Permissions
Set up role-based access control:
```php
use SolutionForest\InspireCms\Filament\Widgets as FilamentWidgets;
'permissions' => [
/**
* Whether to skip access right permission checks on resources
*/
'skip_access_right_permission_on_resource' => false,
/**
* Define actions that require specific permissions
*/
'guard_actions' => [
],
/**
* Dashboard widgets requiring permissions to view
*/
'guard_widgets' => [
FilamentWidgets\CmsInfoWidget::class,
FilamentWidgets\TemplateInfo::class,
FilamentWidgets\UserActivity::class,
],
],
```
### Template Management
Configure themes and templates:
```php
'template' => [
'component_prefix' => 'inspirecms', // Prefix for Blade layout components
// Example usage:
'exported_template_dir' => resource_path('views/inspirecms/templates'),
// Where template exports are stored
// Make sure this directory exists and is writable
],
```
### Resolvers
Configure how InspireCMS resolves various components:
```php
'resolvers' => [
// Service classes for resolving common entities
// Replace with custom classes to modify behavior
// How the current user is determined
'user' => \SolutionForest\InspireCms\Support\Resolvers\UserResolver::class,
// How published content is retrieved and filtered
'published_content' => \SolutionForest\InspireCms\Resolvers\PublishedContentResolver::class,
// Add custom resolvers here as needed for extending functionality
],
```
### Frontend and Routing
Control how InspireCMS handles frontend requests:
```php
'frontend' => [
'routes' => [
'middleware' => [], // Apply middleware to all frontend routes
// Example: ['web', 'localize', 'cache']
// Core middleware like 'web' is already applied
],
/**
* Handles URL segment parsing for content routing
*
* Replace with custom class to implement custom URL schemes
*/
'segment_provider' => \SolutionForest\InspireCms\Content\DefaultSegmentProvider::class,
/**
* Class that handles content previews
*
* Override with a custom class to implement specialized preview behavior
*/
'preview_provider' => \SolutionForest\InspireCms\Content\DefaultPreviewProvider::class,
/**
* Controls how URL slugs are generated for content
*
* Override to implement custom slug generation rules
*/
'slug_generator' => \SolutionForest\InspireCms\Content\DefaultSlugGenerator::class,
'fallback_seo' => [
'title' => env('APP_NAME', 'Home'),
'description' => null,
'keywords' => null,
'image' => null,
],
],
```
### Sitemap Generation
Configure automatic sitemap generation:
```php
'sitemap' => [
// Class responsible for generating sitemaps
// Replace with custom class for specialized sitemap behavior
'generator' => \SolutionForest\InspireCms\Sitemap\SitemapGenerator::class,
// Where the sitemap is stored - should be in public web directory
'file_path' => public_path('sitemap.xml'),
// To regenerate sitemap: php artisan inspirecms:generate-sitemap
],
```
### Scheduled Tasks
Set up automated background tasks:
```php
'scheduled_tasks' => [
'execute_import_job' => [
'enabled' => true, // Enable/disable automated imports
'schedule' => 'everyFiveMinutes', // Laravel schedule frequency
// See Laravel docs for options
// Command configurations...
],
'execute_export_job' => [
'enabled' => true, // Enable/disable automated exports
// Export job settings...
],
'data_cleanup' => [
'enabled' => true, // Enable/disable data pruning
'schedule' => 'daily', // Run once per day
// Cleanup settings...
],
// To use scheduled tasks, ensure Laravel's scheduler is running:
// * * * * * cd /path-to-project && php artisan schedule:run >> /dev/null 2>&1
],
```
### Localization
Configure language and translation settings:
```php
'localization' => [
// Languages available in the admin panel
// Format: language code or locale identifier
'user_preferred_locales' => ['en','zh_CN','zh_TW'],
],
```
## Content Drafts & Revisions
---
title: Content Drafts & Revisions
slug: content-drafts-revisions
path: docs/v1/content-drafts-revisions
uri: /docs/v1/content-drafts-revisions
heading: Content Drafts & Revisions
brief: InspireCMS provides a content versioning system that allows you to work with drafts and track revisions of your content. This guide explains how to use these features to manage your content workflow effectively.
quick_links: []
---
## Overview
In InspireCMS, content can exist in various states:
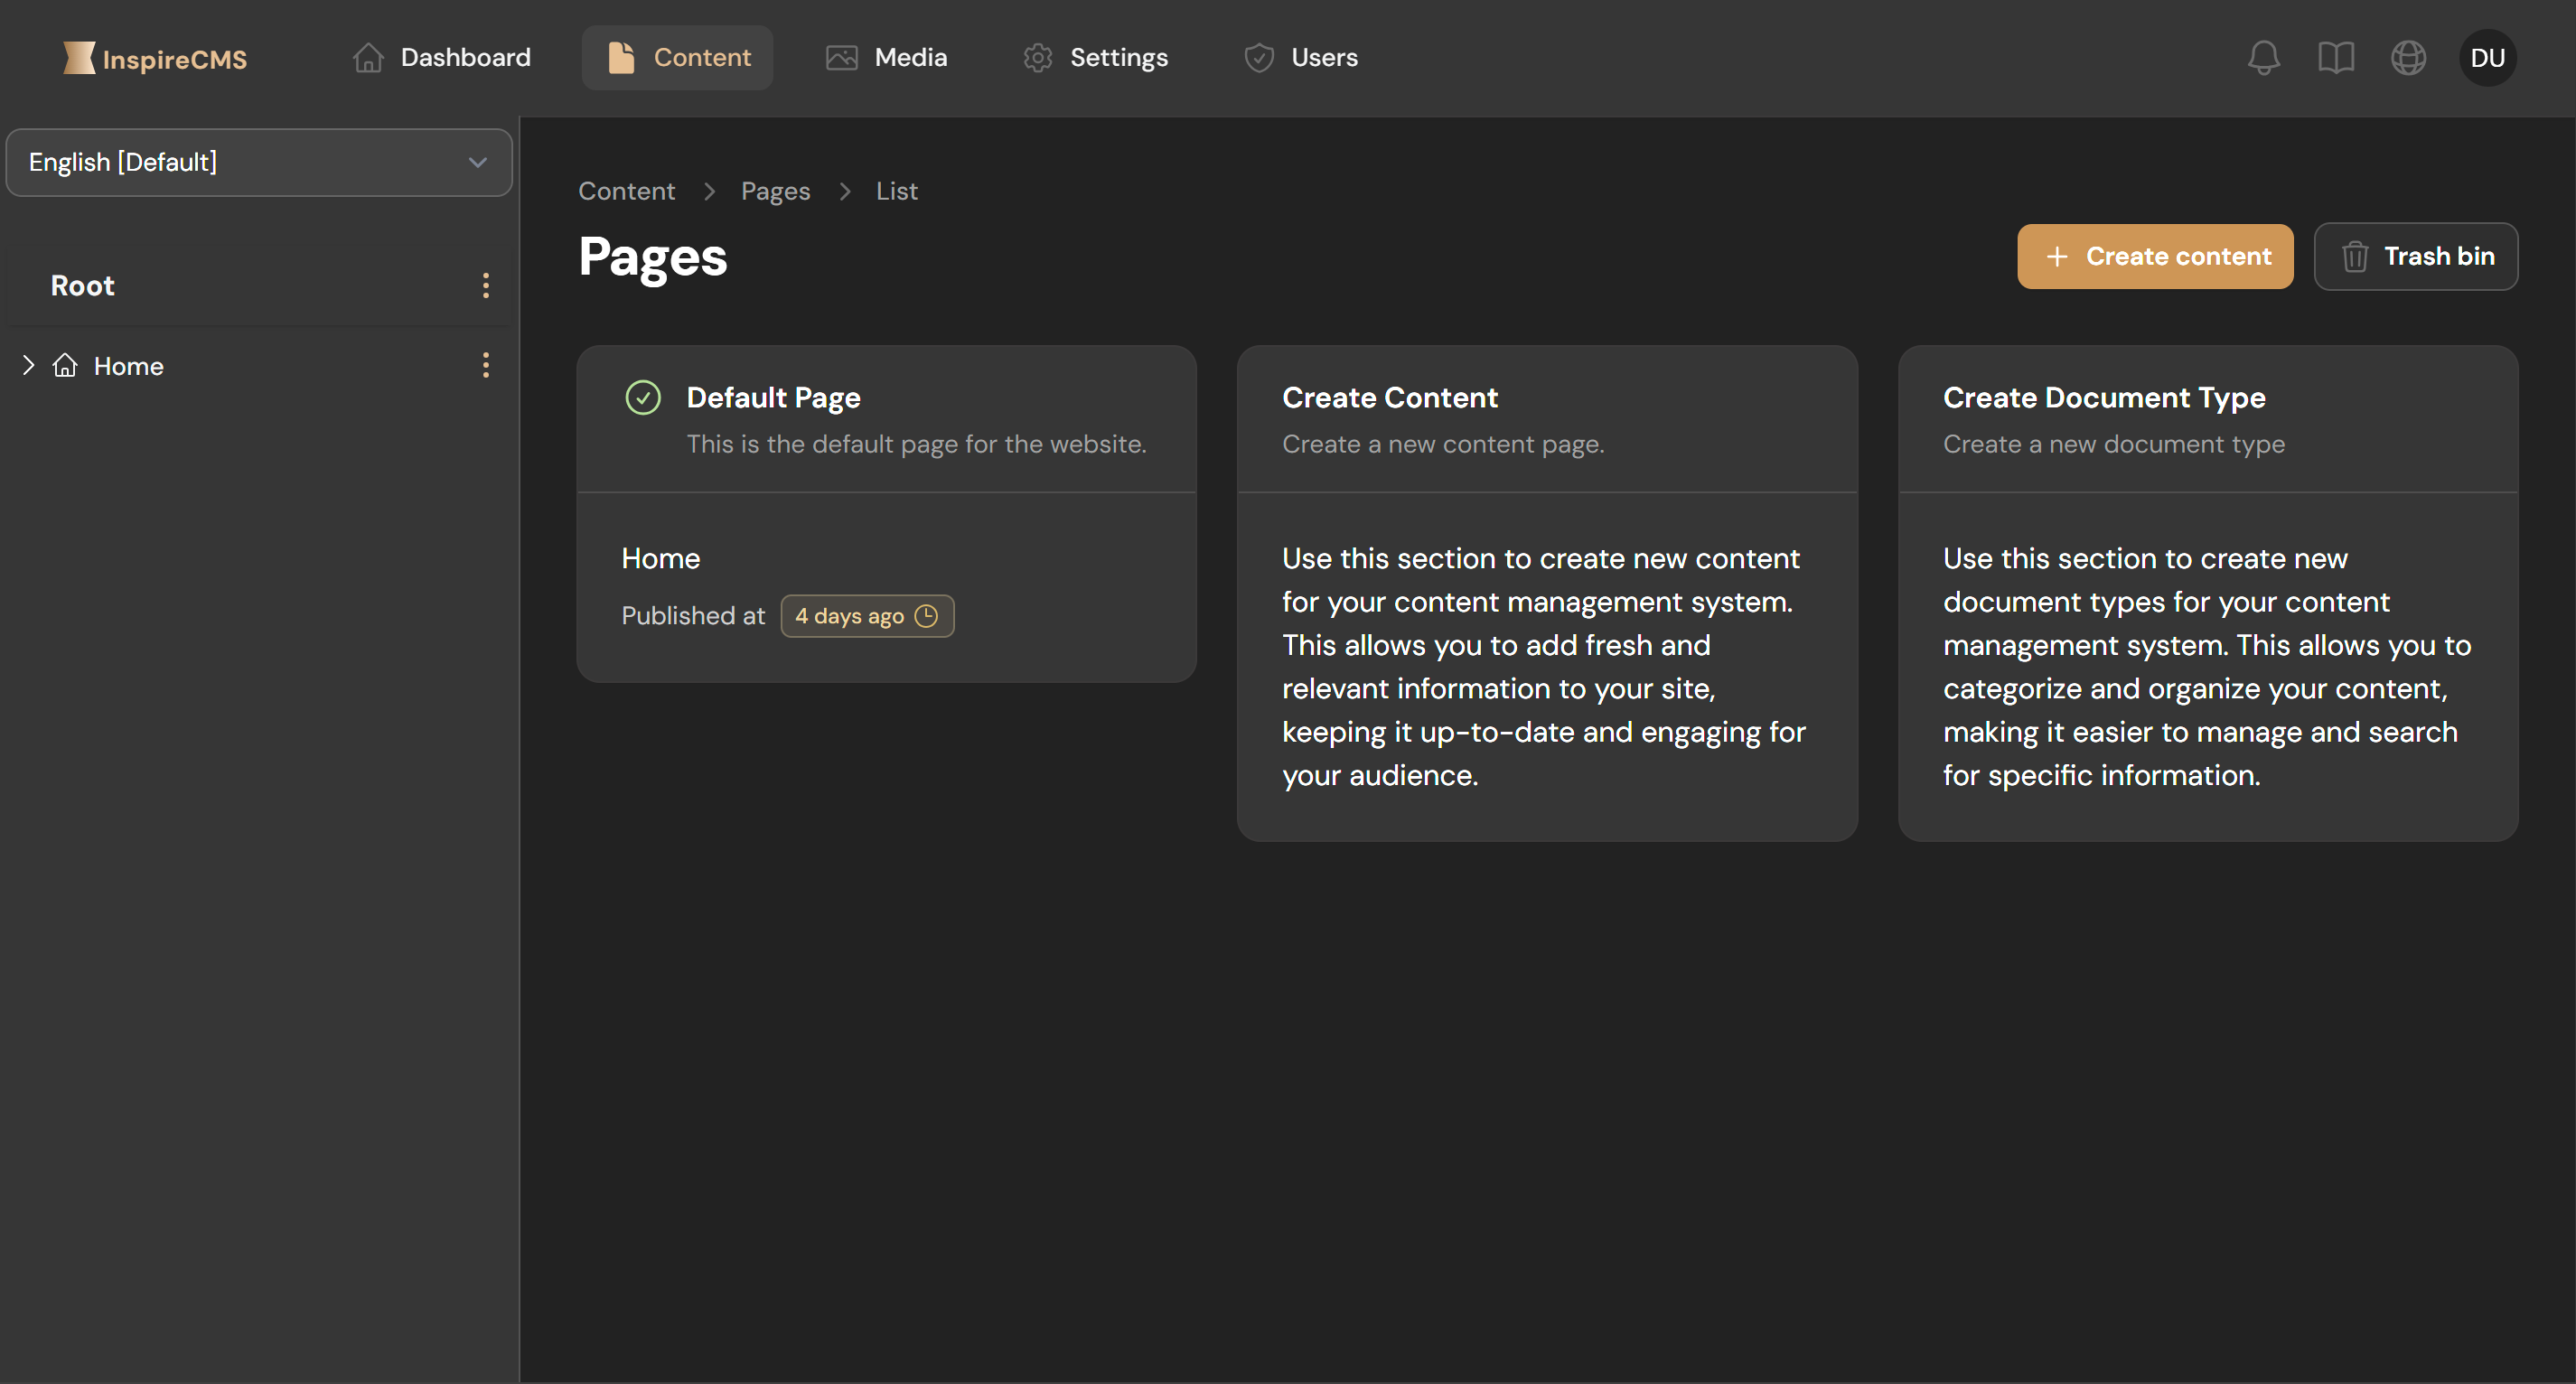
1. **Draft**: Content that is being worked on but not yet published
2. **Published**: Content that is live and visible to site visitors
3. **Unpublished**: Previously published content that has been taken offline
4. **Scheduled**: Content set to be published automatically at a future date
> [!note]
>
> The system will not create a new revision entry if the content data remains unchanged, even if other metadata like publish time differs. This prevents unnecessary revision clutter and maintains a clean content history focused on actual content modifications.
---
## Working with Drafts
### Creating a Draft
When you create new content in InspireCMS, it starts as a draft by default:
1. Navigate to **Content** in the admin panel
2. Click **Create Content**
3. Add your content details, fields, and settings
4. Click **Save** (not "Publish") to store as a draft
Drafts are visible only in the admin panel and not on your live site.
### Identifying Drafts
Drafts are clearly marked in the content list:
- Status indicator shows "Draft"
- Often color-coded differently from published content
- Show an editing icon
### Editing Drafts
You can freely modify drafts without affecting your live content:
1. Find the draft in your content list
2. Click to open it in the editor
3. Make your changes
4. Click **Save** to update the draft
### Draft Preview
Preview your draft to see how it will look when published:
1. Open the draft in the editor
2. Click the **Preview** button in the editor toolbar
3. Your draft will appear in a modal window showing how it will appear on the site
This preview is visible only to authenticated admin users.
## Publishing Content
When your draft is ready to go live:
1. Open the draft in the editor
2. Review all content and settings
3. Click the **Publish** button
4. Confirm the publish action
Once published, the content becomes visible on your live site.
### Scheduling Publication
For content that should go live at a specific time:
1. Edit your content as usual
2. In the publishing options, select **Schedule**
3. Set the desired publish date and time
4. Click **Schedule**
The system will automatically change the content status from "Scheduled" to "Published" at the specified time.
---
## Content Revisions
InspireCMS automatically tracks revisions each time content is saved, creating a history of changes.
### Viewing Revision History
To see the history of changes to a content item:
1. Open the content item in the editor
2. Look for the **Versions** button in the top-right corner of the page
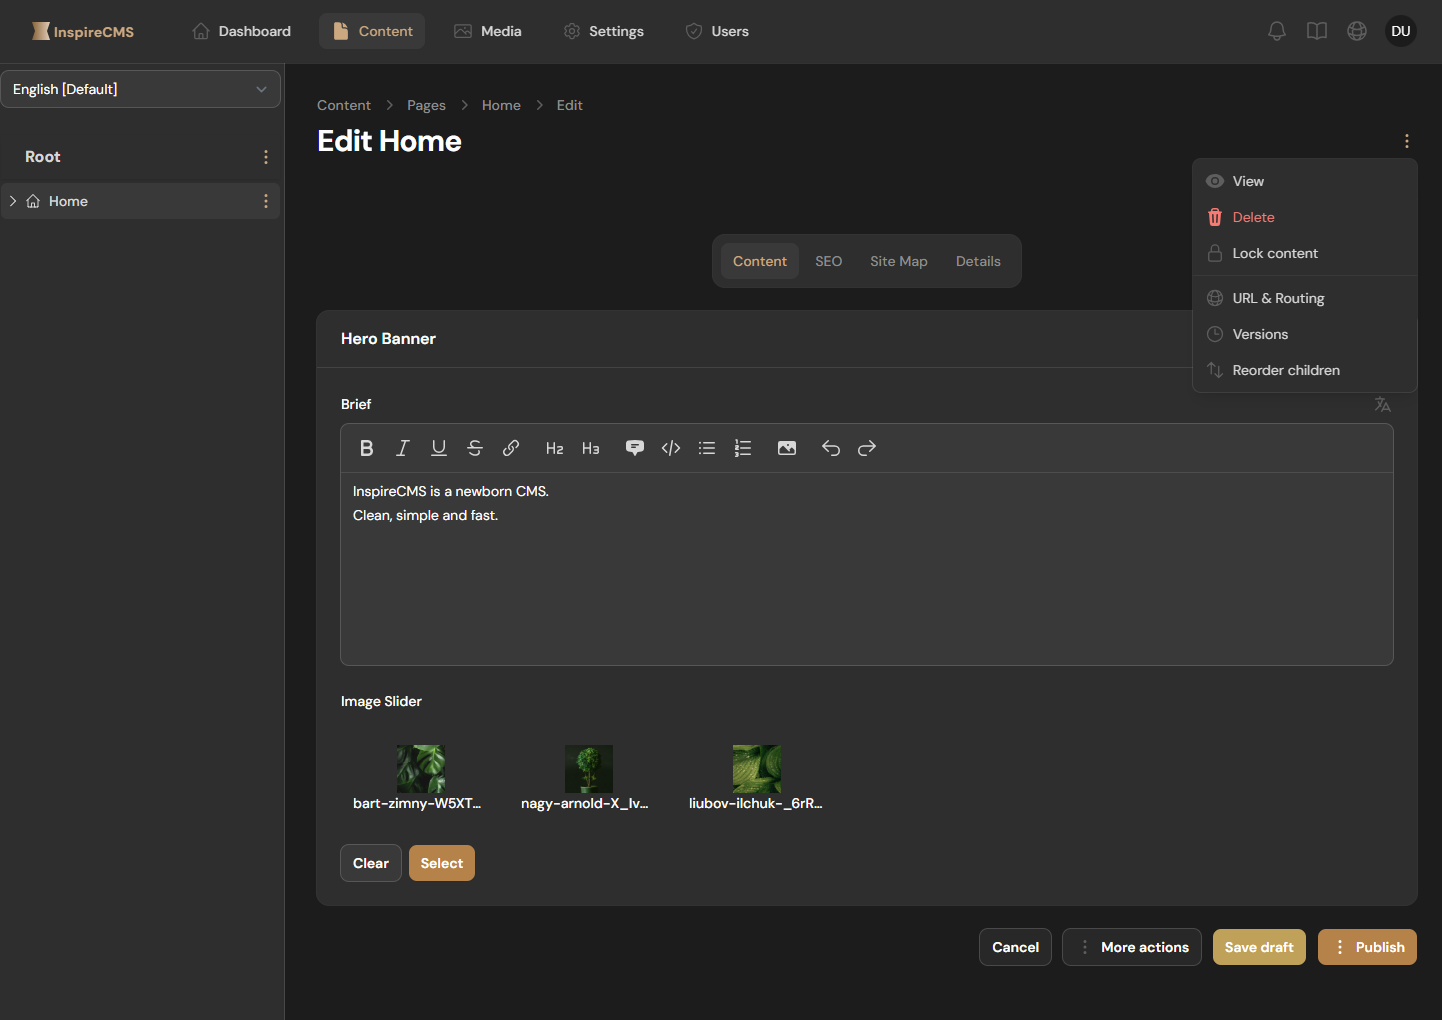
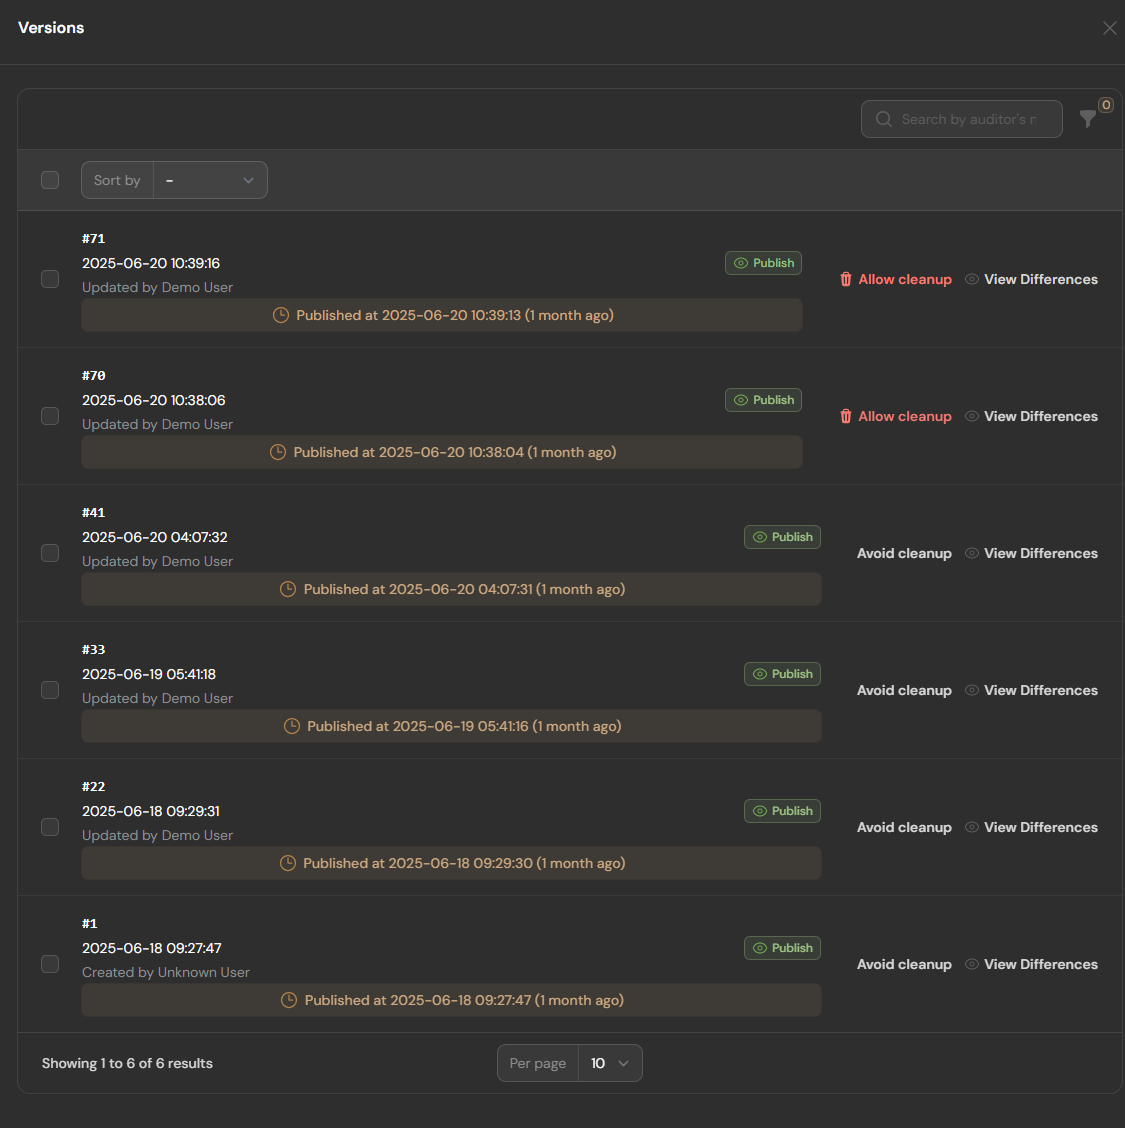
3. View the list of all revisions with timestamps and authors
### Rolling Back to Previous Versions
> [!note]
> Rollback functionality is available in v1.1.0+
If you have **Pro** tier license, you can restore content to selected version:
1. Navigate to the revision history as described above
2. Find the revision you want to restore
3. Click the **Rollback** button next to that revision
4. Confirm the rollback action
---
## Content Locks
To prevent conflicts when multiple users edit the same content:
1. When a user begins editing content, a lock is placed on that content
2. Other users see an indicator that the content is being edited
3. Locks remain active until explicitly released
4. Only administrators and the user who placed the lock can unlock the content
---
## Custom Publishing States
InspireCMS allows for custom publishing states to match your workflow:
```php {title="app/Providers/AppServiceProvider.php"}
use SolutionForest\InspireCms\Facades\ContentStatusManifest;
use SolutionForest\InspireCms\DataTypes\Manifest\ContentStatusOption;
use Filament\Actions\Action;
// In your service provider
public function boot()
{
ContentStatusManifest::addOption(
new ContentStatusOption(
value: 2,
name: 'review',
formAction: fn () => Action::make('review')
->label('Send for Review')
->action(function ($record, $action) {
if (is_null($record)) {
$action->cancel();
return;
}
if (! \SolutionForest\InspireCms\Helpers\ContentHelper::handlePublishableRecord($record, $publishableState, $livewire, [])) {
return;
}
$action->success();
})
)
);
}
```
---
## Example Usage: Content Review and Approval System
For organizations that require approval before publishing:
1. Content author creates and edits a draft
2. Author submits the content for review
3. Editors/approvers are notified of pending review
4. Approvers can:
- Approve and publish
- Request changes (returns to draft)
- Reject the content
### Adding a Custom Content Status
A basic approval workflow can be set up using custom states and notifications:
```php {title="app/Providers/AppServiceProvider.php"}
use Filament\Actions\Action;
use SolutionForest\InspireCms\DataTypes\Manifest\ContentStatusOption;
use SolutionForest\InspireCms\Facades\ContentStatusManifest;
use SolutionForest\InspireCms\Helpers\ContentHelper;
// In your service provider
public function boot()
{
// Add "In Review" status
ContentStatusManifest::addOption(
new ContentStatusOption(
value: 2, // Raw db value
name: 'in_review',
formAction: fn () => Action::make('submit_for_review')
->authorize('inReview')
->successNotificationTitle('Send to Review')
->action(function ($record, $action, $livewire) {
$if (is_null($record)) {
$action->cancel();
return;
}
$publishableState = 'in_review';
if (! ContentHelper::handlePublishableRecord($record, $publishableState, $livewire, [])) {
return;
}
$action->success();
})
)
);
// Add "Approved" status
ContentStatusManifest::addOption(
new ContentStatusOption(
value: 5, // Raw db value
name: 'approved',
formAction: fn () => Action::make('approved')
->authorize('approved')
->successNotificationTitle('Approved')
->action(function ($record, $action, $livewire) {
$if (is_null($record)) {
$action->cancel();
return;
}
$publishableState = 'approved';
if (! ContentHelper::handlePublishableRecord($record, $publishableState, $livewire, [])) {
return;
}
$action->success();
})
)
);
}
```
### Customizing Models and Authorization Policies
To fully implement a review workflow, you may need to extend the default content model and define authorization policies:
#### Custom Content Policy
```php
namespace App\Policies;
use App\Models\Content;
use App\Models\User;
use SolutionForest\InspireCms\Policies\ContentStatusPolicy as BasePolicy;
class ContentPolicy extends BasePolicy
{
public function viewAny(User $user): bool
{
return true;
}
public function view(User $user, Content $content): bool
{
return true;
}
public function create(User $user): bool
{
return $user->hasAnyRole(['author', 'editor', 'admin']);
}
public function update(User $user, Content $content): bool
{
// Authors can only edit drafts they created
if ($user->hasRole('author') && $content->user_id === $user->id) {
return $content?->display_status?->getName() === 'draft';
}
// Editors can review content in review status and edit any draft
if ($user->hasRole('editor')) {
return in_array($content?->display_status?->getName(), [
'draft',
'in_review',
]);
}
// Admins can edit anything
return $user->hasRole('admin');
}
public function publish(User $user, Content $content): bool
{
return $user->hasAnyRole(['editor', 'admin']);
}
public function inReview(User $user, Content $content): bool
{
return $content?->display_status?->getName() !== 'in_review';
}
public function approved(User $user, Content $content): bool
{
return $content?->display_status?->getName() === 'in_review';
}
}
```
#### Custom Content Model
```php
namespace App\Models;
use SolutionForest\InspireCms\Models\Content as BaseContent;
class Content extends BaseContent
{
}
```
Register your custom model and policy in your `AppServiceProvider`:
```php {title="app/Providers/AppServiceProvider.php"}
use Illuminate\Support\Facades\Gate;
use Illuminate\Support\ServiceProvider;
use SolutionForest\InspireCms\Facades\InspireCms;
use SolutionForest\InspireCms\Facades\ModelManifest;
use SolutionForest\InspireCms\Models\Contracts\Content;
class AppServiceProvider extends ServiceProvider
{
public function register(): void
{
ModelManifest::replace(Content::class, \App\Models\Content::class);
}
public function boot()
{
Gate::policy(\App\Models\Content::class, \App\Policies\ContentPolicy::class);
}
}
```
Or update in config:
```php {title="config/inspirecms.php"}
return [
'models' => [
'fqcn' => [
'content' => \App\Models\Content::class,
],
'policies' => [
'content' => \App\Policies\YourContentPolicy::class,
]
],
];
```
---
## Conflict Resolution
When conflicting edits occur:
1. The system detects when two users have edited the same content
2. On save, the second user is shown a conflict resolution screen
3. They can choose to:
- Merge changes manually
- Keep their version (overwrite)
- Discard their changes
- Save as a new draft
## Content Routing
---
title: Content Routing
slug: content-routing
path: docs/v1/content-routing
uri: /docs/v1/content-routing
heading: Content Routing
brief:
quick_links: []
---
## Overview
By default, content URLs follow a hierarchical structure:
```plaintext
/parent-section/child-section/content-slug
```
**Example Content Structure**:
```plaintext
- Root
- about
- products
- widgets
- blue-widget
- gadgets
- red-gadget
```
For example:
- `/about`: A top-level "About" page
- `/products/widgets/blue-widget`: A "Blue Widget" page under the "Widgets" section of "Products"
---
## Setting Content Routes
To set a custom route for content:
1. Edit the content item in the admin panel
2. Navigate to the "**URL & Routing**" button in the top-right corner of the admin panel
3. Enter your custom route in the "Path" field
4. Save the content
> [!note]
>
> Remember to uncheck the checkbox `Is default pattern` if not using default pattern
### Route Constraints
You can define URL patterns with parameters:
```plaintext
blog/{year}/{month}/{slug}
```
Define [constraints](https://laravel.com/docs/11.x/routing#parameters-regular-expression-constraints) to validate parameters:
```php
[
'year' => '[0-9]{4}',
'month' => '[0-9]{1,2}',
'slug' => '[a-z0-9\-]+'
]
```
### Accessing Route Variables in Blade
After setting a content route with parameters, you can access those variables in your Blade templates. For example, if your route is defined as `blog/{year}/{month}/{slug}`, you can access the `{year}` variable like this in your `blade.php` file:
```php
Year: {{ $year }}
```
This allows you to dynamically display content based on the URL parameters.
For more information on route parameters, refer to the [Laravel documentation](https://laravel.com/docs/11.x/routing#route-parameters).
---
## Content Slugs
Content slugs are URL-friendly versions of content titles used in routes.
### Automatic Slug Generation
When creating content, InspireCMS automatically generates a slug from the title:
- "Hello World" becomes "hello-world"
- "Top 10 Tips & Tricks" becomes "top-10-tips-tricks"
### Custom Slugs
To use a custom slug:
1. Edit the content item
2. Find the "Slug" field (often near the title)
3. Enter your custom slug
4. Save the content
### Slug Validation
Slugs must:
- Contain only lowercase letters, numbers, and hyphens
- Not conflict with existing routes or reserved words
- Be unique within their parent section
### Customizing the Slug Generator
You can customize how slugs are generated by modifying the `slug_generator` setting in your configuration file. Here's how:
1. Locate `frontend` section in the `config/inspirecms.php` file.
2. **Edit the Slug Generator**:
Change the `slug_generator` to your custom class:
```php
'frontend' => [
'slug_generator' => \App\CustomSlugGenerator::class,
],
```
3. **Create Your Custom Slug Generator**:
Implement your custom slug generator class:
```php
namespace App;
use SolutionForest\InspireCms\Content\DefaultSlugGenerator;
class CustomSlugGenerator extends DefaultSlugGenerator {
public function generate($text, $language = DefaultSlugGenerator::LANG_AUTO, $separator = '-') {
// Custom logic for slug generation
return strtolower(trim(preg_replace('/[^A-Za-z0-9-]+/', '-', $text)));
}
}
```
4. **Test Your Changes**:
After saving your configuration and custom class, create new content or edit existing content to see your custom slug generation in action.
---
## Route Registration
InspireCMS registers routes during application bootstrap:
```php {title="routes/web.php"}
use Illuminate\Support\Facades\Route;
\SolutionForest\InspireCms\Facades\InspireCms::routes();
```
## Customizing Routes
### Adding Custom Middleware
Apply middleware to frontend routes:
```php {title="config/inspirecms.php"}
'frontend' => [
'routes' => [
'middleware' => [
\App\Http\Middleware\TrackVisitors::class,
\App\Http\Middleware\CacheControl::class,
],
],
],
```
### Custom Route Handlers
To handle specific routes with custom logic, register them in your application's `routes/web.php` file:
```php {title="routes/web.php"}
use Illuminate\Support\Facades\Route;
Route::get('/special-section/{id}', [\App\Http\Controllers\SpecialController::class, 'show'])
->name('special.show')
->where('id', '[0-9]+');
```
These custom routes will be processed before InspireCMS content routes, allowing you to override or extend functionality for specific URL patterns. For more information on Laravel routing, refer to the [Laravel documentation](https://laravel.com/docs/11.x/routing#basic-routing).
---
## Route Caching
InspireCMS caches content routes for performance:
### Cache Configuration
```php {title="config/inspirecms.php"}
'cache' => [
'content_routes' => [
'key' => 'inspirecms.content_routes',
'ttl' => 120 * 60 * 24, // 120 days in seconds
],
],
```
### Clearing Route Cache
To clear the route cache:
```bash
php artisan route:clear
```
This is useful after:
- Bulk content changes
- Changing route configuration
- Upgrading InspireCMS
---
## Advanced Routing
### Content Route Resolution
The route resolution process:
1. Incoming request URL is processed by the FrontendController
2. The PublishedContentResolver analyzes the request and route
3. For default routes, the system extracts URL segments and locale information
4. For custom routes, the system checks against registered content route patterns
5. Content is retrieved based on the resolved route with appropriate language settings
6. The system verifies that the content is published and configured as a web page
7. Content, template, and locale information are combined into a PublishedContentDto
8. Response is generated using the appropriate template and content data
### Custom Segment Provider
For custom URL structure handling:
```php
namespace App\Services;
use SolutionForest\InspireCms\Content\SegmentProviderInterface;
class CustomSegmentProvider implements SegmentProviderInterface
{
public function getUrlSegmentFromDefaultRoute($route)
{
// Custom logic
}
}
```
Register in configuration:
```php {title="config/inspirecms.php"}
'frontend' => [
'segment_provider' => \App\Services\CustomSegmentProvider::class,
],
```
### Customizing PublishedContentResolver
The PublishedContentResolver is responsible for determining which content to display based on the requested URL. You can extend or replace this component to implement custom routing logic.
#### Extending the Default Resolver
Create your own resolver by extending the default implementation:
```php
namespace App\Resolvers;
use SolutionForest\InspireCms\Resolvers\PublishedContentResolver;
class CustomContentResolver extends PublishedContentResolver
{
protected function resolve(...$args)
{
// Custom implementation for finding content based on route
// You can add additional logic here before or after the parent method
return parent::resolve($args);
}
}
```
#### Register Your Custom Resolver
Register your custom resolver in a service provider:
```php
namespace App\Providers;
use Illuminate\Support\ServiceProvider;
use SolutionForest\InspireCms\Resolvers\PublishedContentResolverInterface;
use App\Resolvers\CustomContentResolver;
class AppServiceProvider extends ServiceProvider
{
public function register()
{
$this->app->bind(PublishedContentResolverInterface::class, CustomContentResolver::class);
}
}
```
---
## Redirects and URL Management
### Managing Content Redirects
- Edit the content item in the admin panel
- Navigate to the "SEO" tab
- Scroll down to the "Redirect" section
- Set the destination URL and redirect type (301 permanent, 302 temporary)
- Save the content
---
## Route Debugging
For troubleshooting routing issues:
```bash
php artisan inspirecms:routes
```
This command shows all registered content routes with:
- URL pattern
- Name
- Bindings
- Middleware
## Control Panel
---
title: Control Panel
slug: control-panel
path: docs/v1/control-panel
uri: /docs/v1/control-panel
heading: Control Panel
brief:
quick_links: []
---
## Accessing the Control Panel
By default, the control panel is available at `/cms` on your domain. You can access it by navigating to:
```plaintext
https://your-domain.com/cms
```
The path can be customized in your configuration if needed:
```php {title="config/inspirecms.php"}
'admin' => [
'path' => 'admin', // Changes the path from /cms to /admin
// other settings...
],
```
---
## Navigation Structure
The control panel is organized into several main sections:
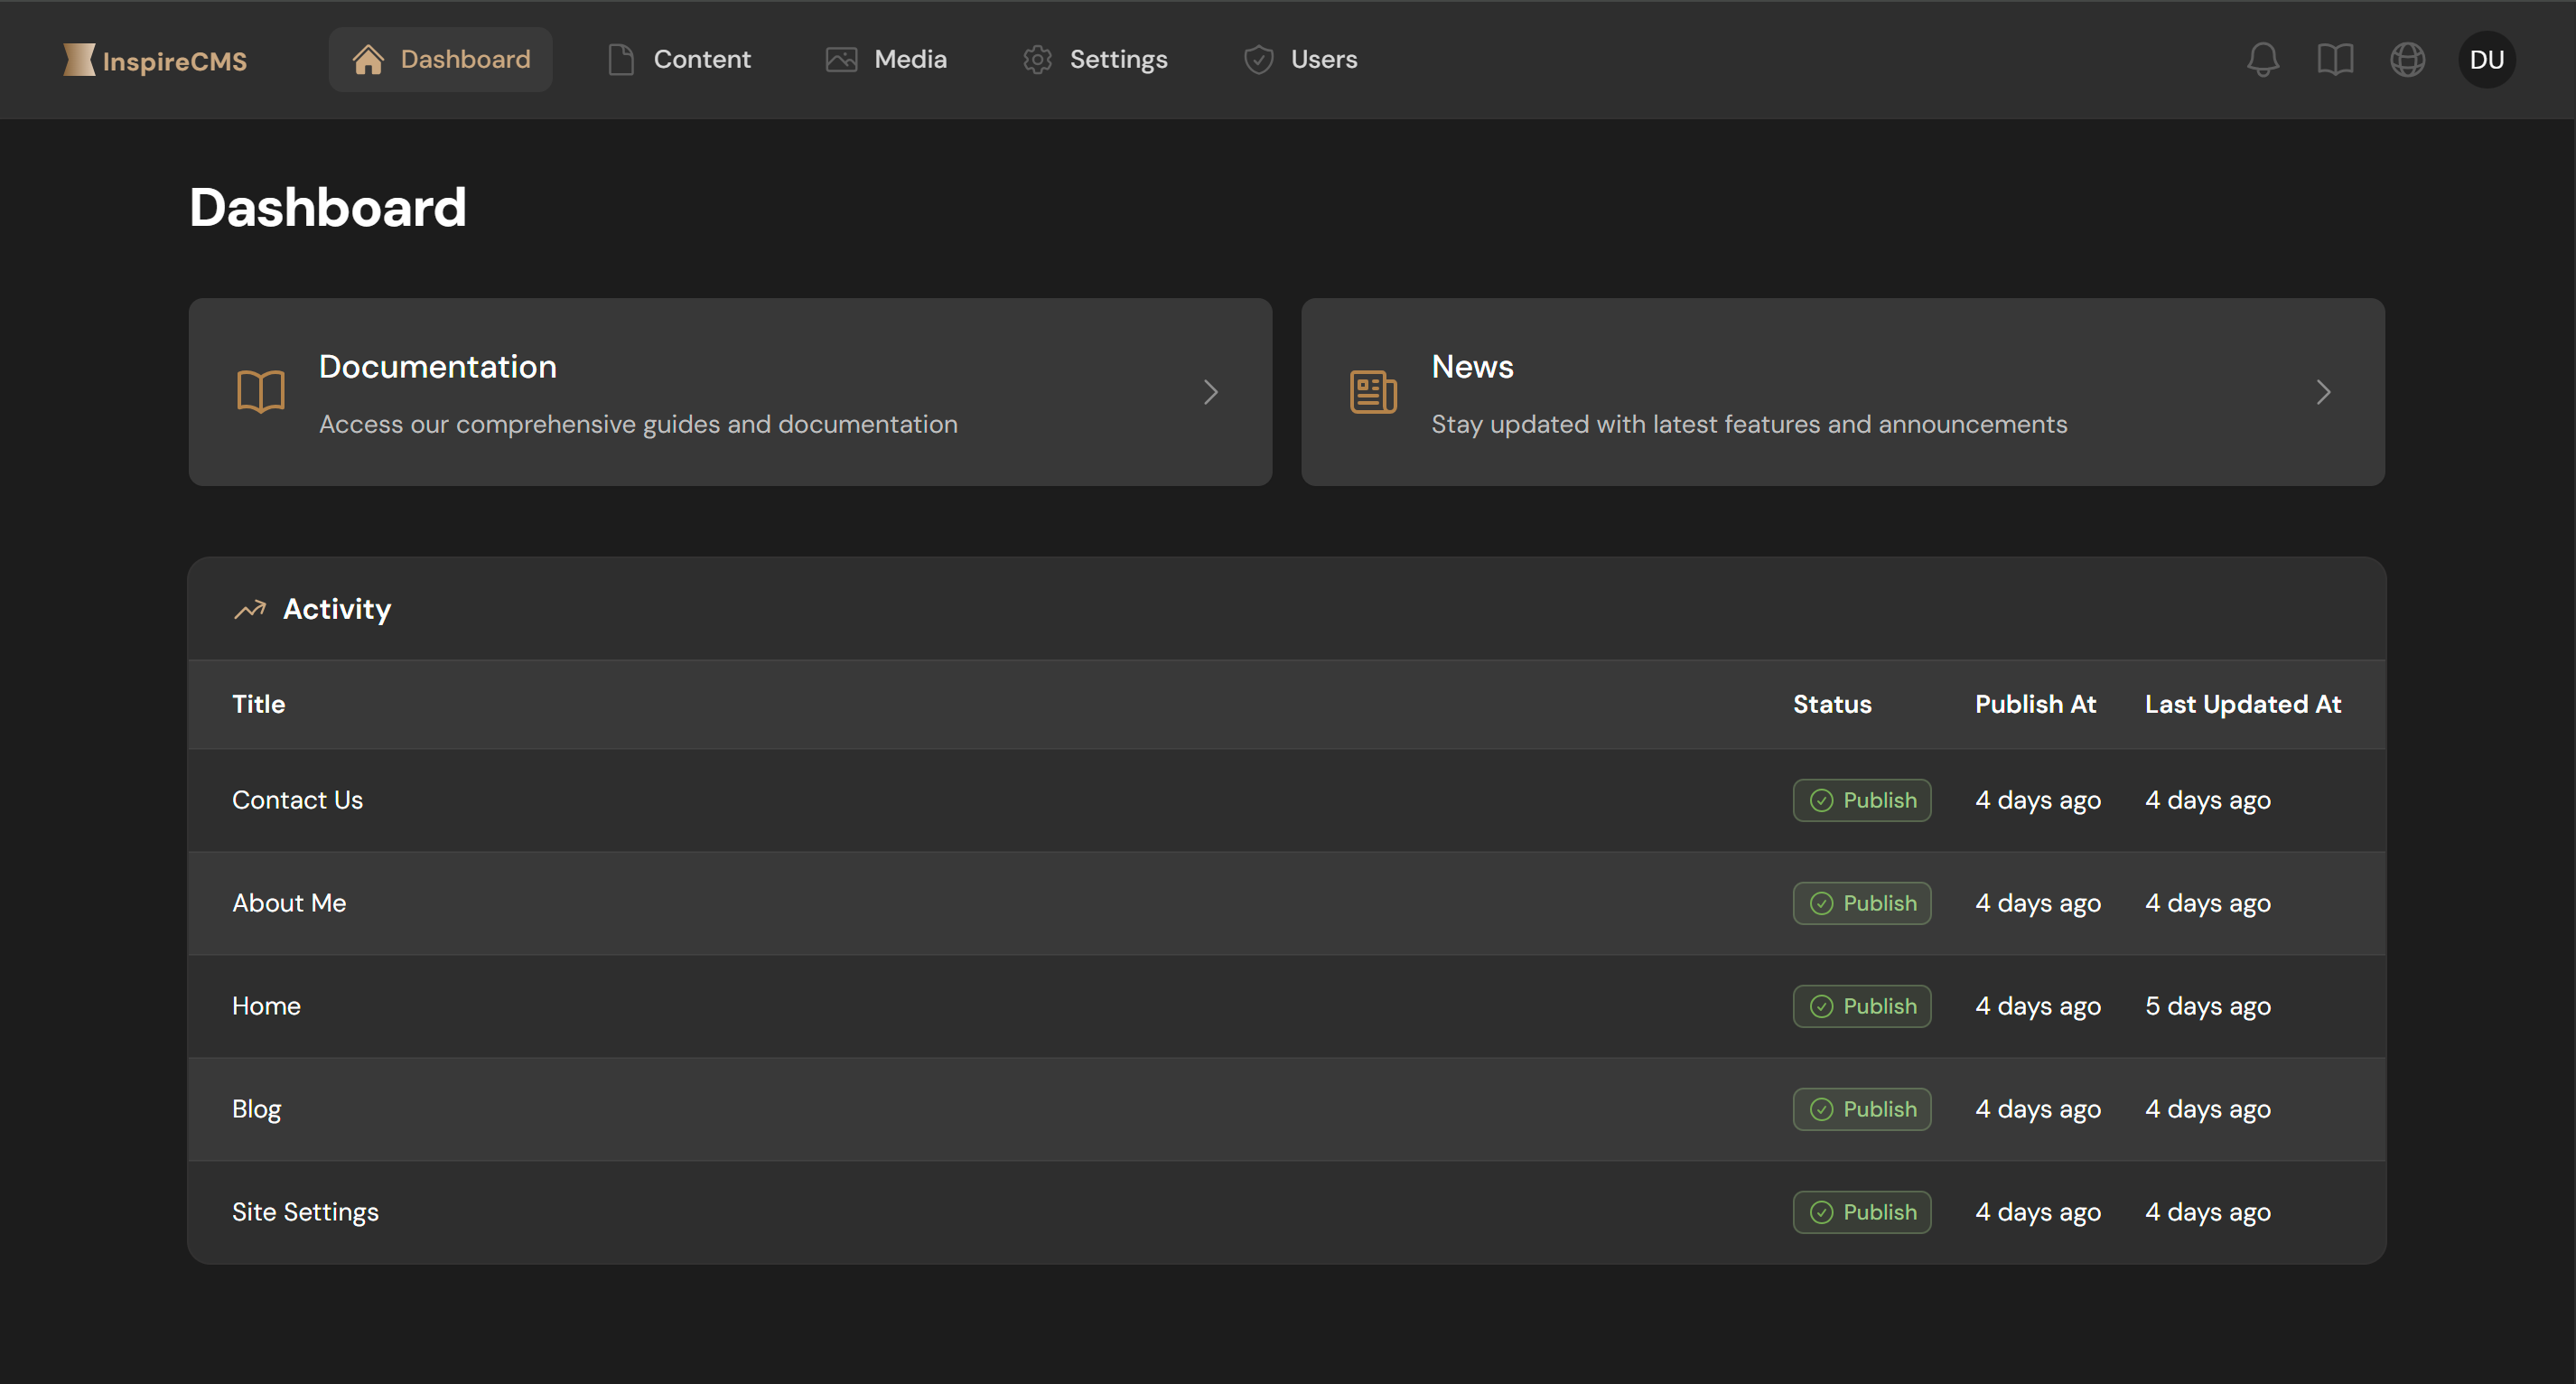
1. **Content**: Manage pages, blog posts, and other content types
2. **Media**: Upload and organize images, documents, and other media
3. **Settings**: Configure system settings, templates, and site options
4. **Users**: Manage user accounts and permissions
---
## Content Management
### Content List View
The Content section lists all your content items with filtering and search capabilities:
- Filter by status (draft, published, unpublish)
- Search content by keyword
- Bulk operations for multiple items
### Content Editor
The content editor includes:
- **Media Integration**: Insert and manage media within content
- **Custom Fields**: Input fields based on your defined content types
- **SEO Settings**: Meta title, description, and other optimization options
- **Versioning**: Manage content revisions and history
- **Publishing Controls**: Schedule content publication and set status
---
## Media Library
The Media Library provides tools for managing digital assets:
- **File Browser**: View and organize media in folders
- **Upload Interface**: Drag-and-drop uploading of multiple files
- **Image Editor**: Basic editing capabilities for images
- **Metadata Management**: View and edit file metadata
- **Usage Tracking**: See where media is being used across the site
---
## System Settings
The Settings section includes:
- **Document Types**: Configure content type structures
- **Customer Fields**: Define custom fields for document type
- **Template Management**: Create and edit templates
- **Navigation**: Manage site menus and navigation structure
- **Languages**: Configure multilingual support
- **Import/Export**: Tools for data migration
---
## Customizing the Control Panel
### Branding
You can customize the appearance of the control panel through the configuration file:
```php {title="config/inspirecms.php"}
'admin' => [
'brand' => [
'name' => 'Your Site Name',
'logo' => fn () => 'path/to/your-logo.svg',
'logo_title' => 'Your Site Name',
'logo_show_text' => true,
'favicon' => fn () => 'path/to/favicon.ico', // Optional
],
],
```
The control panel automatically adapts to these branding settings, giving your admin area a custom look that matches your site's identity.
### Adding Custom Resources
You can extend the control panel with your own resources:
```php {title="config/inspirecms.php"}
'admin' => [
// Existing resources...
'resources' => [
'content' => FilamentResources\ContentResource::class,
// Add your custom resource
'products' => App\Filament\Resources\ProductResource::class,
],
],
```
### Adding Custom Pages
You can add custom pages to the control panel:
```php {title="config/inspirecms.php"}
'admin' => [
// Existing pages...
'pages' => [
'dashboard' => FilamentPages\Dashboard::class,
// Add your custom page
'analytics' => App\Filament\Pages\Analytics::class,
],
],
```
### Control Panel Appearance
You can fully customize the control panel's theme by overriding the default CmsPanelProvider. This allows you to change colors, fonts, and other visual elements to match your brand.
#### Creating a Custom Panel Provider
First, create a custom provider class that extends the base CmsPanelProvider:
```php
colors([
'primary' => '#6366f1',
'secondary' => '#8b5cf6',
'success' => '#10b981',
'info' => '#06b6d4',
'warning' => '#fbbf24',
'danger' => '#f43f5e',
'gray' => '#71717a',
])
->font('Poppins');
}
}
```
#### Registering Your Custom Provider
Next, register your custom provider in `bootstrap/providers.php`:
```php
widgets([
// Default widgets
Widgets\CmsInfoWidget::class,
Widgets\PageActivity::class,
// Your custom widget
AnalyticsWidget::class,
]);
}
}
```
---
## User Preferences
Users can customize their experience through the profile page:
- **Personal Information**: Update name, email, and profile picture
- **Password Management**: Change password and security settings
- **Interface Preferences**: Theme preferences and display options
---
## Keyboard Shortcuts
The control panel supports various keyboard shortcuts for power users:
- `Ctrl+S` or `Cmd+S`: Save the current item
- `Esc`: Close modals or cancel operations
## Custom Fields
---
title: Custom Fields
slug: custom-fields
path: docs/v1/custom-fields
uri: /docs/v1/custom-fields
heading: Custom Fields
brief:
quick_links: []
---
Note: This document depends on the [Filament Field Group](https://github.com/solutionforest/filament-field-group). Field types may not update automatically; for missing or updated field references, please consult that repository.
Additional Note: The following field types are provided as custom fields by the InspireCMS plugin:
- Repeater
- Tags
- Rich Editor
- Markdown Editor
- Content Picker
- Media Picker
- Icon Picker
All other field types listed in this document are sourced from the Filament Field Group package.
## Overview
InspireCMS offers a wide range of field types for different content needs:
| Field Type | Description | Example Use |
| --------------- | -------------------------- | ---------------------------------- |
| Text | Single-line text input | Titles, headings, names |
| Text Area | Multi-line text input | Descriptions, short paragraphs |
| Rich Editor | WYSIWYG HTML editor | Formatted content bodies |
| Markdown Editor | Markdown text editor | Technical documentation |
| Email | Validated email input | Contact information |
| URL | Validated URL input | External links |
| Number | Numeric input | Quantities, ratings |
| Select | Dropdown selection | Categories, statuses |
| Toggle | On/off switch | Feature flags, visibility settings |
| Radio | Radio button group | Mutually exclusive options |
| File | File upload | Documents, downloads |
| Image | Image upload | Photos, illustrations |
| Color Picker | Color selection tool | Theme colors, text highlights |
| DateTime Picker | Date/time selector | Publication dates, event times |
| Content Picker | Reference other content | Related articles, products |
| Media Picker | Select from media library | Gallery images, videos |
| Icon Picker | Icon selection tool | Heroicon identifiers |
| Repeater | Group of repeatable fields | Team members, features list |
| Tags | Multiple keyword input | Blog tags, product attributes |
---
## Creating Field Groups
Field groups organize related fields together. To create a field group:
1. Navigate to **Settings** > **Custom Fields** in the admin panel
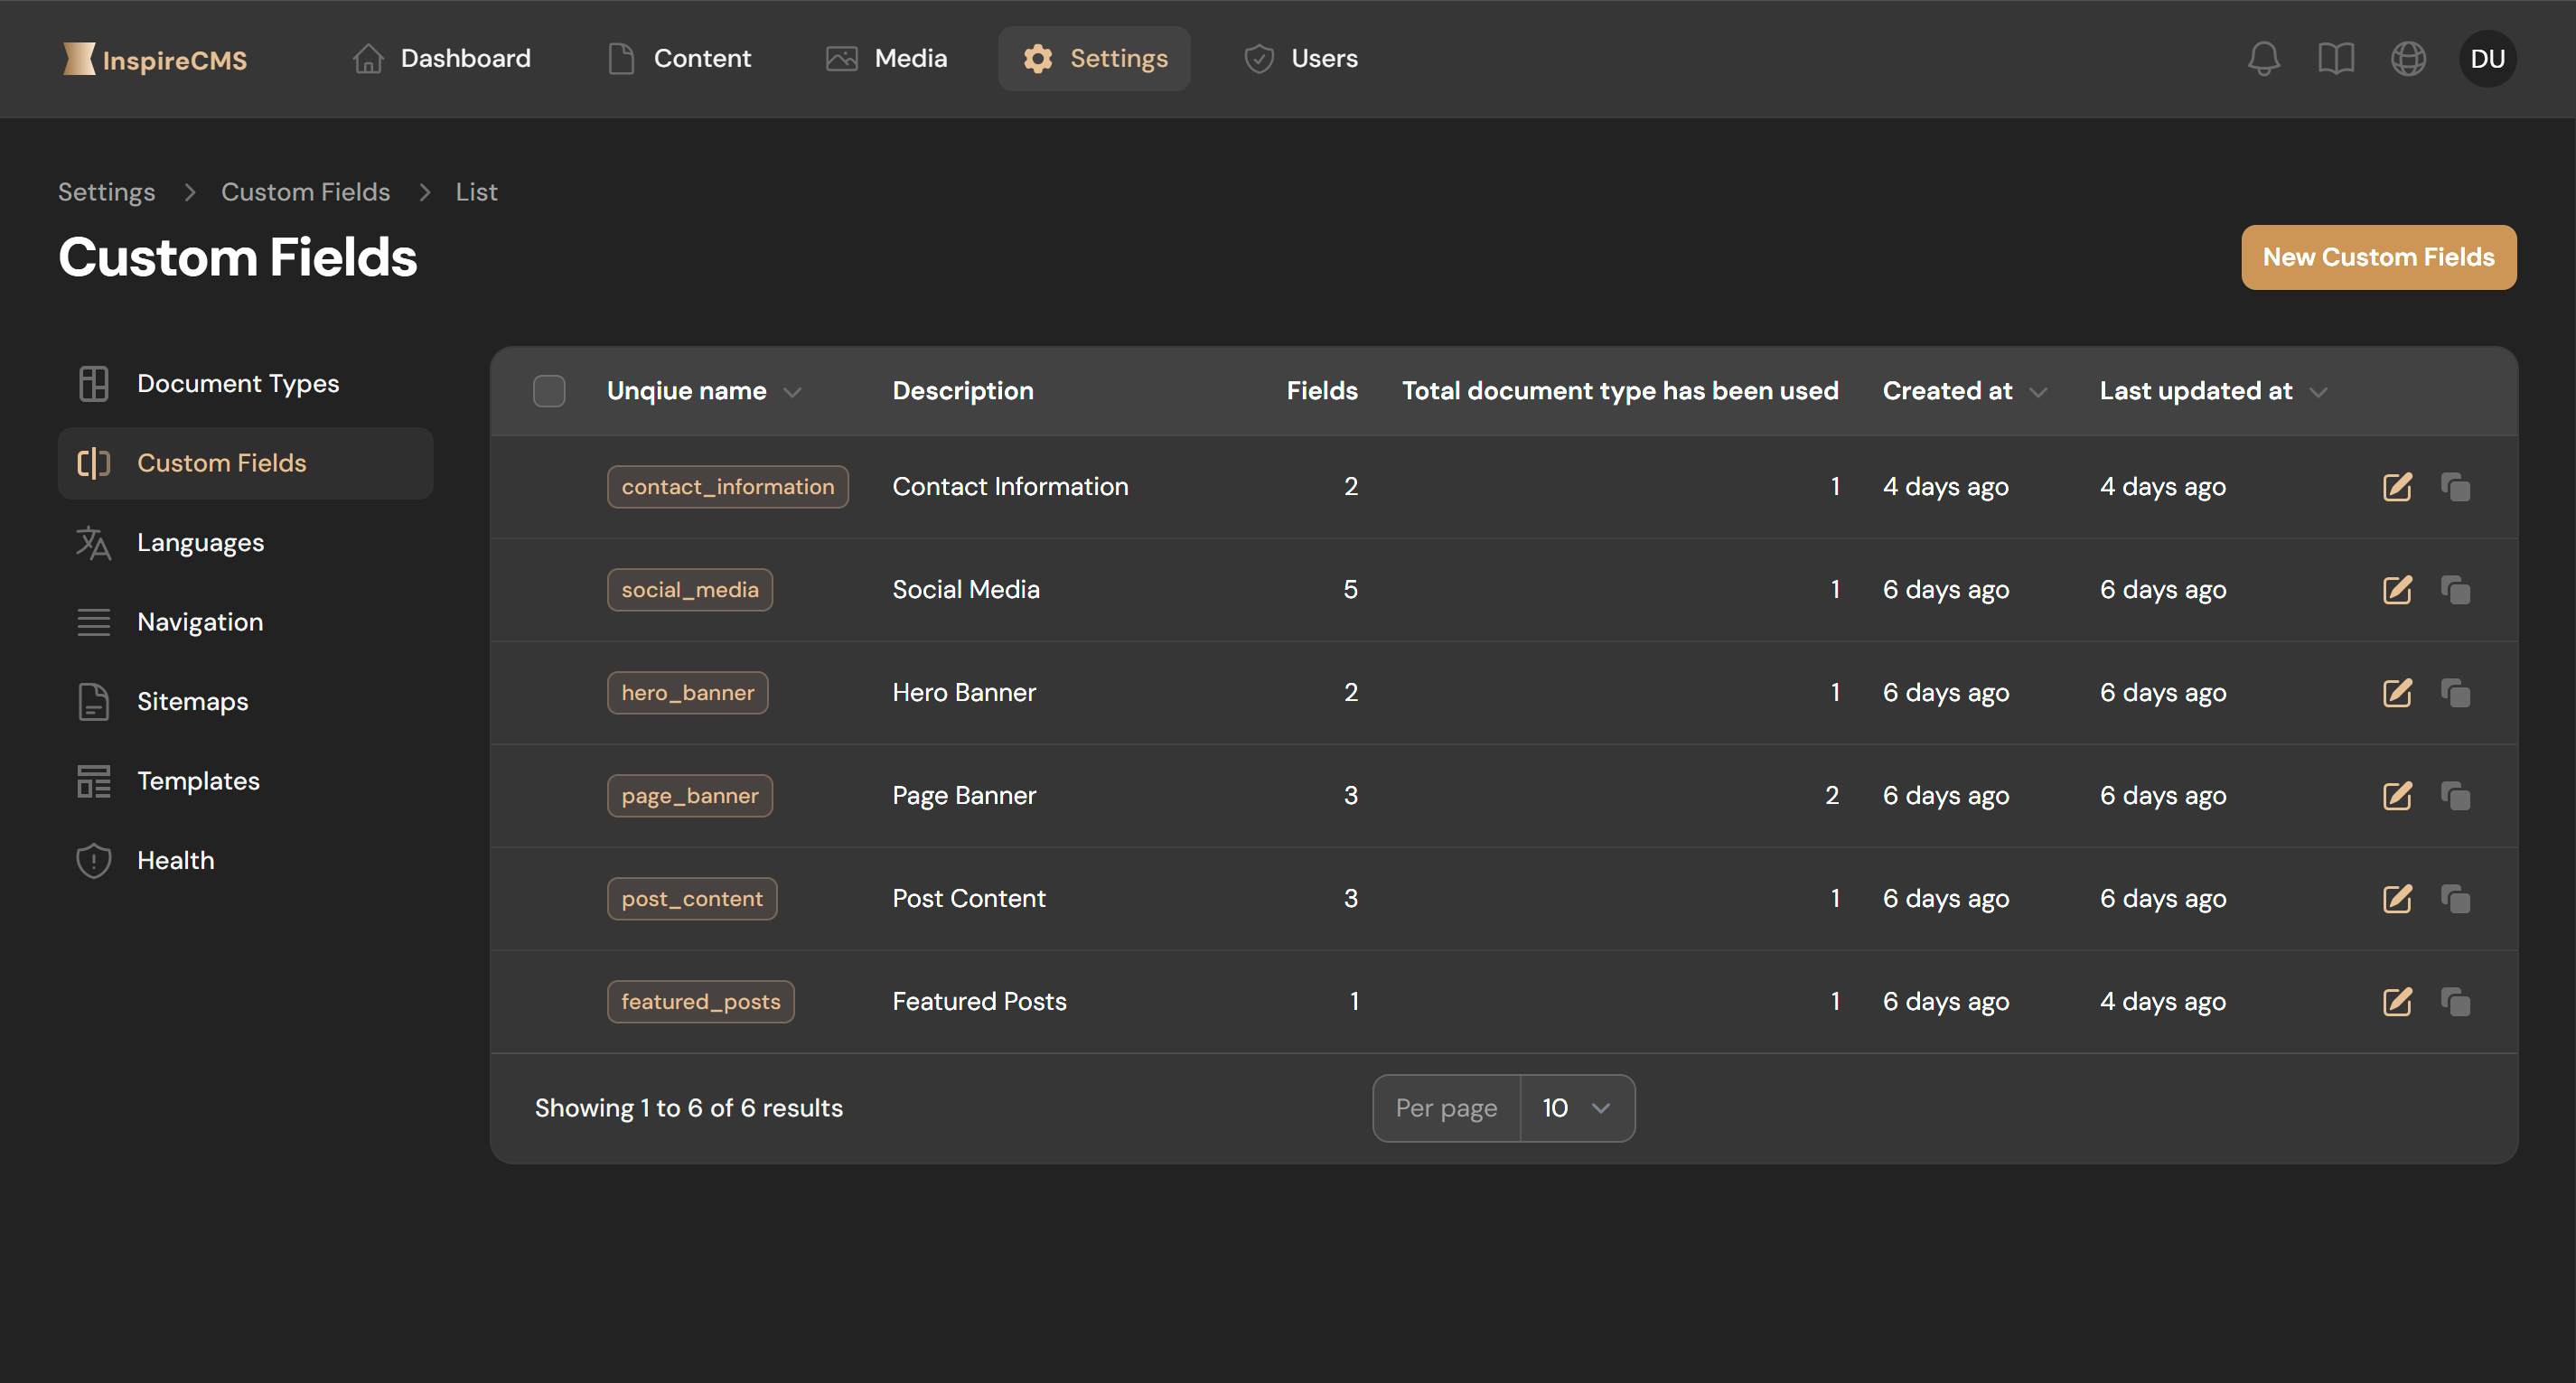
2. Click **New Custom Fields**
3. Add fields to the group using the form
4. Enter a name and slug for your field group
---
## Using Fields in Document Types
After creating field groups, associate them with document types:
1. Navigate to **Settings** > **Document Types**
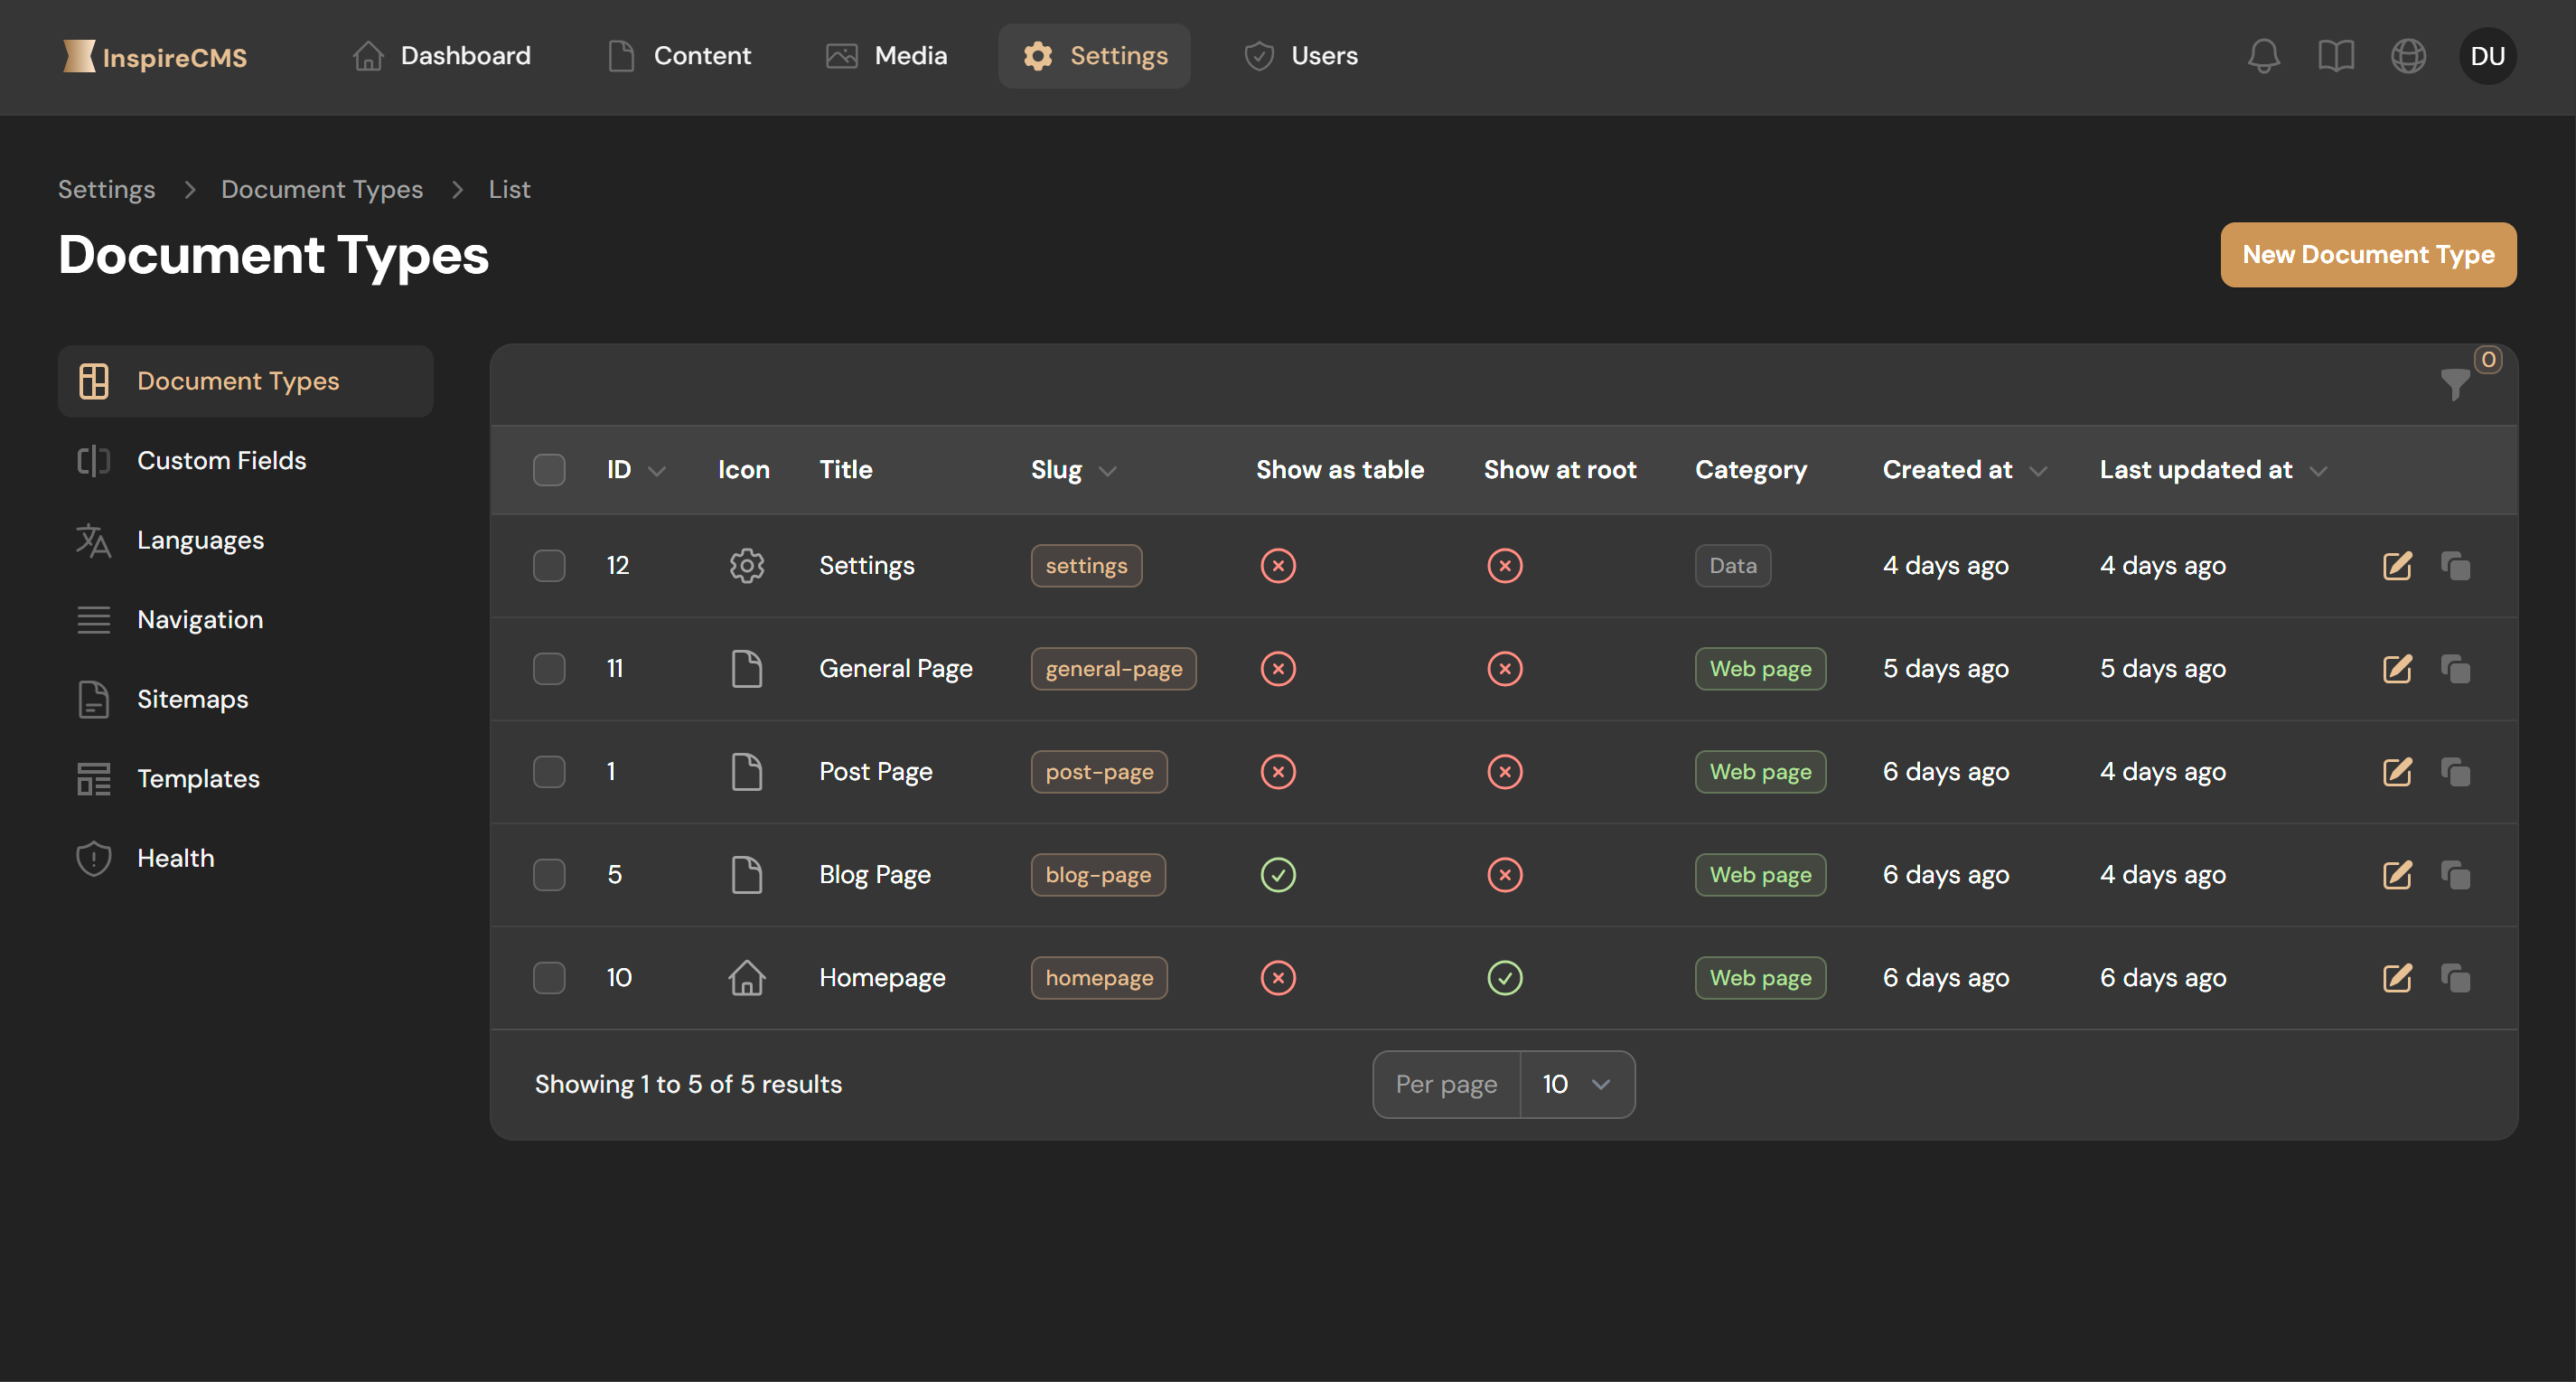
2. Create or edit a document type
3. Under "Structures," select the relevant field groups
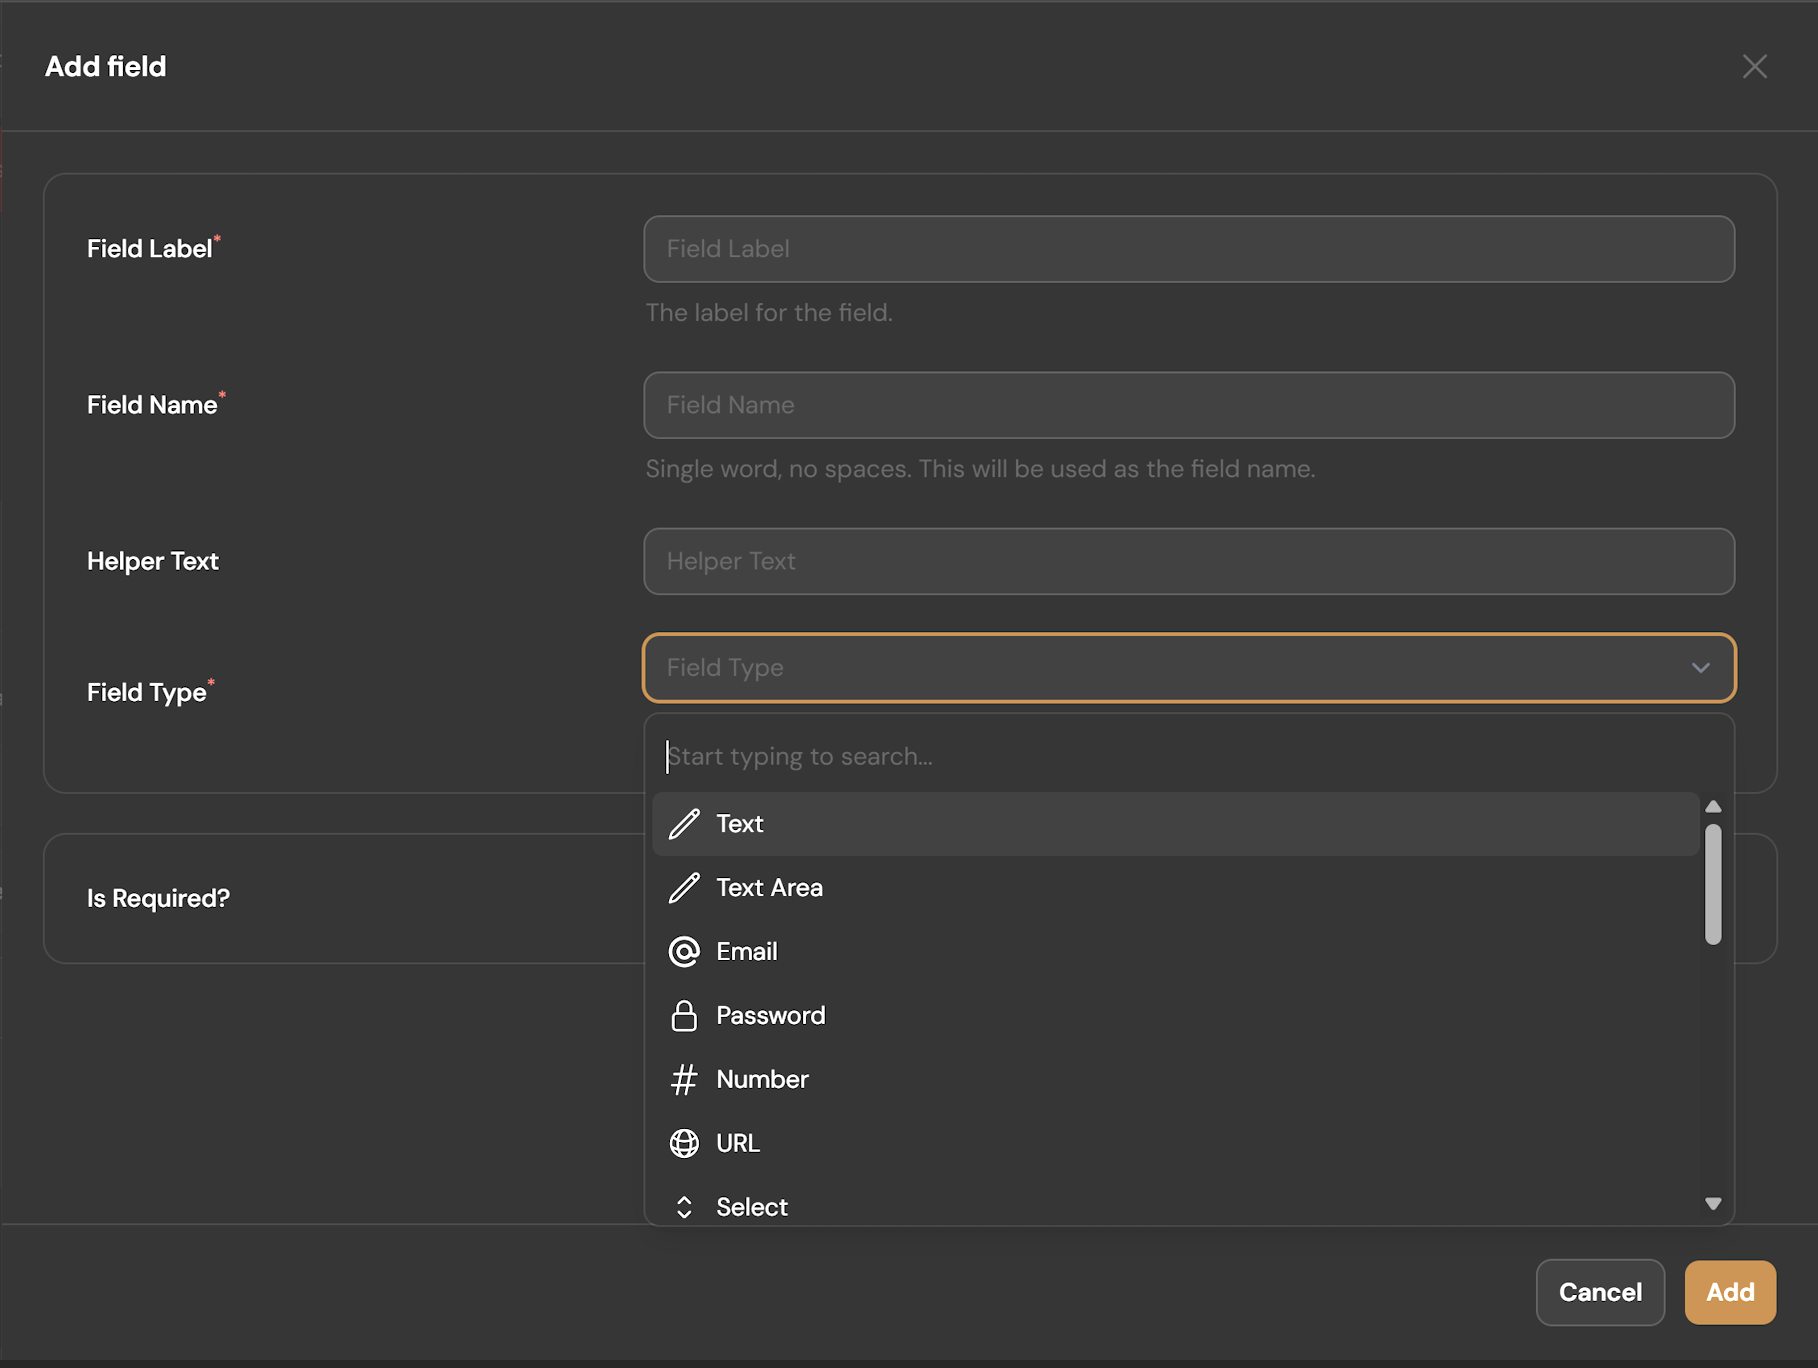
4. Save your document type
---
## Accessing Fields in Templates
InspireCMS provides several directives to access field data in templates:
### Basic Field Access
```blade
@property('field_group_name', 'field_name')
```
This outputs the field value and creates a variable `$field_group_name_field_name` accessible in your template.
### Conditional Field Access
```blade
@propertyNotEmpty('field_group_name', 'field_name')
{{ $field_group_name_field_name }}
@endif
```
This checks if the field has a value before rendering content.
### Accessing Arrays
```blade
@propertyArray('field_group_name', 'field_name')
@foreach($field_group_name_field_name as $item)
{{ $item }}
@endforeach
```
This is useful for repeaters, tags, and other multi-value fields.
### Alternative Access Pattern
You can also access field data through the content object:
```blade
{{ $content->getPropertyGroup('field_group_name')->getPropertyData('field_name')->getValue() }}
```
---
## Field Configuration Options
Each field type has specific configuration options, but most share these common settings:
- **Label**: The display name shown to content editors
- **Name**: The technical identifier used in templates
- **Helper Text**: Additional guidance shown below the field
- **Required**: Whether the field must be filled
- **Translatable**: Whether the field should be multilingual
## Field Type Configuration and Usage
### Text
> Configuration Options
>
> - **Translatable**: Whether the field supports multiple languages.
> - **Default Value**: The initial value of the field.
> - **Placeholder**: Text displayed inside the field when empty.
> - **Prefix Label**: Text displayed before the field.
> - **Suffix Label**: Text displayed after the field.
> - **Rule**: Validation rules for the field.
> - **Length**: The exact length of the input.
> - **Max Length**: The maximum allowed length of the input.
> - **Min Length**: The minimum required length of the input.
>
> Template Usage
> ```blade
> @property('hero', 'title')
> ```
>
>
### Text Area
> Configuration Options
>
> - **Translatable**: Whether the field supports multiple languages.
> - **Rows**: The number of visible rows in the text area.
> - **Default Value**: The initial value of the field.
> - **Placeholder**: Text displayed inside the field when empty.
> - **Rule**: Validation rules for the field.
>
> Template Usage
>
> ```blade
> @property('intro', 'text')
> ```
>
>
### Email
> Configuration Options
>
> - **Translatable**: Whether the field supports multiple languages.
> - **Default Value**: The initial value of the field.
> - **Placeholder**: Text displayed inside the field when empty.
> - **Prefix Label**: Text displayed before the field.
> - **Suffix Label**: Text displayed after the field.
> - **Rule**: Validation rules for the field.
>
> Template Usage
>
> ```blade
> @property('contact', 'email')
> ```
>
>
### Password
> Configuration Options
>
> - **Translatable**: Whether the field supports multiple languages.
> - **Placeholder**: Text displayed inside the field when empty.
> - **Rule**: Validation rules for the field.
>
> Template Usage
>
> ```blade
> @property('user', 'password')
> ```
>
>
### Number
> Configuration Options
>
> - **Translatable**: Whether the field supports multiple languages.
> - **Default Value**: The initial value of the field.
> - **Placeholder**: Text displayed inside the field when empty.
> - **Prefix Label**: Text displayed before the field.
> - **Suffix Label**: Text displayed after the field.
> - **Rule**: Validation rules for the field.
> - **Min Value**: The minimum allowed value.
> - **Max Value**: The maximum allowed value.
>
> Template Usage
>
> ```blade
> @property('event', 'max_ppl')
> ```
>
>
### URL
> Configuration Options
>
> - **Translatable**: Whether the field supports multiple languages.
> - **Default Value**: The initial value of the field.
> - **Placeholder**: Text displayed inside the field when empty.
> - **Prefix Label**: Text displayed before the field.
> - **Suffix Label**: Text displayed after the field.
> - **Rule**: Validation rules for the field.
>
> Template Usage
>
> ```blade
> @property('contact', 'facebook')
> ```
>
>
### Select
> Configuration Options
>
> - **Translatable**: Whether the field supports multiple languages.
> - **Options**: The predefined choices available in the dropdown.
> - **Multiple**: Whether multiple selections are allowed.
> - **Default Value**: The initial value of the field.
> - **Rule**: Validation rules for the field.
>
> Template Usage
>
> Multiple is false:
>
> ```blade
> @property('event', 'type')
> ```
>
> Multiple is true:
>
> ```blade
> @propertyArray('event', 'types')
> {{ implode(', ', $event_types ?? []) }}
> ```
>
>
### Toggle
> Configuration Options
>
> - **Translatable**: Whether the field supports multiple languages.
>
> Template Usage
>
> ```blade
> @if ($content?->getPropertyGroup('event')?->getPropertyData('active')?->getValue() ?? false)
> @endif
> ```
>
>
### Radio
> Configuration Options
>
> - **Translatable**: Whether the field supports multiple languages.
> - **Options**: The predefined choices available for selection.
> - **Default Value**: The initial value of the field.
>
> Template Usage
>
> ```blade
> @property('user', 'gender')
> ```
>
>
### File
> Configuration Options
>
> - **Translatable**: Whether the field supports multiple languages.
> - **Disk**: The storage disk where files are saved.
> - **Directory**: The directory path within the disk.
> - **Visibility**: The visibility of the uploaded files.
> - **Multiple**: Whether multiple files can be uploaded.
> - **Rule**: Validation rules for the field.
> - **Accepted File Types**: The allowed file types for upload.
> - **Min File**: The minimum number of files required.
> - **Max File**: The maximum number of files allowed.
> - **Min Size**: The minimum file size allowed.
> - **Max Size**: The maximum file size allowed.
>
> Template Usage
>
> ```blade
> @propertyArray('event', 'docs')
> @foreach ($event_docs ?? [] as $doc)
> Doc
> @endforeach
> ```
>
> Or
>
> ```blade
> @propertyArray('event', 'docs')
> @foreach ($event_docs ?? [] as $doc)
> Doc
> @endforeach
> ```
>
>
### Image
> Configuration Options
>
> - **Translatable**: Whether the field supports multiple languages.
> - **Disk**: The storage disk where images are saved.
> - **Directory**: The directory path within the disk.
> - **Visibility**: The visibility of the uploaded images.
> - **Multiple**: Whether multiple images can be uploaded.
> - **Rule**: Validation rules for the field.
> - **Accepted File Types**: The allowed file types for upload.
> - **Min File**: The minimum number of images required.
> - **Max File**: The maximum number of images allowed.
> - **Min Size**: The minimum image size allowed.
> - **Max Size**: The maximum image size allowed.
>
> Template Usage
>
> ```blade
> @propertyArray('event', 'images')
> @foreach ($event_images ?? [] as $img)
>
> @endforeach
> ```
>
> Or
>
> ```blade
> @propertyArray('event', 'images')
> @foreach ($event_images ?? [] as $img)
>
> @endforeach
> ```
>
>
### Color Picker
> Configuration Options
>
> - **Translatable**: Whether the field supports multiple languages.
> - **Default Value**: The initial value of the field.
>
>
> Template Usage
>
> ```blade
> @propertyNotEmpty('user', 'fav_color')
>
$user_fav_color
> @endif
> ```
>
>
### DateTime Picker
> Configuration Options
>
> - **Translatable**: Whether the field supports multiple languages.
> - **Default Value**: The initial value of the field.
> - **Placeholder**: Text displayed inside the field when empty.
> - **Prefix Label**: Text displayed before the field.
> - **Suffix Label**: Text displayed after the field.
> - **Has Time**: Whether the field includes time selection.
> - **Has Date**: Whether the field includes date selection.
> - **Rule**: Validation rules for the field.
> - **Format**: The format of the date/time value.
>
>
> Template Usage
>
> ```blade
> @propertyNotEmpty('event', 'date')
>
Year: {{ $event_date?->format('Y') }}
> @endif
> ```
>
>
### Content Picker
> Configuration Options
>
> - **Translatable**: Whether the field supports multiple languages.
> - **Types**: The types of media files allowed.
> - **Min**: The minimum number of items required.
> - **Max**: The maximum number of items allowed.
>
> Template Usage
>
> ```blade
> @propertyArray('hero', 'image_slider')
> @foreach ($hero_image_slider ?? [] as $item)
>
>
>
{{ $item?->description }}
>
> @endforeach
> ```
>
>
### Media Picker
> Configuration Options
>
> - **Translatable**: Whether the field supports multiple languages.
> - **Types**: The types of media files allowed.
> - **Min**: The minimum number of items required.
> - **Max**: The maximum number of items allowed.
>
> Template Usage
>
> ```blade
> @propertyArray('hero', 'image_slider')
> @foreach ($hero_image_slider ?? [] as $item)
>
>
>
{{ $item?->description }}
>
> @endforeach
> ```
>
>
### Icon Picker
> Configuration Options
>
> - **Translatable**: Whether the field supports multiple languages.
> - **ColumnsLayout**: Controls how many columns the icons are displayed in the selection interface.
>
> Template Usage
>
> ```blade
> @propertyNotEmpty('section', 'icon')
> @svg($section_icon, ['class'=>'h-5 w-5'])
> @endif
> ```
>
>
### Repeater
> Configuration Options
>
> - **Fields**: The sub-fields included in the repeater.
> - **Collapsible**: Whether the repeater sections can be collapsed.
> - **Cloneable**: Whether the repeater sections can be cloned.
> - **ColumnsLayout**: Controls how many columns the repeater items are displayed in.
>
> Template Usage
>
> ```blade
> @propertyArray('document_content', 'sections')
> @foreach ($document_content_sections ?? [] as $item)
>
>
> {{ $item->getPropertyData('content')?->getValue() ?? '' }}
>
> @endforeach
> ```
>
>
### Tags
> Configuration Options
>
> - **Translatable**: Whether the field supports multiple languages.
> - **Prefix Label**: Text displayed before the field.
> - **Suffix Label**: Text displayed after the field.
> - **Prefix**: Text added before each tag.
> - **Suffix**: Text added after each tag.
> - **Separator**: The character used to separate tags.
> - **Suggestions**: Predefined suggestions for tags.
> - **Reorderable**: Whether tags can be reordered.
> - **Color**: The color of the tags.
> - **Rule**: Validation rules for the field.
>
> Template Usage
>
> ```blade
> @propertyArray('event', 'categories')
>
{{ implode(' | ', $event_categories ?? []) }}
> ```
>
>
### Rich Editor
> Configuration Options
>
> - **Translatable**: Whether the field supports multiple languages.
> - **Toolbar** Buttons: The buttons available in the editor toolbar.
> - **Disk**: The storage disk where files are saved.
> - **Directory**: The directory path within the disk.
> - **Visibility**: The visibility of the uploaded files.
>
> Template Usage
>
> ```blade
> @property('event', 'content')
> ```
>
>
#### Markdown Editor
> Configuration Options
>
> - **Translatable**: Whether the field supports multiple languages.
> - **Toolbar** Buttons: The buttons available in the editor toolbar.
> - **Disk**: The storage disk where files are saved.
> - **Directory**: The directory path within the disk.
> - **Visibility**: The visibility of the uploaded files.
>
> Template Usage
>
> ```blade
> @property('document', 'content')
> ```
>
>
---
## Field Type Attributes
Field types in InspireCMS are defined by a set of attributes that control their behavior, storage, and presentation. These attributes ensure seamless integration with the system.
### Core Attributes
- **ConfigName**: A unique identifier for the field type configuration. This is used internally to load the appropriate configuration class for each field type.
- **DbType**: Specifies how the field's data is stored in the database, including the data type and structure.
- **FormComponent**: Defines the Filament form component used to render the field in the admin interface, controlling the user interface for content editors.
### Additional Attributes
- **Translatable**: Indicates whether the field supports multilingual content. If enabled, the system stores separate values for each configured language.
- **Converter**: A class responsible for transforming data between its raw database format and the format used in templates. Converters handle data processing during both saving and retrieval.
### Example Configuration
For a simple text field:
- **ConfigName**: `text`
- **DbType**: `string`
- **FormComponent**: `TextInput::class`
- **Translatable**: `true`
- **Converter**: `TextConverter::class`
---
## Creating Custom Field Types
InspireCMS allows you to create custom field types for specialized needs:
1. Create a field type configuration class
2. Register the field type
Example configuration class:
```php
[
'extra_config' => [
CustomFieldConfig::class, // Add your custom field configuration here
// ...existing field configurations...
],
],
```
## Field Value Converters
Field type converters are responsible for transforming data between the raw format stored in the database and the format used in templates. They play a crucial role in ensuring data is properly processed, validated, and formatted throughout the content lifecycle.
### Purpose of Converters
- **Data Transformation**: Convert between database storage format and usable application format
- **Type Casting**: Ensure data is of the correct PHP type when used in templates
- **Value Preparation**: Handle any necessary pre-processing before storage or display
### Built-in Converters
InspireCMS includes several built-in converters for common field types:
| Converter | Purpose |
|---|---|
| DefaultConverter | Basic conversion for simple field types like text and numbers |
| DateTimeConverter | Converts between string dates and DateTime objects |
| ContentPickerConverter | Transforms content references into usable content objects |
| FileConverter | Handles file path conversions and URL generation |
| MarkdownConverter | Processes markdown text into HTML for display |
| MediaPickerConverter | Manages media asset conversions and metadata |
| RepeaterConverter | Processes nested field groups within repeater fields |
| RichEditorConverter | Handles HTML content sanitization and processing |
### Creating Custom Converters
Value converters transform field data between storage format and display format:
```php
processValue($sourceValue);
}
}
```
Then, apply your converter to a field type using the `Converter` attribute:
```php
use SolutionForest\FilamentFieldGroup\FieldTypes\Configs\Attributes\ConfigName;
use SolutionForest\FilamentFieldGroup\FieldTypes\Configs\Attributes\DbType;
use SolutionForest\FilamentFieldGroup\FieldTypes\Configs\Attributes\FormComponent;
use SolutionForest\FilamentFieldGroup\FieldTypes\Configs\Contracts\FieldTypeConfig;
use SolutionForest\FilamentFieldGroup\FieldTypes\Configs\FieldTypeBaseConfig;
use SolutionForest\InspireCms\Fields\Configs\Attributes\Converter;
use SolutionForest\InspireCms\Fields\Configs\Attributes\Translatable;
#[ConfigName('customField', 'Custom Field', 'Custom', 'heroicon-o-tag')]
#[FormComponent(\Filament\Forms\Components\TextInput::class)]
#[DbType('mysql', 'text')]
#[DbType('sqlite', 'text')]
#[Converter(\App\Support\Converters\CustomConverter::class)]
#[Translatable(true)]
class CustomFieldConfig extends FieldTypeBaseConfig implements FieldTypeConfig
{
// Field configuration implementation
}
```
### Configuring Converters
You can customize the behavior of built-in converters by using their configuration methods. Configure converters in your service provider's `boot` method:
```php {title="app/Providers/AppServiceProvider.php"}
use SolutionForest\InspireCms\Fields\Converters\MarkdownConverter;
use League\CommonMark\Extension\Attributes\AttributesExtension;
use League\CommonMark\Extension\Table\TableExtension;
public function boot(): void
{
MarkdownConverter::configureUsing(function (MarkdownConverter $converter) {
// Set CommonMark configuration options
$converter->setConfigs([]);
// Add CommonMark extensions
$converter->setExtensions([
new AttributesExtension(),
]);
});
}
```
Each converter type may have its own configuration methods:
#### MarkdownConverter
The MarkdownConverter handles parsing and rendering of Markdown content using the PHP League's CommonMark library. You can customize the parser with various extensions and configuration options:
```php
use SolutionForest\InspireCms\Fields\Converters\MarkdownConverter;
MarkdownConverter::configureUsing(function (MarkdownConverter $converter) {
// Set CommonMark configuration options
$converter->setConfigs([
'allow_unsafe_links' => false,
'html_input' => 'strip',
'max_nesting_level' => 100,
'renderer' => [
'soft_break' => " \n",
],
]);
// Add CommonMark extensions
$converter->setExtensions([
new AttributesExtension(),
new TableExtension(),
]);
});
```
For more information, see:
- [Available extensions](https://commonmark.thephpleague.com/2.6/extensions/overview/)
- [Configuration options](https://commonmark.thephpleague.com/2.6/configuration/)
---
## Macros
The Field Type system supports macros, allowing you to extend functionality without creating full custom field types. This approach is useful for adding small enhancements or modifications to existing field types.
You can use the mixin method to add multiple macros at once:
```php
use SolutionForest\FilamentFieldGroup\FieldTypes\Configs\FieldTypeBaseConfig;
// Add multiple methods via a mixin class
FieldTypeBaseConfig::mixin(new \Your\Mixins\FieldMixin);
```
Or add individual macros using the macro method:
```php
use SolutionForest\FilamentFieldGroup\FieldTypes\Configs\FieldTypeBaseConfig;
// Add a single macro
FieldTypeBaseConfig::macro('addHelpText', function ($text) {
$this->helperText($text);
return $this;
});
```
---
## Best Practices
- Keep field groups organized by logical function (e.g., "Banner", "Content")
- Use clear, descriptive names for fields and field groups
- Add helper text to guide content editors
- Use appropriate validation rules to ensure data quality
- Leverage translatable fields for multilingual content
- Consider the frontend display when designing field structures
## Customize the Admin Panel
---
title: Customize the Admin Panel
slug: customize-the-admin-panel
path: docs/v1/customize-the-admin-panel
uri: /docs/v1/customize-the-admin-panel
heading: Customize the Admin Panel
brief: This guide explains how to customize and extend the admin panel to meet your specific needs, including creating custom resources, pages, widgets, and modifying the appearance to match your brand. Whether you need to add new functionality or tailor the existing features, InspireCMS offers multiple extension points for developers.
quick_links: []
---
## Overview
The InspireCMS admin panel is built on [Filament](https://filamentphp.com/), a powerful admin panel framework for Laravel applications. This integration allows you to:
- Create custom admin pages
- Add new resources for managing database models
- Organize related functionality into clusters
- Define custom dashboard widgets
- Extend existing admin functionality
- Customize the look and feel of the admin panel
---
## Prerequisites
Before you begin extending the admin panel, ensure you have:
1. A working InspireCMS installation
2. Basic knowledge of **Laravel** and **Filament** concepts
3. Appropriate permissions to access the admin area
---
## Creating a Custom Panel Provider
The recommended approach for customizing InspireCMS is to create your own CMS Panel Provider by extending the base `CmsPanelProvider`:
1. Generate a new provider:
```bash
php artisan make:filament-panel my-cms
```
2. Extend the base CMS Panel Provider:
```php{title="app/Providers/Filament/MyCmsPanelProvider.php"}
[
// Other providers...
// Comment out or remove the default CmsPanelProvider
// SolutionForest\InspireCms\CmsPanelProvider::class,
// Add your custom provider
App\Providers\Filament\MyCmsPanelProvider::class,
],
```
### Customizing the Panel Appearance
Here's how to customize various aspects of the panel:
```php{title="app/Providers/Filament/MyCmsPanelProvider.php"}
brandName('My Custom CMS')
->brandLogo(fn() => view('admin.logo'))
->favicon(asset('images/favicon.png'))
// Custom colors
->colors([
'primary' => [
50 => '238, 242, 255',
100 => '224, 231, 255',
200 => '199, 210, 254',
300 => '165, 180, 252',
400 => '129, 140, 248',
500 => '99, 102, 241',
600 => '79, 70, 229',
700 => '67, 56, 202',
800 => '55, 48, 163',
900 => '49, 46, 129',
950 => '30, 27, 75',
],
'danger' => '#ff0000',
'success' => '#10b981',
'warning' => '#f59e0b',
])
// Fonts
->font('Poppins')
->fontSize('md')
// Dark mode
->darkMode(true) // Enable dark mode
// Render hooks
->renderHook(
'panels::body.start',
fn () => view('custom-scripts')
);
}
}
```
### Customizing Navigation
You can customize the navigation structure:
```php{title="app/Providers/Filament/MyCmsPanelProvider.php"}
navigationGroups([
NavigationGroup::make()
->label('Content')
->icon('heroicon-o-document-text'),
NavigationGroup::make()
->label('Shop')
->icon('heroicon-o-shopping-bag'),
NavigationGroup::make()
->label('Settings')
->icon('heroicon-o-cog'),
])
->navigationItems([
NavigationItem::make('Analytics')
->url('https://analytics.google.com')
->icon('heroicon-o-chart-bar')
->group('Reports'),
]);
}
}
```
### Adding Widgets and Resources
Configure default widgets and resources:
```php{title="app/Providers/Filament/MyCmsPanelProvider.php"}
widgets([
StatsOverview::class,
])
->resources([
ProductResource::class,
])
->pages([
Settings::class,
]);
}
}
```
### Advanced Configuration Options
For more advanced customization:
```php{title="app/Providers/Filament/MyCmsPanelProvider.php"}
middleware([
App\Http\Middleware\CustomMiddleware::class,
])
->authMiddleware([
App\Http\Middleware\CustomAuthMiddleware::class,
])
// Plugin registration
->plugin(new App\Filament\Plugins\CustomPlugin())
// Custom assets
->assets([
// CSS assets
\Filament\Support\Assets\Css::make('custom-stylesheet', 'path/to/stylesheet.css'),
// JavaScript assets
\Filament\Support\Assets\Js::make('custom-script', 'path/to/script.js'),
])
// Authentication
->login()
->registration()
->passwordReset()
->emailVerification();
}
}
```
---
## Adding Custom Clusters
### Creating Custom Cluster
1. Generate a new cluster class:
You can create a Filament cluster for the CMS panel or any other panel:
```bash
# Create a cluster for the CMS panel (auto-registered)
php artisan make:filament-cluster YourClusterName --panel=cms
# Create a cluster for another panel (requires manual registration)
php artisan make:filament-cluster YourClusterName --panel=admin
```
2. Register your cluster:
If you created the cluster under the CMS panel (`--panel=cms`), it will be automatically registered. However, if you created the cluster under a different panel or want to customize the registration, you can register your custom cluster in two ways:
**Option 1: Using configuration**
```php{title="app/Providers/AppServiceProvider.php"}
clusters([
YourClusterName::class,
// Add more clusters here
]);
}
}
```
### Example Cluster Class
```php{title="app/Filament/Cms/Clusters/Shops.php"}
[!IMPORTANT]
> Always ensure your Cluster implements the `SolutionForest\InspireCms\Filament\Contracts\ClusterSection` interface.
### Associating Resources and Pages with Clusters
To associate a resource or page with a cluster, specify the cluster class in the resource or page definition:
For resources:
```php{title="app/Filament/Cms/Resources/ProductResource.php"}
resources([
YourModelResource::class,
// Add more resources here
]);
}
}
```
### Example Resource Class
```php{title="app/Filament/Cms/Resources/ProductResource.php"}
schema([
Forms\Components\TextInput::make('name')
->required()
->maxLength(255),
Forms\Components\TextInput::make('price')
->required()
->numeric()
->prefix('$'),
Forms\Components\Textarea::make('description')
->maxLength(65535),
Forms\Components\Toggle::make('is_active')
->required(),
]);
}
public static function table(Table $table): Table
{
return $table
->columns([
Tables\Columns\TextColumn::make('name'),
Tables\Columns\TextColumn::make('price')
->money('USD'),
Tables\Columns\BooleanColumn::make('is_active'),
Tables\Columns\TextColumn::make('created_at')
->dateTime(),
])
->filters([
Tables\Filters\Filter::make('active')
->query(fn (Builder $query): Builder => $query->where('is_active', true)),
])
->actions([
Tables\Actions\EditAction::make(),
Tables\Actions\DeleteAction::make(),
])
->bulkActions([
Tables\Actions\DeleteBulkAction::make(),
]);
}
public static function getPages(): array
{
return [
'index' => Pages\ListProducts::route('/'),
'create' => Pages\CreateProduct::route('/create'),
'edit' => Pages\EditProduct::route('/{record}/edit'),
];
}
}
```
---
## Custom Pages
You can add standalone pages to the admin panel that aren't tied to a specific resource.
### Creating a Custom Page
1. Generate a new page class:
You can create a Filament page for the CMS panel or any other panel:
```bash
# Create a page for the CMS panel (auto-registered)
php artisan make:filament-page YourPage --panel=cms
# Create a page for another panel (requires manual registration)
php artisan make:filament-page YourPage --panel=admin
```
2. Register your page:
If you created the page under the CMS panel (`--panel=cms`), it will be automatically registered. However, if you created the page under a different panel or want to customize the registration, you can register your custom pages in two ways:
**Option 1: Using configuration**
```php{title="app/Providers/AppServiceProvider.php"}
pages([
YourPage::class,
// Add more pages here
]);
}
}
```
### Example Page Class
```php{title="app/Filament/Cms/Pages/ShopSettings.php"}
form->fill([
'site_name' => config('app.name'),
'site_description' => config('app.description'),
'maintenance_mode' => config('app.maintenance'),
]);
}
public function form(Form $form): Form
{
return $form
->schema([
Forms\Components\Section::make('General Settings')
->schema([
Forms\Components\TextInput::make('site_name')
->required()
->maxLength(255),
Forms\Components\Textarea::make('site_description')
->maxLength(1000),
Forms\Components\Toggle::make('maintenance_mode'),
]),
]);
}
public function save(): void
{
$data = $this->form->getState();
// Save settings logic here
// For example, update .env file or settings table
Notification::make()
->title('Settings saved successfully')
->success()
->send();
}
}
```
---
## Custom Widgets
You can add widgets to the admin dashboard to display important information, statistics, or shortcuts.
### Creating a Custom Widget
1. Generate a new widget class:
You can create a Filament widget for the CMS panel or any other panel:
```bash
# Create a widget for the CMS panel (auto-registered to CMS dashboard)
php artisan make:filament-widget StatsOverview --panel=cms
# Create a widget for another panel (requires manual registration)
php artisan make:filament-widget StatsOverview --panel=admin
```
2. Register your widget:
If you created the widget under the CMS panel (`--panel=cms`), you can optionally register it to the CMS dashboard. However, if you created the widget under a different panel, you need to manually register it to that panel's dashboard.
**For CMS Panel widgets - Optional registration to CMS Dashboard:**
You can register CMS widgets to the CMS Dashboard in two ways:
**Option 1: Using service provider**
```php{title="app/Providers/AppServiceProvider.php"}
[
// ...
'extra_widgets' => [
// Extra widgets to be added to the CMS Dashboard
\App\Filament\Cms\Widgets\StatsOverview::class,
],
//..
],
```
### Widgets for Other Filament Panels
If you created a widget for a different panel (e.g., `--panel=admin`), you need to register it manually:
```php{title="app/Providers/Filament/MyCmsPanelProvider.php"}
widgets([
StatsOverview::class,
// Add more widgets here
]);
}
}
```
### Example Widget Class
```php
description('Increased by 20%')
->descriptionIcon('heroicon-s-trending-up')
->color('success'),
Card::make('Total Orders', Order::count())
->description('3% increase from last month')
->descriptionIcon('heroicon-s-trending-up')
->color('success'),
Card::make('Average Order Value', '$' . number_format(Order::avg('total') ?? 0, 2))
->description('1.5% decrease from last month')
->descriptionIcon('heroicon-s-trending-down')
->color('danger'),
];
}
}
```
---
## Further Resources
- [Filament Documentation](https://filamentphp.com/docs)
- [Laravel Documentation](https://laravel.com/docs)
With these tools and techniques, you can extend and customize the InspireCMS admin panel to suit your specific requirements while maintaining a consistent and user-friendly interface.
## Directory Structure
---
title: Directory Structure
slug: directory-structure
path: docs/v1/directory-structure
uri: /docs/v1/directory-structure
heading: Directory Structure
brief: Understanding the InspireCMS directory structure helps you efficiently develop and customize your application. This guide explains the key directories and files in an InspireCMS installation.
quick_links: []
---
## Overview
InspireCMS follows Laravel's standard directory structure, with additional directories and files specific to CMS functionality.
```plaintext
project/
├── app/
│ └── Filament
│ └── Cms/ # Custom CMS extensions
│ ├── Clusters/ # Custom admin panel clusters
│ ├── Pages/ # Custom admin panel pages
│ ├── Resources/ # Custom admin panel resources
│ └── Widgets/ # Custom admin panel widgets
├── config/
│ └── inspirecms.php # Main CMS configuration file
└── resources/
└── views/
├── components/
│ └── inspirecms/ # CMS components and templates
│ └── {theme}/ # Theme-specific components
└── inspirecms/ # Exported CMS templates
└── templates/
```
---
## Key Directories Explained
### App Extensions
- **`app/Filament/Cms/`**: Directory for all your custom CMS extensions
- **`Clusters/`**: Custom admin panel sections, each containing related resources
- **`Pages/`**: Custom admin dashboard pages
- **`Resources/`**: Custom Filament resources for CRUD operations
- **`Widgets/`**: Custom dashboard widgets
### Configuration
- **`config/inspirecms.php`**: The main configuration file for InspireCMS, containing settings for:
- Authentication and users
- Media management
- Custom models
- Database connections
- Frontend themes
- Caching
- Permission settings
### Resources
- **`resources/views/components/inspirecms/{theme}/`**: Theme-specific components
- `page.blade.php`: Default page layout template
- `layout.blade.php`: Base layout used by templates
- Various component templates (header, footer, navigation, etc.)
- **`resources/views/inspirecms/templates/`**: Exported templates from the CMS
---
## Custom Theme Structure
When creating a new theme, follow this structure:
```plaintext
resources/views/components/inspirecms/{theme-name}/
├── page.blade.php # Default page layout template
├── header.blade.php # Header component
├── footer.blade.php # Footer component
└── navigation.blade.php # Navigation component
```
---
## Adding Custom Extensions
### Creating a Custom Cluster
```bash
php artisan make:filament-cluster YourClusterName --panel=cms
```
### Creating a Custom Resource
```bash
php artisan make:filament-resource YourModel --panel=cms
```
### Creating a Custom Page
```bash
php artisan make:filament-page YourPage --panel=cms
```
## Document type
---
title: Document type
slug: document-type
path: docs/v1/document-type
uri: /docs/v1/document-type
heading: Document Type
brief: Document Types in InspireCMS define the structure and behavior of your content. They determine what fields are available, how content is organized, and how it's presented to visitors.
quick_links: []
---
## Overview
A document type is essentially a **blueprint** for content, similar to a class in object-oriented programming. It defines:
- What fields are available for content entry
- How content is organized in the admin panel
- What templates can be used for rendering
---
## Creating Document Types
To create a document type:
1. Navigate to Admin Panel > **Settings** > **Document Types**
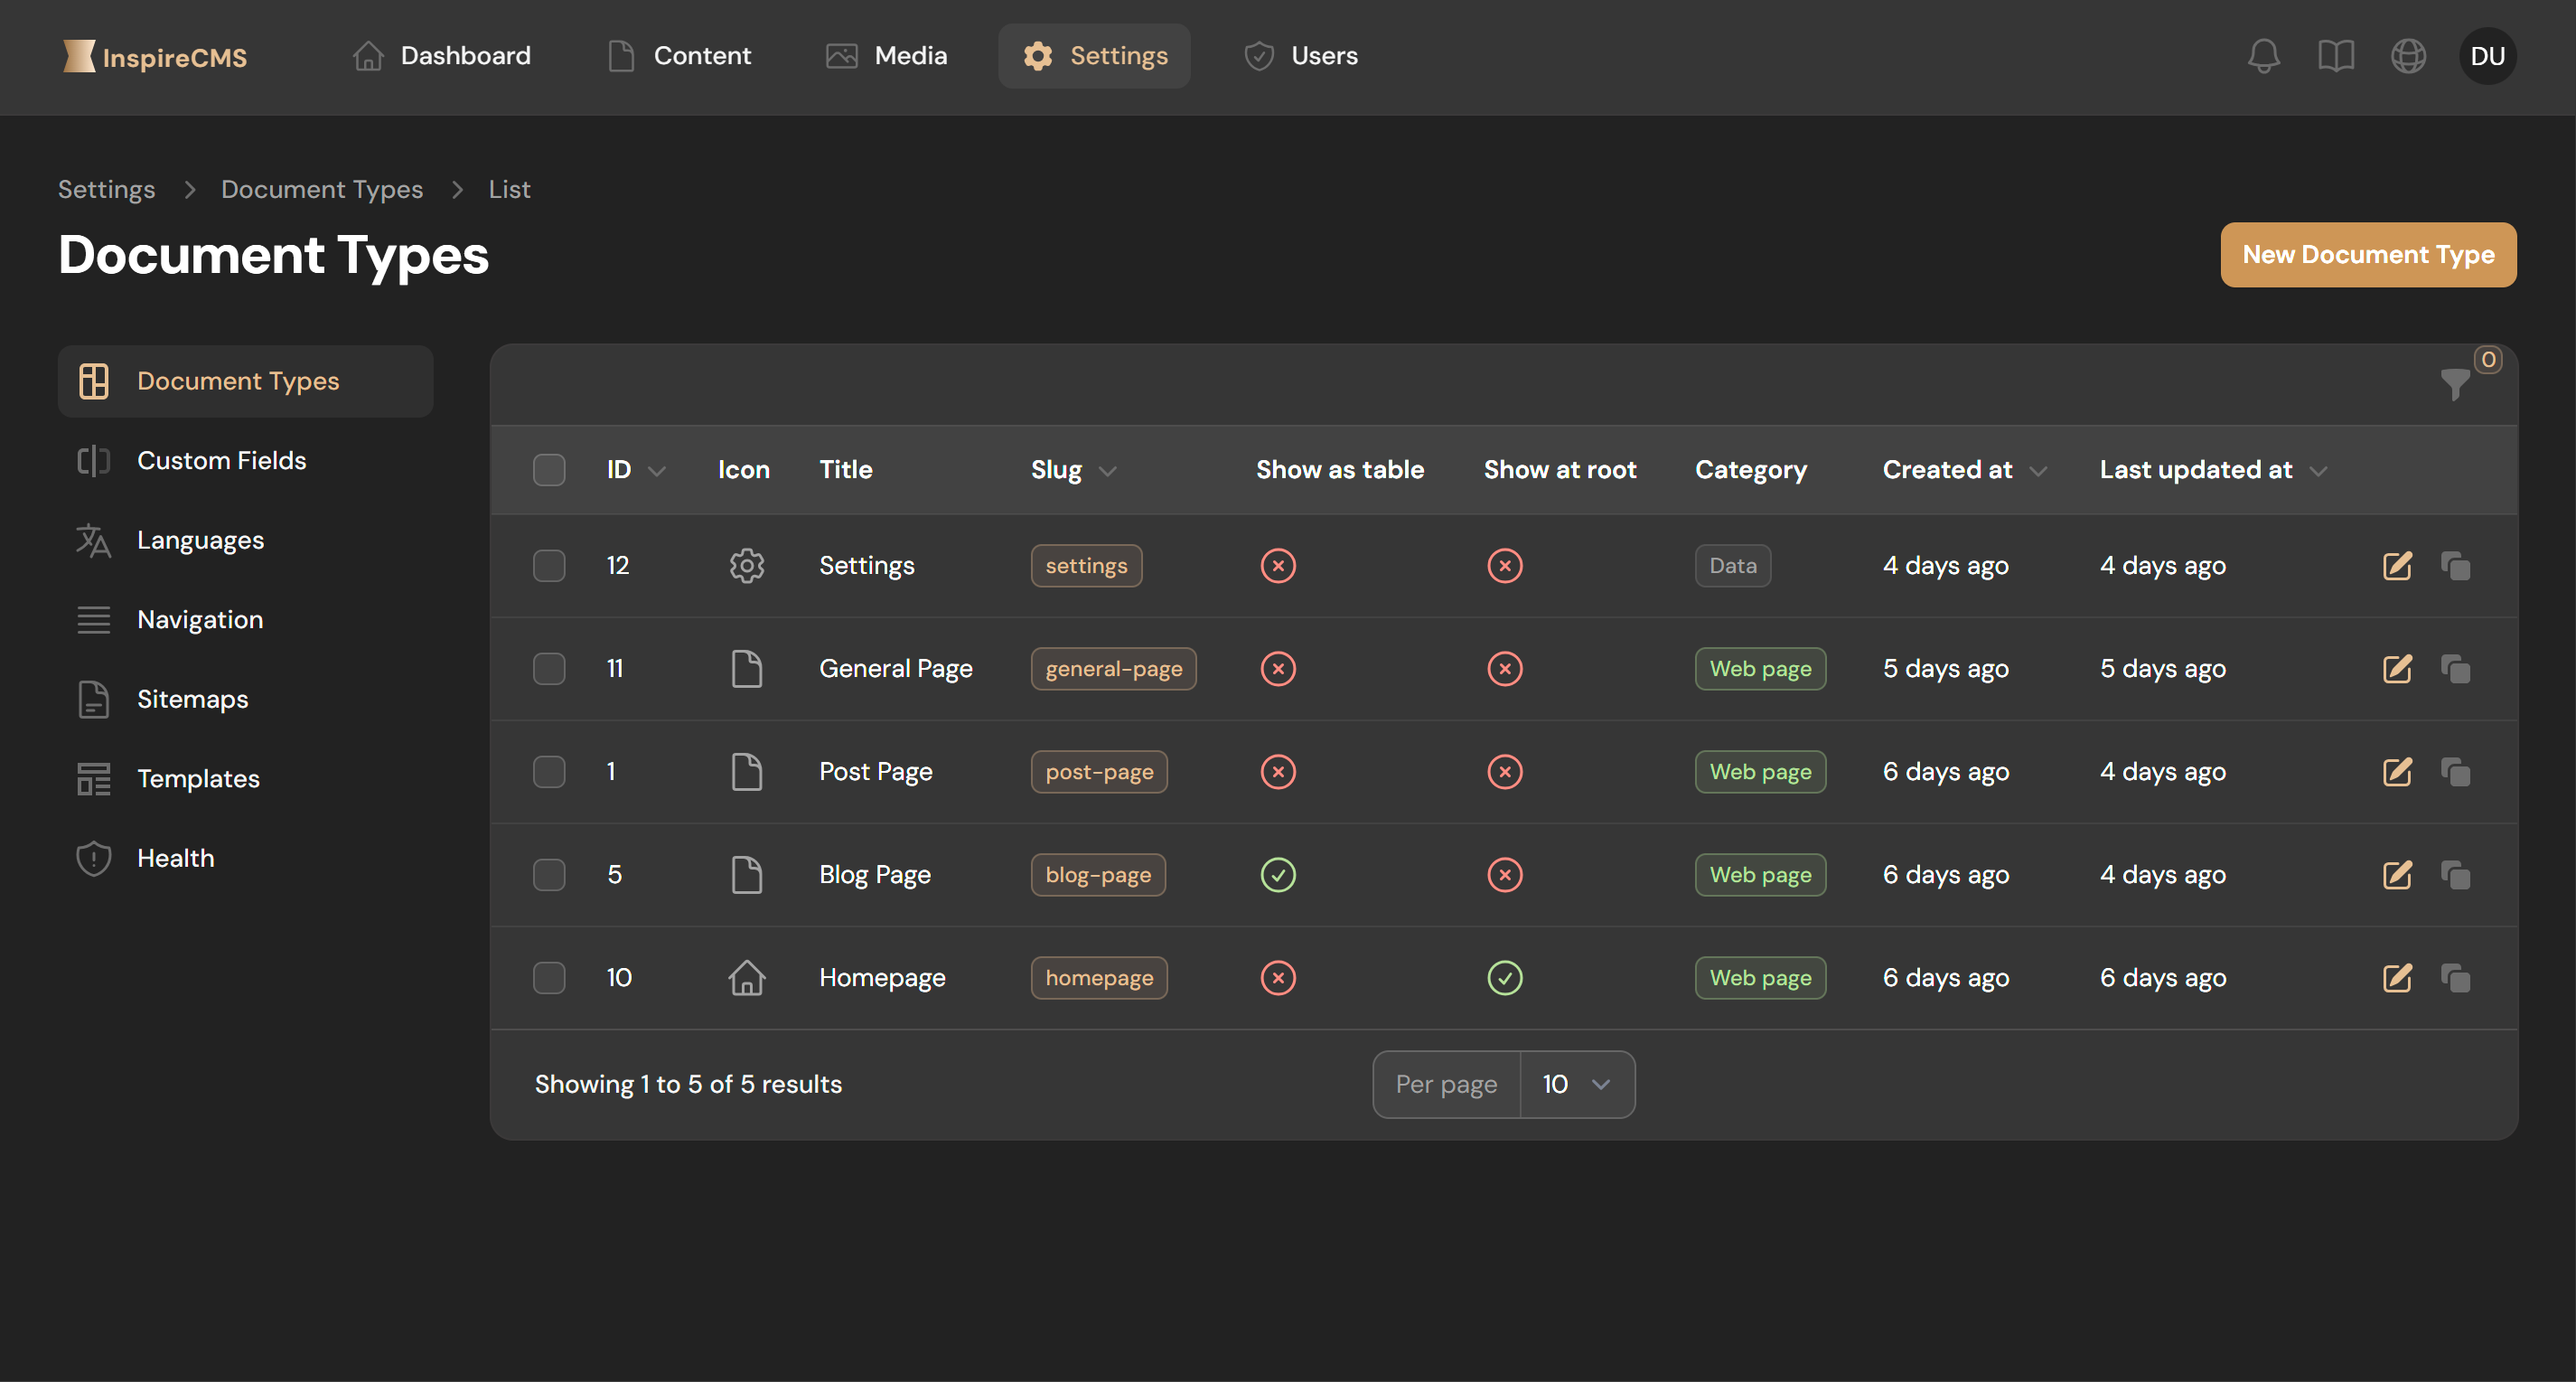
2. Click **Create Document Type**
3. Configure the following settings:
### Basic Settings
- **Name**: Human-readable name (e.g., "Blog Post")
- **Slug**: Machine-readable identifier (e.g., "blog-post")
- **Icon**: Visual identifier in the admin panel
- **Category**: For organizing document types (e.g., "web", "data")
- **web**
Pages with built-in routing and SEO settings
(e.g., Blog Post, Landing Page)
- **data**
Reusable data entities without their own URL
(e.g., Company Email, Site Settings)
### Advanced Settings
- **Show as Table**: Whether to display content under this content (children) in a table view
- **Show at Root**: Whether content can be created at the root level
- **Allowed document types**: Document types that can be children of this type
---
## Custom Fields
Associate custom fields with your document type to define what data can be entered:
1. In the **Structure** section, click **New field** or **Attach**
2. Select from available field groups or create new ones
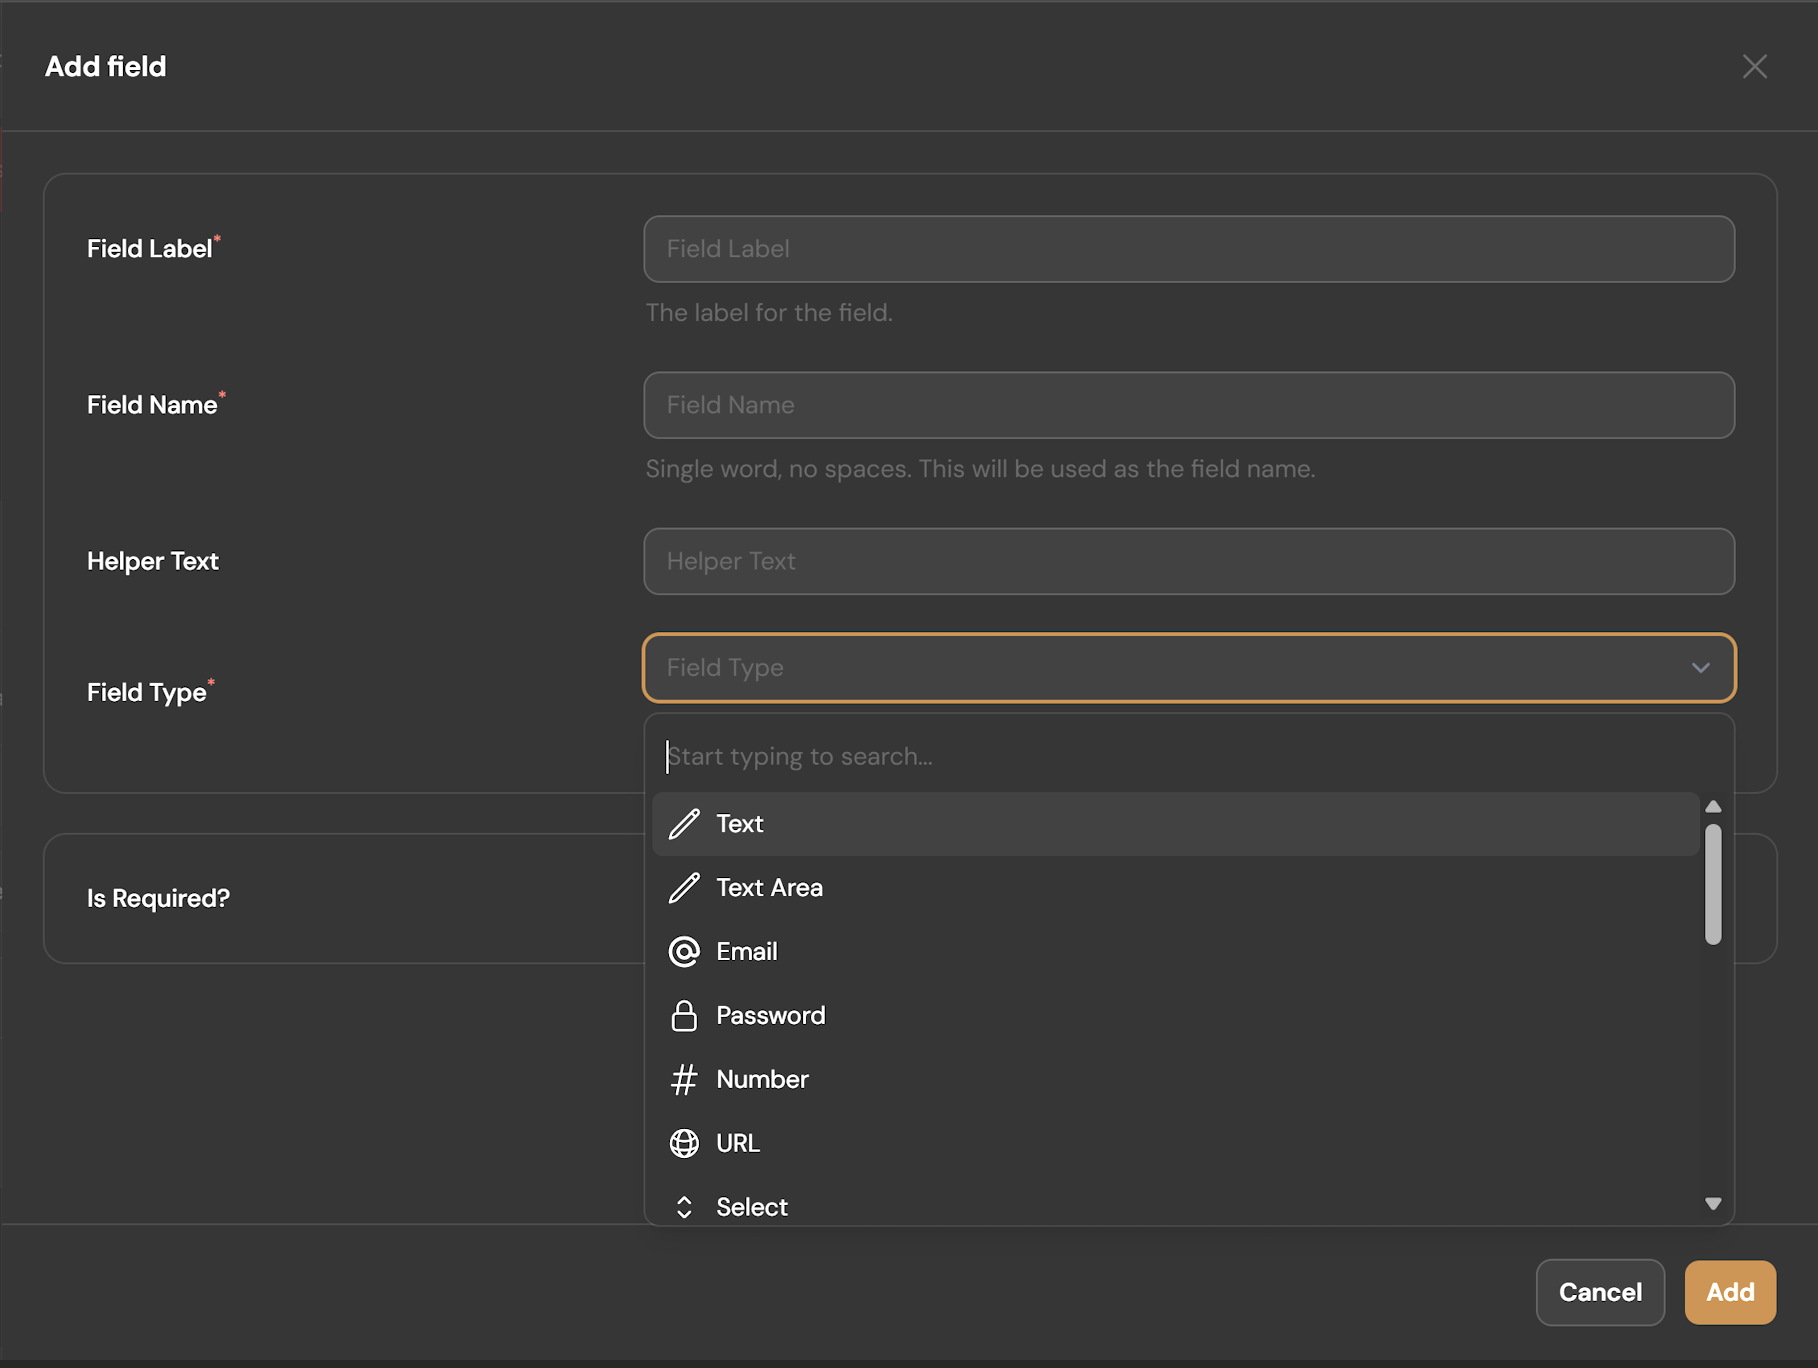
3. Arrange field groups in the desired order
For detailed information about creating and configuring custom fields, see the [Custom Fields documentation](./custom-field){.doc-link}.
---
## Templates
Define which templates are available for rendering your content:
1. In the **Templates** section, click **Add Template** or **Attach**
2. Create a new template or select an existing one
3. Set a default template for new content
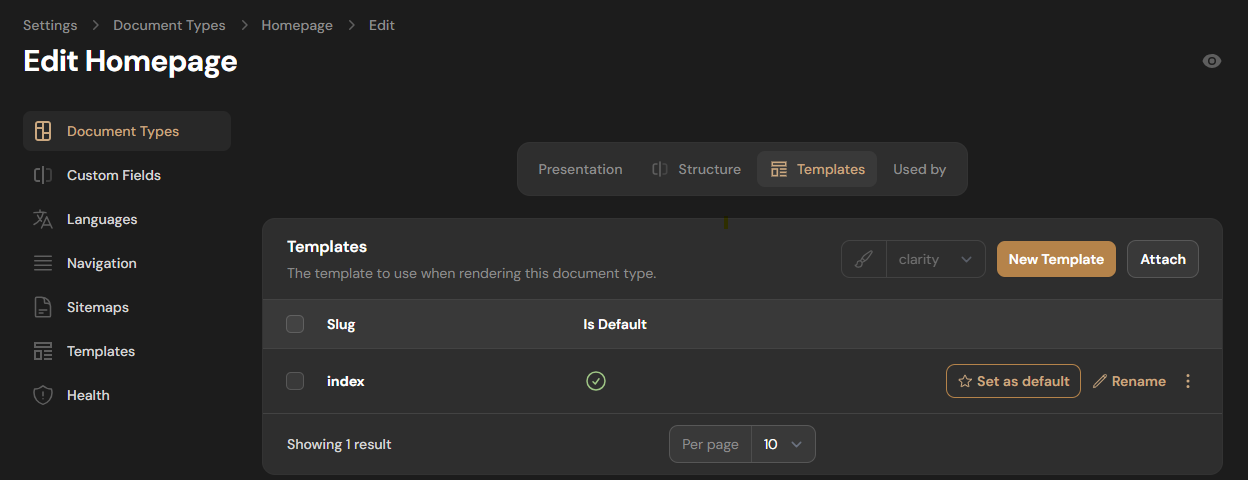
For detailed information about creating frontend layouts and templates, see the [Frontend Layouts documentation](./fe-layouts){.doc-link}.
---
## Content Hierarchy
InspireCMS allows you to create parent-child relationships between content:
### Setting Child Types
Define which document types can be children of the current type:
1. In the **Allowed document types** field, select appropriate document types
2. This determines what content types can be created underneath this content
3. Leave empty to prevent child content from being created
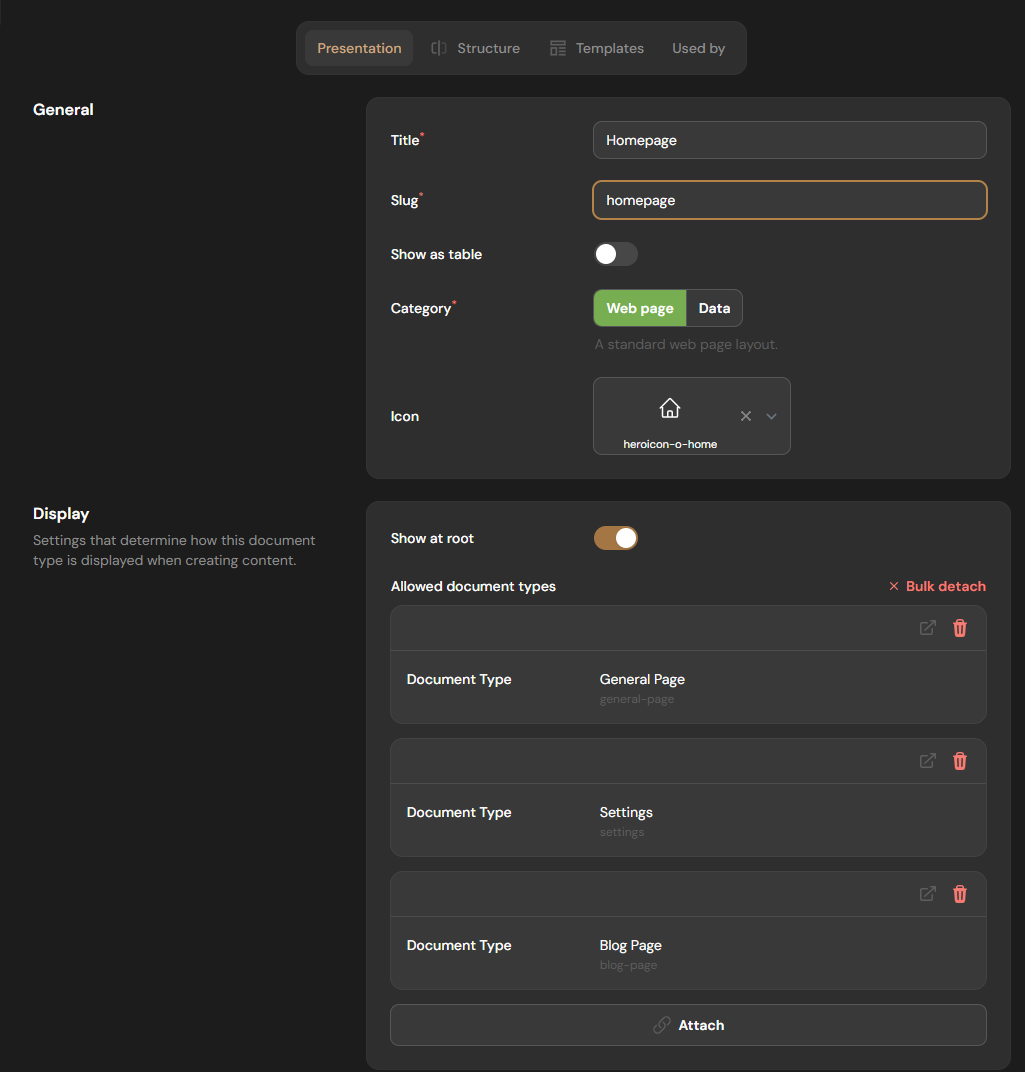
---
## Using Document Types
Once document types are configured, content editors can use them to create structured content:
1. Navigate to the **Content** section in the admin panel
2. Click **Create Content** and select your document type
3. Fill in the fields defined by your field groups
4. Save and publish your content
---
## Best Practices
- Create document types that align with your content strategy
- Use clear, descriptive names for document types
- Group related fields for better organization
- Define parent-child relationships carefully to create logical content hierarchies
## Event Listeners
---
title: Event Listeners
slug: event-listeners
path: docs/v1/event-listeners
uri: /docs/v1/event-listeners
heading: Event Listeners
brief:
quick_links: []
---
## Available Events in InspireCMS
InspireCMS fires events for various system activities. Here are the key events organized by category:
### Content Events
```php
// Content version events
SolutionForest\InspireCms\Events\Content\CreatingContentVersion::class // Before a content version is created
SolutionForest\InspireCms\Events\Content\CreatedContentVersion::class // After a content version is created
SolutionForest\InspireCms\Events\Content\CreatingPublishContentVersion::class // Before publishing a content version
SolutionForest\InspireCms\Events\Content\CreatedPublishContentVersion::class // After publishing a content version
SolutionForest\InspireCms\Events\Content\DispatchContentVersion::class // When a content version is dispatched
// Content status events
SolutionForest\InspireCms\Events\Content\ChangeStatus::class // When content status is changed
// Sitemap events
SolutionForest\InspireCms\Events\Content\GenerateSitemap::class // When sitemap generation is requested
SolutionForest\InspireCms\Events\Content\SitemapGenerated::class // After sitemap has been generated
```
### Template Events
```php
// Template events
SolutionForest\InspireCms\Events\Template\UpdateContent::class // When template content is updated
SolutionForest\InspireCms\Events\Template\CreateTheme::class // When a new theme is created
SolutionForest\InspireCms\Events\Template\ChangeTheme::class // When the active theme is changed
```
### Licensing Events
```php
// Licensing events
SolutionForest\InspireCms\Events\Licensing\LicensesRefreshed::class // When licenses are refreshed
```
---
## Creating Event Listeners
### Step 1: Generate a Listener Class
You can create an event listener using Laravel's artisan command:
```bash
php artisan make:listener YourListener --event=\\SolutionForest\\InspireCms\\Events\\Content\\CreatedPublishContentVersion
```
This creates a new listener in the `app/Listeners` directory.
### Step 2: Implement the Listener Logic
Edit the generated file to implement your listener logic:
```php
content;
$version = $event->version;
$status = $event->status;
Log::info('New content version created:', [
'content_id' => $content->id,
'version_id' => $version->id,
'status' => $status ? $status->name : 'none',
'is_publishing' => $event->isPublishing,
]);
// Your custom logic here
// E.g., send notifications, update external systems, etc.
}
}
```
Adding the `ShouldQueue` interface makes your listener run asynchronously for better performance. The `InteractsWithQueue` trait provides methods like `release()` and `delete()` for queue management.
### Step 3: Register the Listener
Register your listener in the `EventServiceProvider` class:
```php
[
YourListener::class,
],
];
}
```
---
## Practical Examples of Event Listeners
### 1. Track Content Status Changes
```php
content;
$oldStatus = $event->oldStatus ? $event->oldStatus->name : null;
$newStatus = $event->status ? $event->status->name : null;
// Record status change in history table
ContentStatusHistory::create([
'content_id' => $content->id,
'content_type' => get_class($content),
'old_status' => $oldStatus,
'new_status' => $newStatus,
'changed_by' => auth()->id(),
'changed_at' => now(),
]);
}
}
```
### 2. Generate Sitemap After Content Changes
```php
content;
// Only trigger sitemap generation for certain content types
$relevantTypes = ['page', 'post', 'product'];
if (in_array($content->document_type, $relevantTypes)) {
// Dispatch the generate sitemap event
Event::dispatch(new GenerateSitemap(
get_class($content),
$content->getKey(),
'content_published'
));
}
}
}
```
### 3. Track User Activity
```php
user;
$request = request();
$agent = new Agent();
$agent->setUserAgent($request->userAgent());
UserActivity::create([
'user_id' => $user->id,
'activity_type' => 'login',
'ip_address' => $request->ip(),
'user_agent' => $request->userAgent(),
'browser' => $agent->browser(),
'browser_version' => $agent->version($agent->browser()),
'device' => $agent->device(),
'platform' => $agent->platform(),
'platform_version' => $agent->version($agent->platform()),
]);
// Update user's last login time
$user->last_login_at = now();
$user->last_login_ip = $request->ip();
$user->save();
}
}
```
## Export
---
title: Export
slug: export
path: docs/v1/export
uri: /docs/v1/export
heading: Export
brief: InspireCMS provides powerful export capabilities for migrating content, creating backups, and transferring data between systems. This guide explains how to use the export features effectively.
quick_links: []
---
## Overview
The export system in InspireCMS allows you to:
- Export content and configuration in various formats
- Select specific elements to include in exports
- Schedule automatic exports
- Create data backups
- Prepare content for migration to other systems
---
## Export Interface
Access the export interface through: **Settings** > **Export**
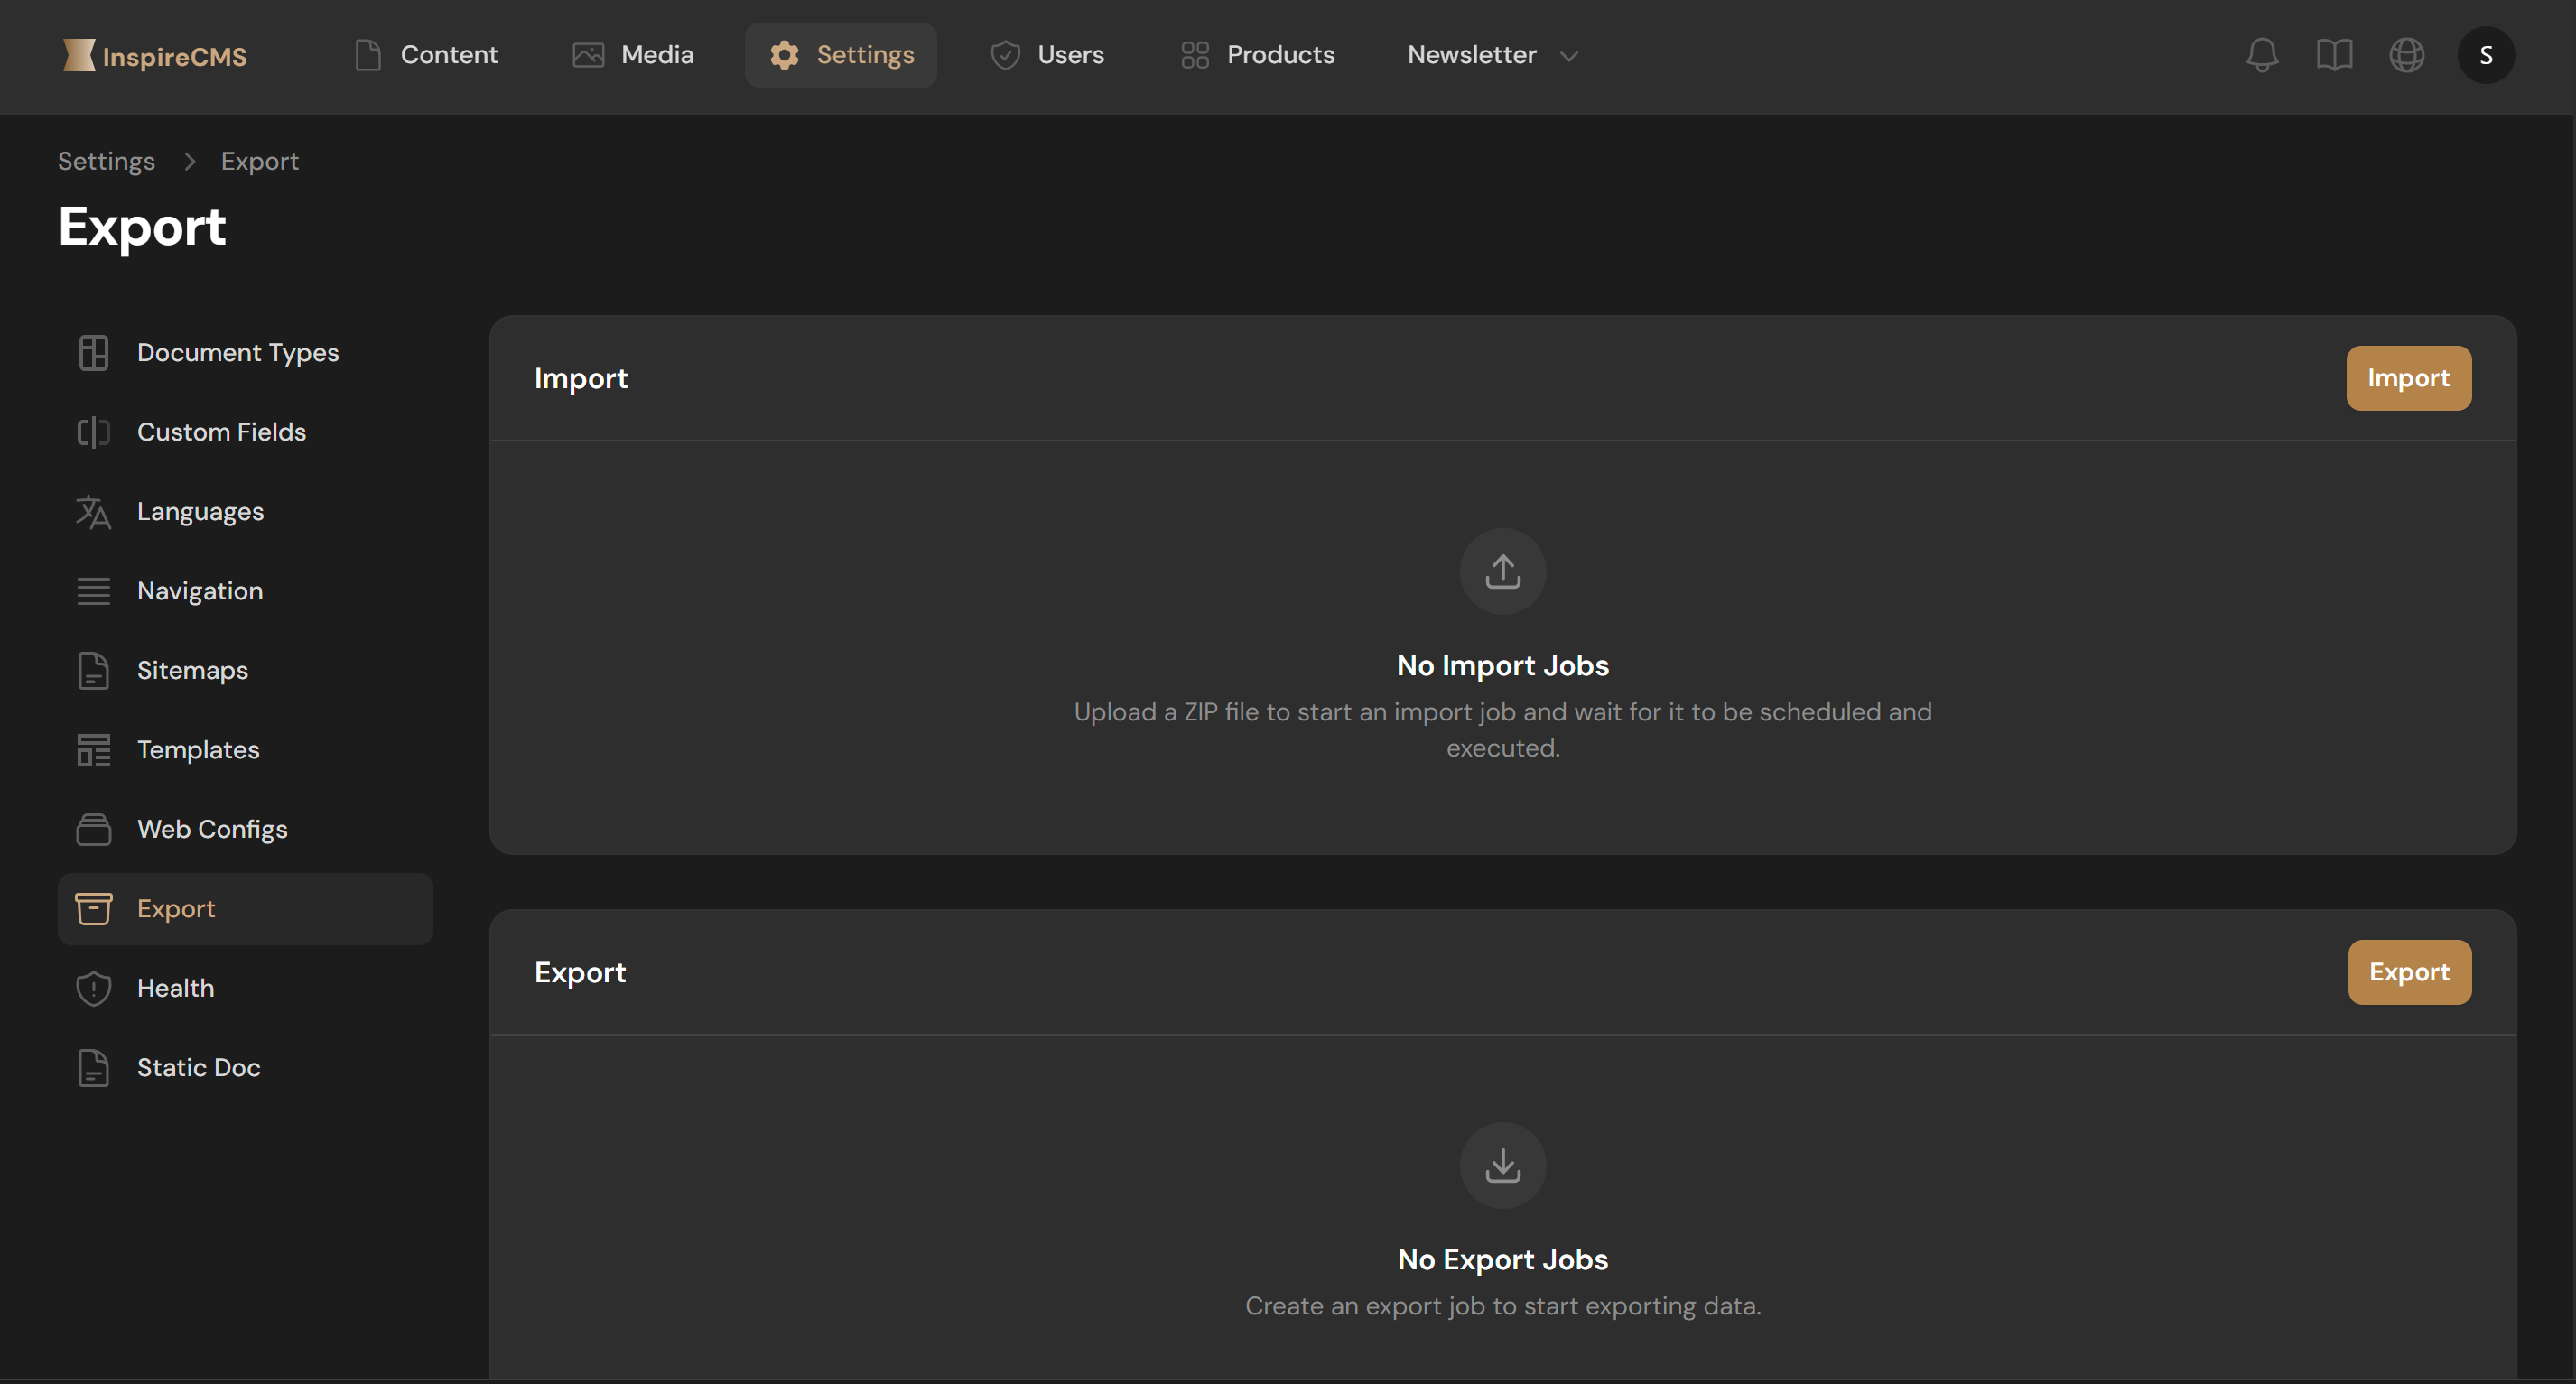
### Export Types
InspireCMS supports several export types:
1. **Full Site Export**: All content, settings, and configuration
2. **Document Type Export**: Document types with field groups and templates
3. **Field Group Export**: Field groups and their field definitions
4. **Template Export**: Templates and associated configuration
### Export Formats
Available export formats include:
- **JSON**: Complete structured data (default)
---
## Creating an Export
### Basic Export
To create a basic content export:
1. Go to **Settings** > **Export**
2. Click "**Export**" to create new export
3. Configure additional options based on export type
4. Click "**Export**" to submit request
5. Wait for the export to complete or execute command `php artisan inspirecms:export`
6. Download the export file
### Export Configuration Options
Depending on the export type, additional options may include:
- **Content Selection**: Which content items to include
- **Include Dependencies**: Whether to include related records
---
## Custom Exporters
InspireCMS allows you to create custom exporters:
```php
namespace App\Exports;
use SolutionForest\InspireCms\Exports\Exporters\BaseExporter;
use SolutionForest\InspireCms\Models\Contracts\Export;
class CustomExporter extends BaseExporter
{
public function export(Export $record): ?string
{
// Implement your custom export logic
$data = $this->collectData();
// Generate export file
$path = storage_path('app/exports/' . uniqid('export_') . '.json');
file_put_contents($path, json_encode($data, JSON_PRETTY_PRINT));
return $path;
}
protected function collectData(): array
{
// Logic to collect data for export
return [
// Your export data structure
];
}
}
```
Register your custom exporter:
```php {title="config/inspirecms.php"}
'import_export' => [
'exports' => [
'exporters' => [
\SolutionForest\InspireCms\Exports\Exporters\ContentExporter::class,
\SolutionForest\InspireCms\Exports\Exporters\DocumentTypeExporter::class,
// Add your custom exporter
\App\Exports\CustomExporter::class,
],
],
],
```
---
## Export File Storage
Configure where export files are stored:
```php {title="config/inspirecms.php"}
'models' => [
'prunable' => [
'export' => [
'interval' => 5, // Automatically delete files after 5 days
],
],
],
'import_export' => [
'exports' => [
'disk' => 'local', // or 's3', 'sftp', etc.
'directory' => 'exports',
],
],
```
For cloud storage:
```php {title="config/filesystems.php"}
'disks' => [
// Local disk
'local' => [
'driver' => 'local',
'root' => storage_path('app'),
'throw' => false,
],
// S3 for export storage
'export_s3' => [
'driver' => 's3',
'key' => env('EXPORT_AWS_ACCESS_KEY_ID'),
'secret' => env('EXPORT_AWS_SECRET_ACCESS_KEY'),
'region' => env('EXPORT_AWS_DEFAULT_REGION'),
'bucket' => env('EXPORT_AWS_BUCKET'),
'url' => env('EXPORT_AWS_URL'),
],
],
```
## Assets
---
title: Assets
slug: fe-assets
path: docs/v1/fe-assets
uri: /docs/v1/fe-assets
heading: Assets
brief: Learn how to work with assets in your frontend templates.
quick_links: []
---
---
title: Content
slug: fe-content
path: docs/v1/fe-content
uri: /docs/1.x/fe-content
heading: Assets
brief: Learn how to work with assets in your frontend templates.
---
## Overview
For detailed media configuration options, please refer to the [configuration documentation](./configuration#media-management){.doc-link}.
---
## Asset Helper
Use the `inspirecms_asset()` helper to work with media assets:
```php
// Get asset by ID
$asset = inspirecms_asset()->findByKeys('550e8400-e29b-41d4-a716-446655440000')?->first();
// Get multiple assets
$assets = inspirecms_asset()->findByKeys('550e8400-e29b-41d4-a716-446655440000', '7f1b96c0-d4f0-11ed-afa1-0242ac120002');
```
---
## Accessing Asset Properties
Access basic asset information:
```php
// Get asset properties
$url = $asset->getUrl(); // Full URL to the asset
$filename = $asset->getFilename(); // Original filename
$extension = $asset->getExtension(); // File extension
$size = $asset->getSize(); // File size in bytes
$mimeType = $asset->getMimeType(); // MIME type
// Get asset metadata
$title = $asset->title; // Title
$caption = $asset->caption; // Caption
$description = $asset->description; // Description
```
---
### Image Transformations
Create responsive image variants:
Predefined variants (from config `media.media_library.responsive_images`):
- **small**: width 400 px
- **medium**: width 600 px
```php
// Get default URL
$url = $asset->getUrl();
// Get predefined responsive variants
$smallUrl = $asset->getUrl('small');
$mediumUrl = $asset->getUrl('medium');
```
---
## Working with Assets in Templates
### Accessing Media from Properties
Use property directives to access media assets linked to content:
```blade
@property('hero', 'image')
@if($hero_image)
@endif
@propertyArray('gallery', 'images')
@foreach($gallery_images as $image)
@if($image->caption)
{{ $image->caption }}
@endif
@endforeach
```
### Responsive Images
Implement responsive images:
```blade
```
## Content
---
title: Content
slug: fe-content
path: docs/v1/fe-content
uri: /docs/v1/fe-content
heading: Content
brief: Learn how to work with content in your frontend templates.
quick_links: []
---
## Content Helper
The `inspirecms_content()` helper provides access to content items throughout your frontend templates:
```php
// Get content by ID
$modelContent = inspirecms_content()->findByIds(ids: '550e8400-e29b-41d4-a716-446655440000', limit: 1)->first();
// Get content by slug
$modelContent = inspirecms_content()->findByRealPath(path: 'about-us', limit: 1)->first();
// Get multiple content items
$modelContents = inspirecms_content()->findByIds(['550e8400-e29b-41d4-a716-446655440000', '7f1b96c0-d4f0-11ed-afa1-0242ac120002']);
// Get published content under 'home'
$modelContents = inspirecms_content()->getUnderRealPath(path: 'home', isPublished: true);
// Get paginated published content under 'home'
$modelContents = inspirecms_content()->getPaginatedUnderRealPath(path: 'home', isPublished: true, page: 1, perPage: 10);
// Get content by document type
$modelContents = inspirecms_content()->getByDocumentType(documentType: 'blog-post', isPublished: true);
// Get paginated content by document type
$modelContents = inspirecms_content()->getPaginatedByDocumentType(documentType: 'blog-post', isPublished: true, page: 1, perPage: 10);
```
> [!note]
>
> These functions return Content model instances. To access content properties and use them in templates, convert the model to a DTO using the `toDto()` method:
>
> ```php
> $contentDto = $moedlContent->toDto($locale ?? app()->getLocale());
>
> $title = $contentDto->getTitle();
> ```
---
## Accessing ContentDTO Properties
### Basic Properties
Access core content attributes:
```php
$title = $contentDto->getTitle(); // Get content title
$slug = $contentDto->slug; // Get content slug
$url = $contentDto->getUrl(); // Get content URL
$locale = $contentDto->getLocale(); // Get content locale
$publishedAt = $contentDto->publishAt; // Publication date
```
### Custom Fields
Use property directives in Blade templates to access custom fields:
```php
// Single property
@property('hero', 'title')
// With custom variable name
@property('hero', 'images', 'custom_images')
@foreach($custom_images ?? [] as $image)
@endforeach
// Value is from $blogDTO, variable available as $blog_category
@property('blog', 'category', null, $blogDTO)
// Array properties
@propertyArray('gallery', 'images')
@foreach($gallery_images ?? [] as $image)
@endforeach
// Conditional display
@propertyNotEmpty('hero', 'button_text')
{{ $hero_button_text }}
@endif
```
You can also access properties programmatically:
```php
// Check if property exists
if ($contentDto->hasProperty('hero', 'title')) {
// Get property value
$title = $contentDto->getPropertyValue('hero', 'title');
// Get property value with fallback
$subtitle = $contentDto->getPropertyValue('hero', 'subtitle') ?? 'Default subtitle';
// Get multilingual property with specific locale
$frenchTitle = $contentDto->getPropertyValue('hero', 'title', 'fr');
}
// Check if property group exists
if ($content->hasPropertyGroup('hero')) {
// Get entire property group
$heroGroup = $contentDto->getPropertyGroup('hero');
}
```
---
## Content Relationships
Access related content and structure:
```php
// Get parent contentDTO
$parent = $contentDto->getParent();
// Get all child contentDTO
$children = $contentDto->getChildren();
// Get paginated child contentDTO (After v1.1.x)
$paginator = $contentDto->getPaginatedChildren(page: 1, perPage: 15, pageName: 'page2', isWebPage: true, isPublished: true, sorting: ['__latest_version_publish_dt' => 'desc'])
// Get ancestors in hierarchical order
$ancestors = $contentDto->getAncestors();
```
---
## Content Filtering and Sorting
Filter and sort content collections:
```php
// Get recent blog posts
$modelContents = inspirecms_content()->getUnderRealPath(
path: 'blogs',
isPublished: true,
sorting: ['__latest_version_publish_dt' => 'desc'],
limit: 5,
);
// Get paginated recent blog posts
$modelContents = inspirecms_content()->getPaginatedUnderRealPath(
path: 'blogs',
page: 1,
perPage: 10,
isPublished: true,
sorting: ['__latest_version_publish_dt' => 'desc'],
);
// Filter by custom fields
$dtoContents = inspirecms_content()->getByDocumentType(
documentType: 'blog_post',
limit: 50,
)
->toDto($locale ?? app()->getLocale())
->filter(function($post) {
return $post->getPropertyValue('blog', 'is_featured') === true;
});
```
---
## Working with Multiple Languages
Access content in different languages:
```php
// Get content in specific language
$frenchContentDto = $modelContent->toDto('fr');
// Loop through all available translations
foreach (inspirecms()->getAllAvailableLanguages() as $locale => $langDto) {
$translatedTitle = $contentDto->getTitle($locale);
// Do something with the translation
}
```
---
## Pagination
Paginate content collections:
```php
// In your controller
$paginatedContentDto = inspirecms_content()->getPaginatedByDocumentType(documentType: 'post-page', perPage: 10)->toDto();
// In your Blade template
@foreach ($paginatedContentDto as $post)
{{ $post->getTitle() }}
{{ $post->getPropertyValue('blog', 'excerpt') }}
@endforeach
{{ $paginatedContentDto->links() }}
```
---
## Best Practices
- Use `inspirecms_content()` helper for retrieving content instead of direct database queries
- Always check if properties exist before using them
- Cache frequent content queries for better performance
- For large content sets, use pagination to improve page load times
- Use property directives in Blade templates for cleaner syntax
> [!note]
>
> For examples of displaying content in layouts, see the [Layouts](./fe-layouts){.doc-link} documentation.
## Layouts
---
title: Layouts
slug: fe-layouts
path: docs/v1/fe-layouts
uri: /docs/v1/fe-layouts
heading: Layouts
brief:
quick_links: []
---
## Overview
Basically, we are using [Blade components](https://laravel.com/docs/11.x/blade) to create reusable UI elements.
### Creating Theme Components
Create a new component in your theme:
```blade { title="resources/views/components/inspirecms/your-theme/hero.blade.php" }
{{ $title ?? 'Welcome' }}
@if(isset($subtitle))
{{ $subtitle }}
@endif
{{ $slot }}
```
### Using Theme Components
Using the helper:
```blade
@php
$heroComponent = inspirecms_templates()->getComponentWithTheme('hero');
@endphp
Custom hero content here
```
---
## Implementation Examples
Let's assume you've created a theme named "**abc**".
#### Folder Structure
```plaintext
resources/views/components/inspirecms/abc/
├── footer.blade.php
├── header.blade.php
├── layout.blade.php
├── page.blade.php
└── simple-page.blade.php
```
#### Component Files
```blade {title="resources/views/components/inspirecms/abc/layout.blade.php"}
@props(['title' => null, 'seo' => null, 'locale' => null, 'isPreviewing' => false, 'isSimple' => false])
@php
$title ??= config('app.name');
$locale ??= request()->getLocale();
$headerComponent = inspirecms_templates()->getComponentWithTheme('header');
$footerComponent = inspirecms_templates()->getComponentWithTheme('footer');
@endphp
@if (isset($seo) && $seo instanceof \Illuminate\Contracts\Support\Htmlable)
{{ $seo }}
@else
{{ $title }}
@endif
@yield('styles')
{{ $slot }}
@yield('scripts')
```
```blade {title="resources/views/components/inspirecms/abc/header.blade.php"}
@props(['locale' => null])
@aware(['isPreviewing'])
```
```blade {title="resources/views/components/inspirecms/abc/footer.blade.php"}
@props(['locale' => null])
@aware(['isPreviewing'])
```
```blade {title="resources/views/components/inspirecms/abc/page.blade.php"
@props(['content', 'locale' => null])
@aware(['isPeekPreviewModal' => false])
@php
$locale ??= $content?->getLocale() ?? request()->getLocale();
$title = $content?->getTitle();
$seo = $content?->getSeo()?->getHtml();
$layoutComponent = inspirecms_templates()->getComponentWithTheme('layout');
@endphp
{{ $slot }}
```
```blade {title="resources/views/components/inspirecms/abc/simple-page.blade.php"}
@props(['content', 'locale' => null])
@aware(['isPeekPreviewModal' => false])
@php
$locale ??= $content?->getLocale() ?? request()->getLocale();
$title = $content?->getTitle();
$seo = $content?->getSeo()?->getHtml();
$layoutComponent = inspirecms_templates()->getComponentWithTheme('layout');
@endphp
{{ $slot }}
```
#### Applying Layouts to Templates
```blade {title="Template: home"}
@props(['content', 'locale' => null, 'isPeekPreviewModal' => false])
@php
$locale ??= $content->getLocale();
$layoutComponent = inspirecms_templates()->getComponentWithTheme('page');
@endphp
Home
```
```blade {title="Template: tnc"}
@props(['content', 'locale' => null, 'isPeekPreviewModal' => false])
@php
$locale ??= $content->getLocale();
$layoutComponent = inspirecms_templates()->getComponentWithTheme('simple-page');
@endphp
TNC Here
```
## Navigation
---
title: Navigation
slug: fe-navigation
path: docs/v1/fe-navigation
uri: /docs/v1/fe-navigation
heading: Navigation
brief:
quick_links: []
---
## Overview
InspireCMS provides a robust navigation system that allows you to:
1. Create and manage navigation menus in the admin panel
2. Programmatically retrieve navigation items
3. Display navigation menus in your frontend templates
4. Support multi-level (nested) navigation structures
5. Handle multi-language navigation
---
## Retrieving Navigation Items
InspireCMS provides helper methods to retrieve navigation data:
```php
// Get navigation items for the "main" menu in the current locale
$mainNavItems = inspirecms()->getNavigation('main');
// Get navigation items for a specific locale
$mainNavItems = inspirecms()->getNavigation('main', 'en');
```
Each navigation item provides methods to access its properties:
```php
foreach($navItems as $item) {
$title = $item->getTitle(); // Get the navigation item title
$url = $item->getUrl(); // Get the navigation item URL
$children = $item->children; // Get child navigation items
$isActive = $item->isActive; // Check if the item is active
$target = $item->target; // Get the target attribute (_blank, _self, etc.)
}
```
---
## Using Navigation in Layouts
Here's how to integrate navigation within your layout components:
2. Header Navigation Example
```blade {title="resources/views/components/inspirecms/your-theme/header.blade.php"}
@props(['locale' => app()->getLocale()])
 }}) >
>  }}) @if($image->caption)
@if($image->caption)
 }})